Sunday, June 30, 2024

Recipe of the Month: Creamy Zucchini Pesto

Last week, as I spied the end of the June approaching, I started hunting around for a new Recipe of the Month. However, this quest was complicated by the early-summer heat wave, which made Brian reluctant to cook indoors any more than he had to. So he presented me with a list of all the veggies we had in the fridge and I started looking for a vegan-friendly dish we could cook on the grill with them. 

That search led me to the Easy Grilled Vegetables recipe from Damn Delicious. We didn't have all the veggies the recipe called for (many of which, like tomatoes and asparagus, aren't in season at the same time), but we figured that wasn't a big deal. Since the key component of that dish was the basil garlic sauce, we thought we'd just make a batch and serve it with our usual selection of grilled veggies, such as zucchini, pepper, and eggplant. In preparation for that, Brian went out and picked a bunch of fresh basil, the first of this year's crop.

But then a complication arose. Dark clouds started piling up in the sky, and the weather report, which had been predicting thunderstorms that night, moved their ETA up to the early evening. That meant we needed a new plan for dinner—one that would use up all that fresh-picked basil without the use of the grill. And, since it was still blazing hot, one that ideally wouldn't heat the kitchen up too much in the process.

So I tried looking for recipes again, this time including "fresh basil" as one of my search terms. Unfortunately, most of the hits I got were just recipes for pesto, which wasn't a new dish to us. But then I came upon a pesto recipe with a twist: the Creamy Zucchini Pesto from The Simple Veganista. This dish featured zucchini in two different forms: pureed as part of the pesto sauce, and cut into long strips to form the "noodles." It certainly cleared the bar for a veggie-centered dish, and it didn't call for anything we didn't have.

However, Brian and I were a bit skeptical about the use of zucchini strips in place of pasta. We've tried a couple of other dishes built on a base of raw veggie "noodles," such as the butternut squash ribbons we made last November, and they just weren't that satisfying. So instead, we decided to use a trick we learned during my low-carb period: mixing raw vegetable strips with real noodles. We had just enough basil to make a quarter-sized batch of the whole dish, which would normally use just half a zucchini's worth of "noodles"; instead, Brian used one very small zucchini plus four ounces of dry whole-wheat spaghetti. He sliced up the zuke with our spiralizer and sauteed the zoodles briefly in oil to soften them up before tossing them with the cooked pasta.

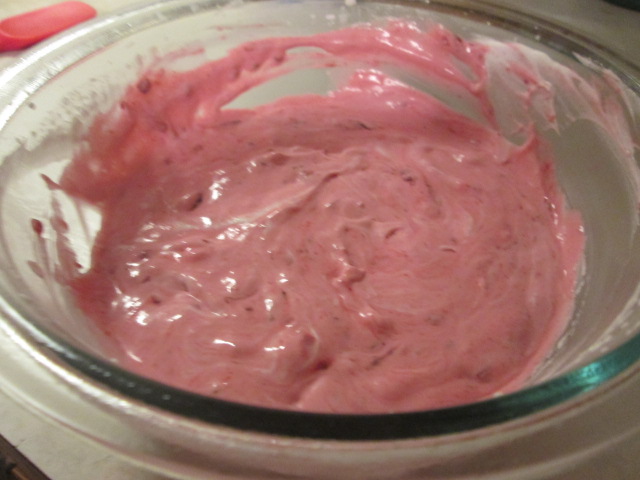
Brian used another mini zuke in the pesto, along with a smallish garlic clove and one-quarter the amount of all the other ingredients. Rather than steaming the zucchini as the recipe recommended, he cooked it in the same pan he'd used for the zoodles, adding a little bit of water and covering it just long enough to soften the squash. He had to add a little bit of oil—about two teaspoons—to this quarter-batch of pesto to get it to blend properly, but it was still much less oily than most pesto. The quarter-sized batch was more than enough to sauce up our mixture of pasta and zucchini.

The resulting dish was pretty good. It wasn't mind-blowing, but it was as flavorful as most pesto, and the addition of zucchini gave it a creamier texture without the need for a lot of high-fat (and expensive) nuts and oil. Its biggest downside was that, even with the added noodles to bulk it up, it wasn't terribly substantial. It really could have used a protein-rich ingredient to give it more heft. I ended up adding the tail end of a tin of herring to my meal because the noodles just weren't enough to fill me up on their own.

Still, I'd say this is a decent recipe, one that will definitely come in handy in a month or so when our zucchini plants are really cranking out the squash. Next time we'll try tossing in some cubed tofu, and maybe some halved cherry tomatoes as well. That will add flavor and texture interest, making the dish more satisfying to the palate as well as the stomach.

As for that other grilled vegetable recipe, I'm sure we'll get around to trying it some other time. There are still two or three months left of grilling season, and there's plenty more basil where this batch came from.

Sunday, June 23, 2024

Gardeners' Holidays 2024: First Fruits

Summer has only just officially begun, but we're not easing into it gradually. New Jersey, like most parts of the country, has been baking under a heat dome for the past six days, with highs in the upper nineties and heavy humidity to boot. Mind you, we've gotten off easy compared to places like Las Vegas, Palm Springs, and Washington, where daytime highs have been in the triple digits. Brian had to drive to work a couple of times rather than riding his bike in the heat, but otherwise, we've been getting along fine without even needing the A/C. But we haven't been in much of a mood to go out and work in the garden. 

Fortunately, we've only had to venture out for a few minutes each day to harvest fresh veggies and fruit. Our honeyberries are about done producing, but we're still getting a few strawberries and plenty of raspberries. Our spring lettuce is also living up to its name (Marvel of Four Seasons) by continuing to provide ample fodder for salads, showing no signs of bolting in spite of the extreme heat. And just this week, Brian harvested the first handful or two of our basil crop. (We were planning to use it in a grilled veggie recipe I dug up online, but we changed plans when the sky started to look ominous. So instead it went into a pesto dish that I'll cover next week as our Recipe of the Month for June.)

Sadly, not all our summer crops are doing so well. In particular, our cucumber vines, which would normally be just starting to produce right about now, appear to be a complete write-off. We planted two varieties: a couple of Marketmores, using seed left over from our last Fedco order in 2022, and two of a new variety called Boston Pickling that we ordered last winter from a new seed supplier. And of those, not a single plant has actually come up. But at least our dill is producing, so Brian was able to use some of our garden produce in the season's first batch of pickles even if the cucumber itself had to be store-bought.

As I write this, the heat wave appears to be breaking at last. The expected storm hasn't hit here yet, but it has brought gusts of cooler air, which we're pulling into the house as fast as possible with every window fan at our disposal. Tonight it's supposed to dip below 75 degrees for the first time all week, and it should continue to do so every night for the next week to come. Granted, daytime highs will still be in the upper 80s and low 90s, but after the week we've just been through, that level of heat will feel positively mild.

Sunday, June 16, 2024

Quick updates

On this blog, I tend to focus on what's new and different in our ecofrugal life. This makes sense, but it has a downside: you hear the beginnings of a lot of stories without hearing the endings. I tell you that I've tried a new homemade conditioner, but I don't think to tell you that it turned out not to work all that well with everyday use. I tell you that we've added a strawberry bed to our garden, but I don't remember to follow up and tell you whether we got any actual strawberries out of it. 

So for this week's blog entry, instead of telling you what's new, I'm going to fill you in on the latest updates to some older stories. I'll start with the most recent stories and work my way backwards, so we're going from the smallest updates to the biggest ones.

Update #1: Potato plants

Last summer, when we got our new rain barrel, I mentioned that Brian was planning to use the old one to grow potatoes. We'd tried before to grow them in five-gallon buckets, but the results were disappointing. Brian thought that a bigger vessel, with plenty of room for the stems and tubers to form, might give us a better crop.

It's too early to say yet what our harvest will look like, but the plants themselves are flourishing in their new home. The stems have already reached the top of the barrel and are loaded with lush green foliage. They just recently flowered, as well. Brian snipped off the flowers because apparently you get more potato production that way, but I got a picture of them first. The trimmed-off blooms are now in the bud vase in our kitchen, so we've already gotten some benefit out of the plants regardless of how the potato crop turns out.

Update #2: Garden paths

Over the years we've had our garden, we've struggled to find a suitable covering for the paths between the beds. I thought I'd hit on the perfect solution with the leftover stone dust from our patio project, but within a year, weeds (and a few stray vegetable plants) were forcing their way through it. So, last winter, I decided to try a new approach: covering the paths with leaves. Using all the leaves we raked up in our own yard, as well as a bag or two of our neighbor's that we scavenged from the curb, we managed to cover all the paths a couple of inches deep.

This approach has been a moderate success. The blanket of leaves hasn't managed to suppress weeds entirely, but we're getting far fewer of them, and the ones that do pop up are easier to remove because they're rooted in loose, leafy soil rather than solid clay. (I'm only bothering to do this with the tall weeds, like crabgrass and dandelions. Ground-hugging weeds like barren strawberries, I figure, can just get walked on. If they pop up in the garden beds themselves, I'll yank them, but otherwise, they can stay where they are.) And since the leaves cost us nothing, we can simply keep replenishing them year after year.

Update #3: Strawberry bed

Last year was our first attempt at growing strawberries. Our new seed supplier offered seeds for the small Alpine variety, and we decided on a whim to add a packet to our order. The plants grew faster than we expected, and we actually managed to get a small handful of fruit off them that first year. But this year, they have really come into their own. The plants are flourishing, and we have already harvested 6 cups of tiny red and white fruits. (They're supposed to be red and yellow, but it's a very pale yellow. Alongside our honeyberries, which ripen around the same time, they make a very patriotic-looking fruit salad.) 

These little berries aren't as plump and juicy as regular strawberries. Their flavor is more concentrated, with a sort of floral undertone to it. They also don't keep nearly as well, which explains why you don't tend to see them in stores. We have to eat them up within a day or two of picking or they turn into mush. This means we can't use really use them in recipes, since we only get a cup or so of berries with each picking, and we can't save them up to get enough for a fruit crisp or a batch of jam. But eating them fresh every day (by themselves or in salads) is certainly no hardship.

So, all in all, I'd consider this experiment a success. The question now is, how long can we keep it going? According to the seed packet, these plants will only remain productive for about two years. But other sources on Alpine strawberries recommend dividing the plants "every four or five years" to keep production high and prevent overcrowding. That suggests that we should be able to expect them to last another couple of years at least. I guess we'll keep an eye on them next spring, and if it looks like they're not coming up, we can pick up a few strawberry plants of the more conventional type to replace them.

Update #4: Homemade deodorant

Over the years, I've tried various alternatives to commercial deodorant in an attempt to avoid both animal testing and excess packaging. Plain baking soda, vinegar, rubbing alcohol, and peroxide didn't work very well; milk of magnesia did but turned out to have an undesirable laxative side effect. The best of the bunch was alcohol-based hand sanitizer; it wasn't strong enough to keep me fresh as a daisy on hot summer days, but it was good enough for light activity in mild weather. 

However, this sanitizer deodorant had a few drawbacks. It still produced some plastic waste; the bottle was recyclable, but the pump top wasn't. Also, annoyingly, the pump was never able to extract all the sanitizer from the bottle, and it also made it impossible to turn the bottle upside down to get the last drops. And it became difficult to obtain during the pandemic, though I was able to get by with a homemade version made from rubbing alcohol and aloe vera gel.

So when I came across a recipe for another homemade deodorant with just three ingredients—one part baking soda, two parts cornstarch, and three parts coconut oil—I thought it was worth a try. True, straight baking soda hadn't worked that well for me, but neither had straight rubbing alcohol, yet the alcohol-based gel worked fine. In any case, it wouldn't cost much to mix up a small batch and test it out.

Well, as it turns out, this baking soda mixture works at least as well as the hand sanitizer. Like the sanitizer, it doesn't always last all day, but it's no big deal to reapply it. It also produces no plastic waste whatsoever, and it's easy to get every last drop of it out of the container. And it's cheap—less than 25 cents for that initial batch (6 tablespoons total), which has already kept me going for a few weeks and is nowhere near running out. Can't get much more ecofrugal than that!

Update #5: Patio furniture

Back in 2013, we furnished our DIY patio with a cheap patio set from IKEA. At $120 for a table and four chairs, it was a much better deal than anything available at Home Depot or Lowe's, where outdoor furniture sets started at around $500. We refinished it once in 2014, but after that we decided to just live with the weathered look.

After 11 years of use, though, the furniture was starting to have problems with more than just its appearance. The pieces had become rickety, wobbling noticeably when we sat down, and tightening the bolts didn't solve the problem. We finally concluded that we were going to need a replacement.

The obvious place to look for one was Craigslist, which we now prefer to IKEA for home furnishings. But there was a snag: unlike IKEA furniture, pieces on Craigslist come fully assembled. How would we fit a whole patio set into our little Honda Fit?

The answer: we didn't. We already knew we'd have to rent a truck at some point to haul home the lumber for our laundry room renovation (which, yes, is still in progress) and for another project that Brian wants to do outdoors (more on that one in a future post). So, once we'd booked the truck for that, we took advantage of the opportunity to haul home a $135 patio set from Craigslist as well. We were still able to get the truck back by the end of the day, so the rental fee was the same; all it cost us was a little extra for gas.

Our new patio set is superior in almost every way to our old one. The glass-topped table is larger and includes a center hole where we can add a patio umbrella, should we ever feel the need for one. The chairs, with their woven plastic seats, are quite comfortable even with no added cushions. And both table and chairs are made of materials that should stand up better to the elements than our old wooden pieces. The previous owner had already kept them outdoors for several summers, and the table during the winters as well, and they're all still in good shape. So, given the same treatment, this new set should serve us for many years to come.

Sunday, June 9, 2024

Honeyberry trellises (and a bonus recipe)

Last week, I told you about how we mulched the slope where our honeyberry bushes are planted. That took a fair amount of effort, but when it was finished, our work still wasn't done. We also needed to cover the bushes themselves with netting to protect our berries from hungry birds. In the past, we've simply thrown the nets over the bushes, which keeps out the birds all right, but also makes it very difficult for us to get underneath the nets and harvest the berries. This year, I wanted to put up some proper enclosures that we could climb into without having to remove the netting entirely.

We had various odds and ends of material to work with for this project—a few scavenged bamboo poles and some old pieces of PVC pipe that had formerly served as trellises for our garden before we built the wooden ones. However, Brian and I had a difference of opinion about the best way to use them. His idea was to build boxes to fit over the bushes with netting on all sides.That would have made very secure enclosures that were also easy to put on and take off again, but they would have taken a lot of work to build, as well as a lot of material. 

My suggestion was to build a little teepee over each bush instead, using three poles tied together at the top, with the netting draped over it. This wouldn't be as secure as a box, but it would require less material and less effort. This idea won out mainly because Brian realized that if he built boxes, he'd have to find a place to store them in the off-season. Our garden shed barely had room to store all the mulch we'd bought at the Co-Op; we'd never be able to fit the frames and a load of mulch in there at the same time. The teepees, by contrast, could be broken down once the harvest was over and stowed away in a corner.

After a little experimentation, Brian figured out a way to build a teepee from three lengths of the PVC pipe that would stand up pretty well on the slope, with one foot planted behind the bush and two at the bottom. He used a hacksaw to cut the pieces to the appropriate length and lashed them together with a section of our old clothesline. Then we loosely draped the netting over it. We held it down at the corners by planting the feet on top of it and added a brick in front to keep it from blowing open.

We only had enough of the PVC pipe to build two of these teepees, so we placed those over the two largest bushes. We wrapped two others in our remaining netting and left the smallest one uncovered, figuring that there weren't that many berries on it to lose. As the bushes get bigger, we can always acquire more pipe, or perhaps some sturdier bamboo poles, to build enclosures for them.

So far, these little tents appear to be doing their job pretty well. I can easily remove the brick and duck under the netting to harvest berries, and I only have to stoop a little bit. And there are always berries to harvest, which suggests that the teepees are succeeding in keeping the birds out. Mind you, the two bushes that are simply draped with netting have their share of berries as well, so it appears the tents aren't actually necessary to keep the birds out. But they certainly do make it easier to get at the berries. We easily gathered a cup of them that first day, and we're getting at least a couple of handfuls every time we go out for more.

We were so pleased with our honeyberry harvest that we decided to celebrate by making a honeyberry fool, something I'd been hoping to do ever since we first got the bushes (mainly because I find the phrase "honeyberry fool" so entertaining). We had to go out and buy some cream for this, since all our attempts at making dairy-free whipped cream have been so-so at best. We didn't have a recipe for it as such, so Brian had to guess at the proportions of fruit to sugar to cream. His first attempt, using twice as much fruit as cream, came out a bit too liquid, though still quite edible. But we had plenty of cream left after that, so he kept experimenting and found that combining equal parts fruit and cream produced a dessert with just the right fluffy texture while still delivering plenty of honeyberry flavor. For anyone who has honeyberries at home and would like to try it, here's the recipe:

HONEYBERRY FOOL

Add 2 Tbsp granulated sugar to ½ cup honeyberries and mash berries with a spoon while mixing. Place in the refrigerator for 20-30 minutes, stirring/mashing occasionally.

In a chilled bowl, add 2 Tbsp powdered sugar and ¼ tsp vanilla extract to ½ cup heavy whipping cream, then beat until soft peaks form. Fold in berry mixture until fully combined.

Serve immediately or refrigerate until ready to serve.

Sunday, June 2, 2024

Mulching on a slope

When we first got our honeyberry bushes five years back, we covered up the entire hillside where we planted them with groundcloth and mulch to protect them from weeds. This turned out not to be one of our more brilliant ideas. Apparently, groundcloth is very slippery stuff, and if you put it on a steep slope like the one in our yard, anything you put on top will slide right off it. So, instead of a nice bed of mulch, we ended up with an expanse of bare groundcloth with pools of mulch (and some ambitious barren strawberry plants) around the bottom. 

The mulch might have stayed in place without the groundcloth underneath, but Brian was reluctant to remove it. There was no guarantee the mulch would stay put without it, and even if it did, it probably wouldn't do as good a job of deterring weeds by itself. Instead, he thought we should lay down some deer netting between the groundcloth and the mulch, giving the mulch a rougher surface to cling to. And since we had to net the honeyberries themselves anyway to protect the ripening berries from birds, we decided to take advantage of Memorial Day weekend to tackle both jobs at once. 

On Saturday, we got out our collection of deer nets and started cutting pieces to fit around the bushes. Rather than cut holes in the netting and try to squeeze the bushes through them, we just cut one long rectangle to place on either side of each berry bush, angling them to achieve maximum coverage and tucking in any excess around the trunks of the bushes. (We did have to cut holes in a couple of places to fit them over the concrete boulders that dot the slope.)

The trickiest part was removing and then replacing the hollow concrete blocks along the fence line. We didn't want to take them all off at once, because they were helping to hold down the groundcloth. So Brian had to repeatedly perch halfway up the slope between two bushes, removing the concrete blocks and handing them to me so he could place the netting, then putting the blocks back in place to hold it down. He also added long spikes to the center of some of the concrete blocks to help hold them in place. (We couldn't treat all of them this way because some of them had rocks in the way, and anyhow, we didn't have enough spikes.)

We also decided, sort of on the spur of the moment, to make a border for the mulched area with some old slate pavers we had sitting around unused. The idea was to create a flat, smooth path for rainwater to flow down so that it would be less inclined to cut a channel through the mulch. We laid the pavers out along the edge of the mulch zone and pounded some more of those big spikes in to hold them in place. Then we spread the last of the mulch from our most recent trip to the Belle Mead Co-Op over the slope and went inside for some well-deserved showers. 

At this point, the hillside was pretty evenly covered with mulch. However, I wasn't confident yet that it would stay that way. That slope had looked pretty good the first time we tried mulching it, but it didn't take long for the rain to start wearing paths through the mulch and leaving bare patches. So I knew the first rainfall would be the real acid test.

As it turned out, we didn't have long to wait. We had a brief thundershower that very night and a couple of additional squalls over the course of the following week, and so far, the mulch has mostly stayed put. There are a couple of tiny bare patches around one bush on the far end, but that might just be because the mulch wasn't laid very thickly to begin with. We've since returned to the Co-Op and hauled home another half-yard, so we can add another layer and cover up those bare patches in the process. Then we'll keep a sharp eye out to see if any more appear. If they do, we may need to come up with a different solution. But for now, fingers crossed, this seems to be working.

Of course, after finishing this job on Saturday, we still needed to put up some additional netting to protect the berry bushes themselves. But that's a topic for another post.