
You know those annoying people who never seem to gain weight? They eat whatever they like and they stay thin, and when you ask them about it, they say, "Yeah, I guess I'm just lucky that way?"
Well, I'm kind of like that with saving money. When I read articles and message boards where people talk about how hard it is for them to resist overspending, I just can't relate to it. I guess I don't have the shopping gene, because I've never really felt the urge to go on a big spending spree...whether I could afford it or not.
So when I see articles with savings tips like, "Save all your change in a jar at the end of each day - it really adds up!" I just think, "How is that supposed to help? Things cost the same whether you pay for them with exact change or not. Why not just put the dollars into savings instead of the coins?" But the answer, of course, is that some people can't save the dollars; if they have them, they'll spend them. If there's money in their wallets—or in their checking accounts, where it's easy to reach—it burns a hole in their pockets.
For these folks, an automatic savings plan can be a real help. With these plans, you immediately set aside a portion of each paycheck in a separate savings account. You can still get the money if you really need it, but it's out of sight and out of mind, so you don't spend it unthinkingly. It's kind of like hiding the cookies on a high shelf, where they're harder to reach (a temptation I do understand).
My latest Money Crashers article is all about these automatic savings plans. I explain how they help you save and how to set one up. Then, as a bonus, I also discuss various money-saving apps that can help you keep a squeeze a little more savings out of each paycheck—like an electronic version of that big jar of coins on the dresser.
Here's the article: How to Use Automatic Savings Accounts & Apps to Build Wealth With Less Stress
Friday, June 30, 2017
Sunday, June 25, 2017
Recipe of the Month: Roasted Mushroom Salad (plus bonus taters)
This Friday, while deciding what to make for dinner, Brian took note of three cogent facts:
Anyway, we figured these changes wouldn't make too big a difference. We both like Boston (butterhead) lettuce better than Romaine anyway, and surely any kind of mushrooms sautéed with olive oil, garlic, and fresh rosemary could only be good. And since we liked all the other flavors in the salad as well—balsamic vinegar, Dijon mustard, and pecans—putting them all together had to be a guaranteed winner, right?
 Well, not really. It only took us a few bites of this salad to conclude that, while all the ingredients of it were good individually, they just didn't play together well. In my opinion, it was the juxtaposition of the mushrooms and the lettuce that didn't work. Adding a hot, cooked ingredient over top of fresh greens wasn't the problem; we'd tried that before with this Warm Chick Pea Salad with Arugula, and we quite liked the combination. It was just the flavor of the seasoned mushrooms that didn't seem to combine well with the salad and dressing. We probably would have enjoyed either the dressed greens or the mushrooms by themselves (or possibly as an accompaniment to pasta or polenta), but the two together weren't satisfying. We managed to finish off the dish, but we felt no interest in trying it again.
 Fortunately, one thing saved the dinner from being a total bust. Rather than just slice some bread to accompany the salad, Brian decided to fix some potatoes. And since he was using rosemary on the mushrooms, he thought it would make sense to put some on the potatoes as well, along with a little olive oil and parmesan. And these turned out to be not just good, but fantastic. Roasted alongside the mushrooms in a 450-degree oven, they cooked up crisp on the outside, tender on the inside, and full of flavor. Brian used a pound and a half of potatoes, and we ate up most of them at dinner time and then kept going back to the fridge all evening long to sneak pieces of the leftovers. Even cold, they were still tasty.
So, even if the official Recipe of the Month was a disappointment, we still have one new dish that we'll definitely be making again. If you want to do the same, here's the very simple recipe:
Cut 1 1/2 pounds baking potatoes into good-sized chunks. (Small potatoes can be quartered, larger ones halved and cut into thick slices.) Toss the pieces with 3 Tbsp. olive oil, 2 Tbsp parmesan, 1 Tbsp. chopped fresh rosemary, and 1 tsp. salt. Spread them out on a baking sheet lined with parchment or a silicone liner (like the ones Brian got for Hanukkah last year) and bake in a 450-degree oven for about 40 minutes, or until they're golden and crispy. Then try not to gobble them up too fast.
- We had some mushrooms in the fridge that needed to get used pretty soon.
- We also had plenty of lettuce out in the garden (so far, the one crop we have that's doing well).
- I still needed a Recipe of the Month for June to put on this blog.
Anyway, we figured these changes wouldn't make too big a difference. We both like Boston (butterhead) lettuce better than Romaine anyway, and surely any kind of mushrooms sautéed with olive oil, garlic, and fresh rosemary could only be good. And since we liked all the other flavors in the salad as well—balsamic vinegar, Dijon mustard, and pecans—putting them all together had to be a guaranteed winner, right?
 Well, not really. It only took us a few bites of this salad to conclude that, while all the ingredients of it were good individually, they just didn't play together well. In my opinion, it was the juxtaposition of the mushrooms and the lettuce that didn't work. Adding a hot, cooked ingredient over top of fresh greens wasn't the problem; we'd tried that before with this Warm Chick Pea Salad with Arugula, and we quite liked the combination. It was just the flavor of the seasoned mushrooms that didn't seem to combine well with the salad and dressing. We probably would have enjoyed either the dressed greens or the mushrooms by themselves (or possibly as an accompaniment to pasta or polenta), but the two together weren't satisfying. We managed to finish off the dish, but we felt no interest in trying it again.
 Fortunately, one thing saved the dinner from being a total bust. Rather than just slice some bread to accompany the salad, Brian decided to fix some potatoes. And since he was using rosemary on the mushrooms, he thought it would make sense to put some on the potatoes as well, along with a little olive oil and parmesan. And these turned out to be not just good, but fantastic. Roasted alongside the mushrooms in a 450-degree oven, they cooked up crisp on the outside, tender on the inside, and full of flavor. Brian used a pound and a half of potatoes, and we ate up most of them at dinner time and then kept going back to the fridge all evening long to sneak pieces of the leftovers. Even cold, they were still tasty.
So, even if the official Recipe of the Month was a disappointment, we still have one new dish that we'll definitely be making again. If you want to do the same, here's the very simple recipe:
Cut 1 1/2 pounds baking potatoes into good-sized chunks. (Small potatoes can be quartered, larger ones halved and cut into thick slices.) Toss the pieces with 3 Tbsp. olive oil, 2 Tbsp parmesan, 1 Tbsp. chopped fresh rosemary, and 1 tsp. salt. Spread them out on a baking sheet lined with parchment or a silicone liner (like the ones Brian got for Hanukkah last year) and bake in a 450-degree oven for about 40 minutes, or until they're golden and crispy. Then try not to gobble them up too fast.
Wednesday, June 21, 2017
Gardeners' Holidays 2017: Cornucopia
 Summer is off to a disappointing start in our garden this year. Normally, by this time of year, we've already started harvesting our sugar snap peas, and we might even be getting a few early green beans. This year, though, both those crops have been a disappointment. The snap peas, for some reason, didn't come up at all when we first planted them early in April; when we attempted a second planting at the beginning of May, only a straggling few plants appeared, and none of them have even flowered, let alone produced pods.
 As for the bean plants, they came up just fine, but then several of them mysteriously disappeared. Some of them were chomped off an inch or two from the ground, while others seem to have been pulled out entirely and spirited away. We might suspect that our resident groundhogs had somehow managed to find a way through the groundhog fence, but our lettuce hasn't been touched, so clearly that's not it. The only critters that can make it into the garden, as far as we know, are squirrels and birds, which shouldn't be interested in our bean plants. So far, our best guess is that we have an infestation of voles—the groundhog fence wouldn't keep those out, and Brian did recall seeing some sort of small tunnel in the dirt near the missing bean plants. But it's only a guess, and we'd have to set out traps to verify it—which didn't work so well with the rat last year.
 Other crops are looking disappointing as well. The lima beans we planted this year were seeds we harvested last year, intending to eat them, but planted instead when we realized we'd forgotten to buy more. Apparently, this didn't work well, as not a single bean plant came up. We also got only three cucumber plants from the eight seeds we planted, even though some of the seeds were only a year old. And even our basil, which is normally one of our most prolific crops—so much that we've sometimes had trouble figuring out how to store it all—is coming in small and patchy.
 Fortunately, there are a few bright spots in the garden as well. The squash plants are all thriving, and the zucchini are already displaying their first blossoms, which means the actual squash aren't far off. (We've already taken the precaution of covering the stems with dirt, in the hope that we can preserve our plants from falling victim to squash vine borers again this year.) And the butterhead lettuce has grown in thick and luxuriant, so it can now take over on salad duty from the winter lettuce that's finally bolted in the summer heat.
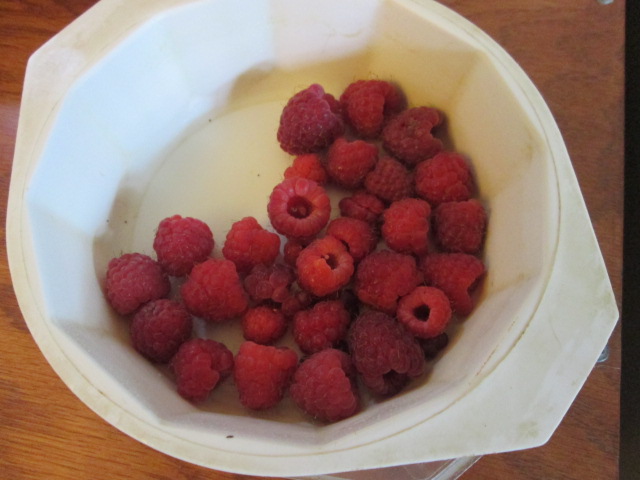
 Best of all, our raspberry canes not only continue to produce, but actually seem to be ramping it up as the summer progresses. Yesterday, I went out and picked a whole colander full, giving me a generous portion for that day's lunch, another for today's, and enough left over to dress a couple of green salads for tonight's dinner. (We've also managed to get the berries up on a trellis of sorts—just a couple of stout cables running the length of the bed, attached to posts on either end—which we hope will make it easier to harvest them in future. More details on that project in a future post.)
So even with all the disappointments in the garden, we still have much to be thankful for. Indeed, with organic raspberries costing about $6 a pint at the farmers' market, I'd say we owe at least $20 worth of gratitude already—and there's more where that came from.
Sunday, June 18, 2017
Becoming an EDC woman
Last month, when I blogged about my new refillable roller-ball pen, I gave several reasons why I was so pleased with it. I liked the fact that it was comfortable to hold, laid down a neat line, and most importantly, was refillable. It uses a cartridge system, which is the easiest method of refilling, if not the most ecofrugal—and if I ever decide I'm willing to trade off some convenience for sustainability, I can switch it to a cartridge converter or ink-dropper system. So, ideally, now that I own these two refillable pens, I should never need to buy and throw away a disposable pen again.
However, there was one other thing that pleased me about these pens that I didn't mention at the time: adding this pen to my purse made a great upgrade to my everyday carry, or EDC.
What's EDC, you ask? Well, there are two answers to that question. Your everyday carry, or EDC, is simply the stuff that you carry around in your pockets on a day-to-day basis. This doesn't mean the detritus of gum wrappers and cash register receipts that accumulates over time; it means the items you carry deliberately, because you need them and feel lost without them. Your keys. Your wallet. Your smartphone, if you're like most people, or your little notebook and pen, if you're more like me.
But the phrase "EDC" means something more than that. It refers to a whole philosophy built around the idea of choosing your EDC as wisely as possible. People who belong to the "EDC community"—and yes, there definitely is one—put a lot of thought into what they carry in their pockets every day. They invest considerable time and energy into clearing junk out of their bags and pockets, paring down their EDC to a few basic essentials—and then making those essential items as useful and well-crafted as possible. Their goal is to have an EDC that can get them through any event they're likely to run into on a day-to-day basis, without weighing them down.
I first discovered the EDC community while shopping for my new pens. I went searching for reviews of refillable roller-ball pens, and I discovered that some of the most thorough ones were on the Everyday Carry website (yes, of course there's a website). Because naturally, if anyone's going to put a lot of thought into which pen is the best pen to keep in your pocket, it's going to be the EDC folks. These people pay attention to every aspect of a pen: functionality, comfort, build quality, size, and style. Some of them even write, in all seriousness, about how well a pen functions in "the harshest conditions," as if they were planning to take their pens on an Arctic expedition. (Who knows—maybe some of them are.)
People get involved with the EDC lifestyle for different reasons. To some, it's all about being prepared for emergencies. These are the ones who want their watches to have built-in compasses and their pens to stand up to "tactical" use. (The EDC movement isn't the same as the "prepper" movement, but there's definitely some overlap.) Others, by contrast, like the idea of being outfitted as a proper gentleman (since most EDC'ers are male) should be. These are the types who prefer fountain pens and pocket watches and always have a clean handkerchief.
I haven't seen any articles that specifically talk about EDC from an environmental perspective. Nonetheless, it seems to me that the EDC lifestyle is a perfect fit with ecofrugality, because it's all about choosing wisely and wasting nothing. You choose only the exact items you need to carry in your pockets, so you don't waste space; you choose the most efficient set of items, so you don't waste time; and you avoid wasting money and resources by choosing sturdy items that are built to last, not cheap ones that get replaced often.
So when I purchased my new pen, I privately labeled it as my new "EDC" pen—and mentally, I made a vow to start improving the rest of my EDC, as well. As a start, I went on eBay two weeks ago and tracked down a working copy of my old, much cherished Timex watch, which died after ten years of loyal service shortly after I'd invested in a new, solid stainless-steel band for it. It was the only watch I'd ever found that really met my short yet stringent list of requirements: a face with all twelve numbers visible; hour, minute, and second hands; a night light; a metal bracelet band (NOT an extension band that snags my hair all the time); and a design that works with any outfit, dressy or casual. So I decided that rather than searching site after site trying to find another watch that meets all those needs, I should just track down another copy of this old, discontinued watch and buy that. (And, as a bonus, if the band wears out, I already have a stainless-steel one to replace it.) So now I have the perfect EDC pen and the perfect EDC watch, and I'm still working on the ideal phone.
All this inspired me to write an article about the EDC lifestyle for Money Crashers. This piece explains the concept of EDC, outlines its benefits (e.g., saving time, saving money, and being prepared for any emergency), and then goes into details about how to craft your own personal EDC. I discuss the nine essentials that show up on most lists of the ideal EDC—wallet, key fob, cell phone, flashlight, pocketknife, multitool, watch, notebook, pen—with details about how to choose the best ones for your needs.
Here are the details: 9 Everyday Carry Items You Need to Have to Be Prepared for Anything
Wednesday, June 14, 2017
Money Crashers: Time Banking Explained
Back in 2011, I was struck by the fact that the Freecycle group I belong to is an example of what an economy would look like with no explicit monetary system. There's a network through which people exchange goods - giving what they don't need, and taking what they do - but there's no explicit "this for that" trade involved. You give something to the group, knowing that at some point you'll get something back that's of value to it. You may not know what or when, but you trust that it will all work out.
However, Freecycle has one limitation: it only works for goods. People give stuff, and they get stuff in return. But what about services? Is there any kind of network where people can exchange those - say, giving five hours of babysitting to one person in the group, and getting back five hours of music lessons from another at some later time?
As it turns out, yes. Time banks are systems that let people pay for goods and, more usually, services with their time, instead of money. The basic premise of all time banks is "One hour equals one hour"—no matter how that hour is spent. An hour of time from a lawyer, whose normal hourly rate is $150 or more, is worth exactly the same as an hour of time from a short-order cook who earns minimum wage. In this way, all contributors are valued equally in a way that they aren't in the money economy. The vast inequality between rich and poor that causes so much trouble in our society just doesn't exist in the time economy.
In my latest Money Crashers article, I explore these fascinating yet little-known alternative economies. I explain how time banking started, how time banks work, the "core values" time banking promotes, and the pros and cons of the system. And I wrap it all up with some advice on how to find a time bank in your area and give it a try—or, if you can't find one, start your own.
Read all the details here: Time Banking Explained – How to Trade Services With a Time-Based Currency
Sunday, June 11, 2017
Raspberry Redux
When we first planted our raspberry canes back in 2013, we planned to grow them using the easy single-crop method. In other words, instead of going to all the trouble of trellising and selectively pruning the canes to keep them healthy, we figured we'd just cut down all the canes every winter and let new ones grow in the spring. That way, we wouldn't get any berries in the summer, but we'd get a generous crop in the fall—and it would be a lot less work. (When in doubt, do it the easy way, that's what I say.)
Last winter, however, Brian had the idea that maybe we should try, just as an experiment, leaving last year's canes in place, and letting next year's canes grow up alongside them. That way, we could get a summer crop off the two-year-old "floricanes," as well as a fall crop off the new "primocanes," before cutting them down and starting over.
 Sure enough, this month the canes started producing berries—lots of them. Not only were we harvesting raspberries much earlier in the season than we'd ever had any before, we were getting nearly as many of them in this first crop as we normally get in our single yearly crop. Just yesterday Brian came in with an overflowing handful of berries and declared that, from now on, he wants to grow the berries this way every year.
My reaction to this announcement was a bit mixed. On the one hand, I'm certainly enjoying having lots of fresh, ripe berries in June, instead of having to wait until September. But on the other hand, as I reminded him, the two-crop method of growing raspberries is a lot more complicated. I pulled out my copy of The Weekend Garden Guide and read him the section on bramble cultivation, stressing the following points:
 If you don't follow these rules, but just let your berries grow willy-nilly, Roth warns that you're liable to end up with "great thickets" that are difficult to harvest from. Even after less than one year, our bramble patch is clearly heading in that direction: last year's canes and this year's are all jumbled up together, creating a thick tangle that it's very difficult to reach into. You can easily pluck the berries that are right on the tips of the canes, but the ones that are lower down tend to get buried, and you have to push the overlying shoots back with some sort of tool to get at them.
So basically, if we're going to start growing our berries by the two-crop method, some sort of trellis is going to be a must. Just harvesting this year's berries without one is tricky enough; trying to find and selectively prune out the floricanes while everything is all tangled up together is going to be a complete nightmare.
Fortunately, according to author Susan Roth, trellising the berries isn't really that big a hassle; you can just build a permanent trellis once and then continue to use it year after year. The type she recommends is a hedgerow: pairs of metal posts on either side of the row of raspberry canes, spaced 20 to 25 feet apart, and joined by wires at 2.5 feet and 5 feet high to support the canes. Once you have this in place, all you have to do is walk along the row once a week, make sure the canes are tucked under the wires, and pull out any little suckers that have spread beyond the limits of the row. The wires keep the canes neatly propped up, making it easy to get in and prune back the floricanes in the fall—a job that Roth says fits easily into a Saturday morning.
Because of the way our raspberries are situated, we figure we can modify Roth's hedgerow plan a little bit. Instead of putting posts on either side of the row of canes, we should be able to make do with just two set of posts, one on each end of the bed, and let the side of the house support the canes on the other side. Brian's only concern about the plan was that the trellis might block access to the telephone box on the side of the house, but I pointed out that it could hardly be more of a barrier than the thicket we've got growing there now. We can always thin out the canes to leave a gap where the box is, and anyone who comes to work on it can just slip in under the wires to get close to it.
I'm actually thinking that, rather than waiting until fall, we should try and get a trellis installed and wrestle these berries onto it as soon as possible. That way we won't have to go out fully armored and armed with a lance just to pick a few berries, and we're less likely to miss out on the ones that we can't see right now through all the foliage.
Last winter, however, Brian had the idea that maybe we should try, just as an experiment, leaving last year's canes in place, and letting next year's canes grow up alongside them. That way, we could get a summer crop off the two-year-old "floricanes," as well as a fall crop off the new "primocanes," before cutting them down and starting over.
 Sure enough, this month the canes started producing berries—lots of them. Not only were we harvesting raspberries much earlier in the season than we'd ever had any before, we were getting nearly as many of them in this first crop as we normally get in our single yearly crop. Just yesterday Brian came in with an overflowing handful of berries and declared that, from now on, he wants to grow the berries this way every year.
My reaction to this announcement was a bit mixed. On the one hand, I'm certainly enjoying having lots of fresh, ripe berries in June, instead of having to wait until September. But on the other hand, as I reminded him, the two-crop method of growing raspberries is a lot more complicated. I pulled out my copy of The Weekend Garden Guide and read him the section on bramble cultivation, stressing the following points:
- Floricanes have to be pruned back as soon as they're done producing, thus giving the new primocanes more light and more room to breathe.
- You must "ruthlessly" root out all stray suckers from the bed and thin the primocanes to 4 to 6 inches apart to avoid overcrowding.
- You'll have healthier plants, get more berries, and have an easier time harvesting them if you put them on a trellis.
 If you don't follow these rules, but just let your berries grow willy-nilly, Roth warns that you're liable to end up with "great thickets" that are difficult to harvest from. Even after less than one year, our bramble patch is clearly heading in that direction: last year's canes and this year's are all jumbled up together, creating a thick tangle that it's very difficult to reach into. You can easily pluck the berries that are right on the tips of the canes, but the ones that are lower down tend to get buried, and you have to push the overlying shoots back with some sort of tool to get at them.
So basically, if we're going to start growing our berries by the two-crop method, some sort of trellis is going to be a must. Just harvesting this year's berries without one is tricky enough; trying to find and selectively prune out the floricanes while everything is all tangled up together is going to be a complete nightmare.
Fortunately, according to author Susan Roth, trellising the berries isn't really that big a hassle; you can just build a permanent trellis once and then continue to use it year after year. The type she recommends is a hedgerow: pairs of metal posts on either side of the row of raspberry canes, spaced 20 to 25 feet apart, and joined by wires at 2.5 feet and 5 feet high to support the canes. Once you have this in place, all you have to do is walk along the row once a week, make sure the canes are tucked under the wires, and pull out any little suckers that have spread beyond the limits of the row. The wires keep the canes neatly propped up, making it easy to get in and prune back the floricanes in the fall—a job that Roth says fits easily into a Saturday morning.
Because of the way our raspberries are situated, we figure we can modify Roth's hedgerow plan a little bit. Instead of putting posts on either side of the row of canes, we should be able to make do with just two set of posts, one on each end of the bed, and let the side of the house support the canes on the other side. Brian's only concern about the plan was that the trellis might block access to the telephone box on the side of the house, but I pointed out that it could hardly be more of a barrier than the thicket we've got growing there now. We can always thin out the canes to leave a gap where the box is, and anyone who comes to work on it can just slip in under the wires to get close to it.
I'm actually thinking that, rather than waiting until fall, we should try and get a trellis installed and wrestle these berries onto it as soon as possible. That way we won't have to go out fully armored and armed with a lance just to pick a few berries, and we're less likely to miss out on the ones that we can't see right now through all the foliage.
Saturday, June 10, 2017
Money Crashers: How to Buy a Fixer-Upper
As I've noted before, I'm a big fan of home-remodeling shows. One of my current favorites is "Rehab Addict," in which pint-sized powerhouse Nikki Curtis buys up old houses in poor condition—sometimes even ones that have been condemned and are slated for demolition—and "restores them to their former glory." It's great fun to watch the transformation, but what I like best about the show is that it doesn't sugar-coat the process of turning these ugly ducklings into swans. Nikki runs into problems—sometimes really big problems—and you see how she struggles to fix them. There's even one episode where she has a couple of houses that aren't selling, and she's forced to sell her own house just to raise enough capital to keep working. Watching this show, you can definitely tell that fixing up a house is a rewarding job, but not an easy one.
In this way, I think "Rehab Addict" is a good counterbalance to some of the other home shows, which make the process of making over a house look like a lark from beginning to end. Binge-watching a whole bunch of "Fixer Upper" episodes could easily lure a viewer into thinking, "Gee, this doesn't seem so hard! All you have to do is buy a beat-up old house and throw up some shiplap and new tile, and you can make a ton of money!" And in reality, of course, it's almost never that simple.
So in my latest Money Crashers article, I offer a more nuanced look at the pros and cons of buying a fixer-upper. I go into all the nitty-gritty details that the HGTV shows tend to gloss over, such as:
- Figuring out what repairs a house needs
- Determining what you can DIY and what you have to hire out
- Calculating the costs for repairs and permits
- Financing options that cover both the house and the repair costs
- Evaluating your own ability to handle a fixer-upper
- Deciding how much to offer
- Bargaining with sellers to get a good deal
- Writing clauses into the contract to protect yourself
Friday, June 2, 2017
Return of the tame-flower bed
Actually, since it's mostly weeds at the moment, I guess I can't exactly call it tame. Perhaps it would be more accurate to call it a lame-flower bed.
A quick recap: Back in 2014, after pulling out the overgrown shrubs to the left of our front door, we planted the area with a wildflower seed mix we bought from American Meadows. This blend was a mix of annuals and perennials for the Northeastern gardens, and the site promised "show-stopping color all season long, year after year." And, after an unpromising start in spring of 2014, the seeds did actually burst into an impressive mix of blooms by mid-June.
But sadly, this triumph was short-lived. One particular flower in the mix, the bachelor's buttons (aka cornflowers), grew up to a height of about four feet and then, in the first heavy rainstorm, flopped over, burying everything else under their stalks. We attempted to compensate for this problem the following year by installing a grid of stakes and string that we hoped would keep the flowers corralled, but that turned out to be too little, too late. The grid wasn't enough to keep the flowers from flopping, and moreover, the bachelor's buttons had spread beyond the borders of the original bed and were flailing about with no constraints. One year later, they had pretty much taken over the entire area, and pulling them all out left us with a pitiful, scraggly mix of a few poppies and black-eyed Susans looking sadly around for all their friends.
So in 2016, we came up with a new plan. We bought a different wildflower seed blend, this one containing only perennial plants. That, we figured, would remove the overly aggressive cornflowers from the mix. Last fall, we pulled everything out of the bed, planted the new perennial seed mix in place of the old, and crossed our fingers.
And now, nearly six months later, here's what we've got:

What you might notice about that picture is the conspicuous absence of flowers. There's a lot of green stuff, but only a few tiny wallflowers blooming. Worse still, those tallish stems that look like they're ready to bloom before too long are actually....wait for it...BACHELOR'S BUTTONS! These things are like the monster in a horror movie! No matter how many times you kill it, it just keeps coming back!
Now, maybe I'm being too hasty in calling this attempt a failure. After all, at this point in June of 2014, all we had was a patch of baby's breath with a few scattered dots of color, but two weeks later, the bed was a full-on riot of color. So maybe the perennials will undergo a similar transformation (once we get the damn cornflowers out of there).
Unfortunately, we'll have to wait quite a while to find out, as the American Meadows site warns one reviewer that "perennials do typically only show green growth in the first year." So we might not know until next summer whether we're actually going to get any blossoms...and by then, it will be too late to do anything about it until the following year. Which means we might not be able to get anything decent-looking into this area before 2019.
All in all, I'm feeling kind of disappointed with our attempts to grow a pollinator garden in this area, as the landscaper we consulted back in 2012 recommended. I'm wondering if maybe we would have been happier just replacing those big, overgrown shrubs with some slightly smaller shrubs—maybe a couple of hydrangeas or small rosebushes—and calling it good.
Subscribe to:
Posts (Atom)

