Tuesday, October 27, 2020

3 new(ish) Money Crashers articles

I've got a bit of a backlog of new Money Crashers articles to tell you about here, since for some reason my work e-mail stopped sending me messages for nearly two weeks. This afternoon, I suddenly found over 40 "new" messages dating back to October 15, including several notifications about newly published pieces. They are:

1) An article on reducing winter heating costs. This is something I've struggled with personally, as I'm such a weather wimp that just turning down the thermostat from 68 to 67 left me shivering. But with winter tips and tricks like weather stripping, wearing a blanket over my clothes, using fleece sheets, drinking hot tea, doing lots of baking, and keeping a pressure-cooker space heater next to my desk, I'm managing to get by. This article can help you do the same.

How to Lower Your Heating Bills & Save Money on Winter Energy Costs

2) A piece on money-making schemes that won't make you any money. Some of them are outright scams, some are illegal, and some just don't pay diddly, but they all have one thing in common: they promise a big payoff for practically no work. In other words, they sound too good to be true, and they are.  

10 Money Making Schemes That You Should Probably Avoid

3) And lastly, a guide to digital cameras. This isn't exactly my area of expertise, since I've been using the same cheapo camera for the past ten years (except that I've somewhat switched over to my phone camera since I bought one that was reasonably easy to use), but hey, if my years at ConsumerSearch taught me anything, it was how to research a purchase. So if you're in the market for a camera, you can gain the benefit of all my skill in this area. You're welcome.

9 Best Digital Cameras to Buy for Photography in 2020


Sunday, October 25, 2020

Recipes of the Month: Almond Crusted Tofu and Eggplant Soy Curls

This month, you are getting two new vegan recipes for the price of one (which is to say, free.) After cruising through most of October without trying anything new, we have tried two new recipes in the space of one week, and you are gaining the benefits of our experience with both. (Actually, one of them isn't quite vegan, since Brian used some fish sauce in the stir-fry sauce, but there are plenty of vegan substitutes for this to be found online, so it would be easy to make it vegan-friendly if you wanted to.)

The first dish was the Almond Rosemary Lemon Crusted Tofu from It Doesn't Taste Like Chicken. I had downloaded this one at some point, thinking it looked like an interesting main dish to try, and we finally got around to making it this week. The concept is pretty simple: it's just thick slices of firm tofu, dredged in flour, dipped in coconut milk, coated with a flavorful mixture of bread crumbs, crushed almonds, lemon zest, and fresh rosemary, and then baked. It's not at all difficult to do, and it takes maybe half an hour, tops.

And the result? Well, it's not bad, but it's not extraordinary. The breading mixture has a nice crisp texture and zingy lemon-rosemary flavor, but the tofu within has basically none, because it hasn't been marinated or spiced at all prior to cooking. It has a pleasant soft texture that contrasts well with the crunchy coating, but it contributes nothing at all to the taste. So as a whole, the dish is nowhere near as flavorful as many other vegan recipes we've tried, including some from It Doesn't Taste Like Chicken. 

Another problem with this dish is that it supplies only one portion of the meal. The tofu has plenty of protein, but it still needs an accompanying veggie and some sort of starch for ballast. We had ours with baked potatoes and green beans, neither of which is much trouble to make, but it's still not as convenient as a one-dish recipe that provides protein, veggie, and starch all together.

All in all, neither Brian nor I thought this was a dish we would go out of our way to make again. Brian thought it could be useful to keep in the repertoire for those occasions when we already have an open can of coconut milk and/or a partially used package of tofu, since it could put them both to good use and doesn't call for any other ingredients we're not likely to have on hand. (Well, maybe the lemon zest, but we could just replace the pepper in the breading with lemon pepper.) But it probably won't go into the regular rotation.

The second dish was a bit more off-the-cuff. Brian had bought an eggplant on a whim at the market, and he was originally planning to cook it up with some of the tofu left over from the first dish. But instead, he decided to experiment by replacing the tofu with Butler Soy Curls, which we were flush with after taking the plunge on a six-bag order from the manufacturer. And since our order of Penzey's Vegetable Stock had also arrived in the interim, he decided to soak the curls in veggie broth, rather than plain water, and see how that affected their flavor.

Answer: a lot. I would say these broth-soaked soy curls were significantly more flavorful than plain chicken would be, and the texture, as always, was about indistinguishable. And because he served them in a sort of Thai stir-fry with the chopped eggplant, garlic, Thai basil, and a Takara Shishito pepper (a mild chili), the dish as a whole was absolutely packed with flavor and the contrasting textures of silky eggplant and chewy soy curls.

All in all, this was a recipe we're much more likely to make again — and one I deemed worthy of reproducing here on the blog in its entirety. So here, without further ado, is:

BRIAN'S THAI EGGPLANT AND SOY CURLS

For the soy curls:

Dissolve 3/4 tsp. Penzey's Veggie Soup Base in 1 cup water and microwave on high for one minute. Submerge 2 oz. Butler Soy Curls in this mixture and let them soak for about 10 minutes. Remove hydrated curls and gently press with a slotted spoon, reserving all the liquid (this is important!). Sprinkle 3 Tbsp. corn starch on the soy curls, toss to coat, and fry in 2-3 Tbsp. canola oil until crisp and just beginning to brown. Set aside.

For the sauce:

Combine 2 Tbsp. brown sugar, 3 Tbsp. fish sauce (or a vegan equivalent), and the leftover soaking liquid from the soy curls. Stir until the sugar dissolves.

For the stir fry:

Dice 1 eggplant (about 1 pound) into roughly 1/2" cubes and chop 1/4 cup Thai basil leaves. Finely chop 1 Takara Shishito pepper (seeds removed) or other mild chili pepper and 3 cloves garlic. Add  pepper to the remaining oil in the pan and try for one minute. Add garlic and eggplant and fry until eggplant is soft but not mushy. Add the sauce and mix, stirring until sauce begins to boil. Add soy curls and stir until sauce thickens. Add basil, stir, and remove from heat.

Serve over rice.

Sunday, October 18, 2020

Small potatoes

It didn't occur to us until recently that, when we planted potatoes for the first time this spring, there was one thing we didn't pay enough attention to: how to know when it was time to harvest them. After thriving throughout the spring and summer, the vines started to wilt and die back, and we weren't sure whether that meant it was time to harvest the potatoes or not. Eventually I checked on it and found that potatoes grown in this way are supposed to be ready to eat after 12 to 20 weeks — which meant we were anywhere from one to three months late gathering them in.

So, yesterday, Brian decided to investigate. He pulled one of the buckets out of the garden and started rummaging through it, searching for spuds.


The first one he found was a tiny little fingerling — maybe half the size of the ones we'd bought as seed potatoes to start with — and he thought, "Gee, I hope the rest are bigger than that." But he kept digging, and eventually he found about a dozen more...all smaller than that first one. The entire harvest from that bucket was small enough to fit into the palm of his hand. When we took them in and weighed them, they came to about an ounce total.

We haven't checked the other three buckets yet, but based on this one, it seems clear that our potato-growing experiment, to put it mildly, hasn't been a huge success. The volume of potatoes we got out of this one bucket may actually be smaller than the total volume of seed potato that went into it. If the others are similar, then the $3.71 we spent on seed potatoes will yield us around a quarter-pound of fingerlings, for a total cost of $14.84 per pound. (Sure, fingerling potatoes cost a lot more at the store than other kinds, but they're nowhere near that much.)

So, in theory, we should just eat the tiny volume of potatoes we have and write off the $3.71 we spent on the experiment as the cost of a lesson learned. (The buckets can be reused, and the compost can go back into the bin, so there weren't any other expenses.) And yet somehow, I hate to let it go at that. I can't help thinking there must be something we could do to get a decent crop of potatoes out of these buckets. Not a huge volume — maybe just a few meals' worth — but at least enough to make a profit on the endeavor. I mean, other people have apparently been able to pull this off successfully, so we know it's theoretically possible. Maybe with a few changes to our technique, we could make it work.

I checked out this YouTube video on bucket potato growing from an urban homesteader by the name of Hollis, and I can definitely see a few things he did differently from us. For instance, he added a 4-inch layer of stones for drainage to the bucket, while we only put in an inch and a half. Then, and this is probably more important, he added just enough compost to cover the stones and put the seed potatoes directly on top of them before layering on 6 inches of compost over top. We put in 4 to 6 inches of compost before adding the potatoes, and looking back on it now, it seems obvious that by doing this, we deprived them of 6 inches' worth of growing space. And obviously, the more underground space your potato vines have to grow in, the more tubers they have room to produce. (Brian confirmed that when he was rooting around in the bucket, he noticed that once he got below a certain level, there just were no more potatoes. So it seems clear that the vines grow only up, not down.)

Also, the growing medium Hollis uses is different. He said he combined equal parts topsoil, peat moss, and composted manure, rather than using all compost as we did. Now, given our druthers, we'd prefer to keep using our own compost, since it's both cheaper and more sustainable (as peat moss is technically a nonrenewable resource). However, it looks like we might not need to use pure compost; a ratio of two parts compost to one part ordinary garden soil would be closer to his mixture and might produce better results.

Third, the video recommends using two whole potatoes per bucket. We followed the advice of the folks at the Belle Mead Co-op and cut ours into pieces, then used three pieces in each bucket. However, it's possible that this actually overcrowded the vines, giving them less space for growing good tubers. Using fewer seed potatoes per bucket, could actually end up giving us a larger yield. (Hollis also used ordinary supermarket potatoes, which he sprouted by setting them in an egg carton and putting them in a sunny window. We'd prefer to grow the fancier fingerlings, since that gives us a better monetary return on our time investment, but it looks like there's no need to go to the co-op for them; we could just pick up a pound at Trader Joe's for two bucks, sprout a dozen of them, and eat the rest.)

Fourth, we set our potato buckets directly on the ground, but Hollis recommends keeping them elevated a couple of inches. His are set on top of what looks like a section of a shipping pallet. This improves the drainage and also keeps any harmful critters from crawling into the bucket from below.

Fifth, the video recommends giving all the buckets a good, thorough soaking with the hose — enough that there's water standing on top of the growing medium, which quickly drains through — right after planting. We watered ours pretty regularly, but I don't think we gave them this much water to start with, and it's possible we could have given them a better head start that way. Hollis also adds a dusting of bone meal on top to give the plants some extra phosphorus, which he says promotes root growth, and soaks them again after that. I don't know if we'd want to add this step, since it's not vegetarian-friendly, but one of the references on our gardening shelf (The Natural Garden Book) says you can boost phosphorus levels with compost, which is what we'd be using, or by raising the pH of the soil — and since our clay soil has a pretty high pH, that's another good argument for adding some of it to the mix.

Using these methods, Hollis claims he can usually get one to three pounds of potatoes out of a single five-gallon bucket. Now, the yield for fingerlings might not be as high in terms of weight, but still, if we can get even the low end of that range, our four buckets could give us four pounds of potatoes — $8 worth — for an initial investment of under a buck. (We'd use less than half of a $2 bag of potatoes for sprouting, and we'd supply the buckets, rocks, dirt, and compost ourselves.) That's definitely a result worth trying for.

Tuesday, October 13, 2020

Money Crashers: Retailers Slashing Prices to Compete With Amazon Prime Day Deals

Amazon Prime Day is officially under way, with two full days of deals. Now, you might think that, for folks like me, who prefer to avoid shopping on Amazon, this would be a non-event. But actually, there are plenty of other major retailers are battling the online retail giant with huge sales of their own, including Walmart, Target, and Best Buy. My recently updated article on the Prime Day competition outlines some of the best deals to be found and how to shop the competing sales to maximize your savings. 

Retailers Slashing Prices to Compete With Amazon Prime Day Deals

One problem with the piece is that, in order to meet our publication schedule, I had to write it nearly two weeks before Prime Day started — and before some sales, and details of others, were actually announced. So here are a few other juicy deals, sent to me directly by the companies, that didn't make it into the story:

  • Rakuten, a cash-back shopping app, is offering 12% cash back on October 12 from 100+ retailers including PetSmart, ULTA, Gap, Express, Overstock dot com, Shoes dot com, Saks OFF 5th, Dyson, Groupon, Michael Kors and many more. From October 13 through 15, Rakuten is offering up to 15% cash back from retailers including Bloomingdale’s, Glossier, PetSmart, Petco, Dyson, Express, Gap, Old Navy, Shoes dot com, ULTA, Adidas, QVC and many more. (Many of Rakuten’s Cash Back offers are from brands and retailers NOT on Amazon, including Topshop, American Eagle, Gap and Express.)
  • Ocelot Market is discounting its handcrafted products made by artisans using sustainable practices and materials. On October 13 and 14, get discounts of 40%, 30%, or 20% on sale items and 15% on everything else.


Sunday, October 11, 2020

Our new invisible deer fence

For all those who have been wondering how we've been faring in our battle to protect our new flowerbed from groundhog attacks, there's good news and bad news. The good news is, the hot pepper spray we made to deter the little furballs seemed to be effective — against them. The bad news is, it does nothing at all to deter an even bigger pest: deer.

The deer population in our town has really grown out of control in recent years, and since the only predator normally keeping them in check is cars, the COVID pandemic has only accelerated the trend. As cars and people have retreated from the roads, the deer have grown bolder, walking straight into people's yards to eat anything that looks tasty (and barely budging even when humans come within a few yards of them). And apparently, that category decidedly includes several of the plants in our flowerbed. The Johnny-jump-ups (violas), apparently a particular favorite of deer, were pretty much demolished, and even the coneflowers, coreopsis, and yarrow — all purported to be deer-resistant — have not gone entirely unscathed.

So, when my weekly gardening newsletter from Mother Earth News tackled the subject of deer control, I read it with interest. To my surprise, there was actually one idea in it that seemed not only feasible, but quite easy and cheap. And that's how we ended up with this new deer fence around our flowerbed:

You can't see any fence there, you say? Well, neither can the deer, which is precisely the point.

You see, deer can jump over pretty much any fence they can see. Brian once spotted one in our back yard, which is surrounded by a chain link fence 4 to 6 feet high on all sides, and when it saw him, it leapt right over the fence like it wasn't there. Any solid fence tall enough to keep out deer entirely would also block out most of the sunlight — not to mention blocking our view of our plants, which would basically defeat their whole purpose.

However, when they walk into a barrier that they can't see, apparently, it completely freaks them out. Or at least, that was the experience of one Henry Barrett from Holly, New York, who told Mother Earth News in a letter that he had successfully kept deer out of his garden with a barrier made from "20-pound-test, monofilament fishing line" — one line strung around at a height of 4 feet, and another at 2 feet. The two lines form a barrier too high for the adult deer to step over and too low for the youngsters to walk under.

When I read that, I thought, "Hmm...if we put a post at the corner of the flowerbed, we could run fishing line from that post to the porch railings along the front of the bed, and from the post to the front end of the raspberry trellis on the other side." And Brian recalled that he had a suitable metal post, similar to the ones we'd used for the trellis, out in the shed, so all we would actually need to buy was some clear fishing line.

We found this easily enough at Dick's Sporting Goods, in the back corner of the store that Brian refers to as the "killing stuff" section, where they keep all the hunting and fishing gear. (Ironically, even though neither of us has ever hunted or fished, this is the part of the store we visit the most, since it's also where we go to refill the canister for my seltzer machine.) It cost us a mere $5, our only cost for the project, for 330 yards — way more than we could possibly need. As you can see, what we bought is 12 pound test, not 20, because we forgot to check the description before heading out to the store, but we figure it shouldn't matter too much. The purpose of the line isn't to keep the deer out by force; it's just to create a barrier that will "spook" them when they walk into it. And if it ends up breaking, oh well, we can go back and get some of the heavier stuff; it's still cheap.

The actual job of putting up the fence was pretty easy, too. The hardest part was hauling out the old metal post and pounding it into the ground at one corner of the flowerbed. (As you can see, it's not in such great shape, but when we checked new ones at Home Depot, they weren't significantly nicer, so we decided to just go with it.) This displaced one of the phone line insulators we'd used to create a decorative barrier around the bed, so we just stuck the extra resistor on the awkward sort of hook that sticks out from the top of the post. This hook was rusted in place, so we couldn't remove it, but having the resistor on top makes it easier to spot so we won't bump into it by accident. We can always hang a decorative basket or something on it later.


Then we simply tied one end of the fishing line to the railing...

...ran it around the post...

...and tied the other end to the top of the raspberry trellis.

We repeated the process with a second line at the 2-foot mark, and there it was: a new stealth fence to deter the deer. (It won't stop the groundhogs, of course, so we'll have to continue spraying the plants as well.)

Now all we have to do is wait and see if it works. Even if it's only partially effective, a solution that requires only a one-time investment of $5 and half an hour of work is hard to beat.

Tuesday, October 6, 2020

Money Crashers: 10 Most Satisfying & Fulfilling Jobs and Career Opportunities

Earlier this year, my editors at Money Crashers asked me to update an article on the best careers for the next decade. They left the criteria for "best" careers up to me, so I chose jobs that combined high wages, strong prospects for growth, and reasonably high ratings for job satisfaction, based on a Payscale survey data. 

Initially, they accepted this, but then one of them got back to me requesting that I add a couple of computer-related fields, including Web design and software development. When I pointed out that these fields didn't meet my criteria for job satisfaction, they decided that what we really needed was two different articles: one on jobs that are satisfying (but still pay enough to live on), and one on jobs that are lucrative. So I went back to the drawing board and rewrote the article as two articles, each with its own focus.

This piece is the first of those two: the one that focuses on job satisfaction. As a result, many of the careers on this list are not particularly lucrative; in fact, some of them just barely pay a living wage. But they're all in reasonably fast-growing fields and they all get high marks for career fulfillment from workers at Payscale and other sites. And although there are only ten jobs on the list, they cover a variety of fields and require varying amounts of education, from a high-school diploma to a graduate degree. The piece also goes into what exactly it is that makes a job satisfying in the first place — info you can use to evaluate your current job and any other you might be considering.

10 Most Satisfying & Fulfilling Jobs and Career Opportunities


Sunday, October 4, 2020

Raspberry Trellis 2.0 (a belated Gardeners' Holiday celebration)

I just realized this week that, in my haste to fit in my Recipe of the Month post for September, I completely overlooked Harvest Home, the Gardeners' Holiday that falls on the autumnal equinox. This is usually my favorite Gardeners' Holiday of the year, a celebration of the full abundance of the fall garden, and I feel a bit embarrassed about missing it.

So, to make up for it, I'm offering up a belated celebration of one particular crop that's been performing like gangbusters right now: our raspberries. Yes, I know I already celebrated Raspberry Fest in June, but that was only our early crop. The second shift came on in August, and the raspberry canes have been pumping out a steady stream of berries ever since. We're currently gleaning about a cup a day — almost more than we can manage to eat. On Friday we used about a cup and a half (that day's harvest and a little from the day before) in a raspberry-apple crisp, and we gathered enough on Saturday to replace that amount in full. Between the first and second crops, we've already harvested 15 pints of fresh berries, and there are still plenty more waiting to ripen.

There's just one problem with this bounty of berries: it really weighs down the canes. By September, the tallest ones had reached a height of over five feet, and their tips were reaching well past the top of the  raspberry trellis we'd built to hold them up. The weight of the berries on these long canes bent them down over the top of the upper cable, and the sagging canes overlapped each other in a tangled thatch that it was really hard to sift through to extract the berries. Meanwhile, some of the shorter canes had bent downward under the lower of the two cables, sagging almost to the ground. In short, the trellis just wasn't doing its intended job of keeping the canes upright and easy to harvest from anymore.

So, at some point, I suggested to Brian that we fix this by adding a third line of cable to the trellis. If we moved the upper cable to the very top of the post, it would hold up the tallest canes, and a third line added below the current bottom one would hold up the low-hanging fruit. Brian agreed, but added that we'd have to fix another problem as well: finding a way to keep the lines taut. Under their burden of berries, the canes were pushing heavily down on the cables, pulling the two support poles inward toward each other. This, in turn, had caused the lines to go slack, so they weren't keeping the canes upright like they should. So, to make the trellis effective, we'd need to add some more lines to the posts to pull them outward, countering the inward pull of the heavy, berry-laden canes.

Fortunately, we still had two of the anchor stakes we'd bought to stake our plum tree after Tropical Storm Isaias. Brian figured if we attached a length of cable to the top of each metal pole, then ran a cable from there to the ground, pulling outward from the trellis, it would counter the inward pull on the line. We didn't have quite enough leftover cable to do this and also add another line to the trellis itself, so we invested $12 in another roll of cable and some hardware, and we were ready to tackle the project.

Unfortunately, Brian started the job on Saturday while I was still in the shower, so I didn't get a good "before" picture to show you what a mess the trellis was to begin with. But here's how it looked at an early stage, when Brian had moved up the lower line to the top of the posts, but not tightened it. (In order to get this far, he had to first get out his electric drill and widen the holes in the top of each stake, which had deformed when he pounded the stakes into the ground, to make room for the bolts.) Brian deliberately let the tall canes slump below the new top line at this point, because he didn't want to damage the canes or dislodge any berries by pulling against them too hard.

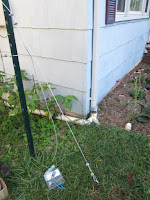
Before tightening this new top line, he had to add the new cables around the stakes on either end to pull them outwards. This was simple enough with the one closer to the street; he just drilled one of our earth anchors into the ground (actually getting it all the way down to ground level this time, something he hadn't managed when staking the plum tree) and ran a line from the top of the post down to the anchor, secured with wire rope clips on either end.

However, securing the post on the other side proved trickier. There's a big shrub at that end of the bed, so we couldn't simply run a line down to the ground on that side. Rather than remove the entire shrub (a job we'll probably have to do eventually, but didn't want to tackle today), Brian figured out that he could run the cable through the shrub to the backyard fence and secure it there. Then, by tightening the line while I pushed on the post from the other side, he was able to pull it upright.

The line between the tops of the posts still wasn't quite taut at that point, but he was able to tighten it by adjusting the turnbuckle we'd presciently installed at the far end. Once it was taut, we carefully fed the tallest raspberry canes under it, detangling them as we went, to lift them up and out of the way while we worked on the middle line. Just this one step made a big difference in sorting out the thicket and making the berries more accessible.

At this point, we ran into a new problem: the middle line was exerting too much of an inward pull on the posts, preventing them from staying upright. So, rather than tightening up the turnbuckle, Brian loosened it so that he had enough slack in the line to pull the posts up more firmly. Once that was done, he tightened the line at the western end of the house — a complicated process that involved first loosening the inner wire clip, then grasping the line between the clips and twisting it to pull it tighter, then re-tightening the inner clip, then loosening the outer clip and pulling the excess wire through, and finally re-tightening the outer clip. He had to repeat these steps a couple of times to get the line reasonably snug, and then he fine-tuned it from the other end by tightening the turnbuckle.

We then repeated the process of adjusting the canes, carefully feeding all the medium-height ones through so that they hung neatly over this middle line and only the short ones were left. To deal with those, we installed a new bottom cable about the same distance below the middle line as the top line was above it. Adding this new line from scratch was actually somewhat easier than adjusting the old ones. Brian started at the west end, putting a new eye bolt through the fence, running the cable through it, and securing it with a pair of clips. Then we unspooled the cable along the ground until it reached the other post and secured it there in a similar fashion, but with a new turnbuckle in between the eye bolt and the cable. Brian clipped off the excess wire and then tightened the turnbuckle, and the line snugged up, lifting the remaining short raspberry canes off the ground and holding them neatly in place.

It took us a few hours altogether (including a run to the Home Depot for more eye bolts when we realized the ones we'd picked up the first time were too big), but the new trellis makes a big difference to the raspberry patch. It's much easier both to see the berries, so we can tell at a glance which ones are ripe, and to reach them without getting scratched in the process. I think the time and money we invested in it will definitely pay for itself in the form of a more accessible berry harvest.

Friday, October 2, 2020

Money Crashers: Loyalty programs and Inflation vs. your retirement savings

Two more of my articles have just gone live on Money Crashers. The first is one I started ages ago that languished for a while in the editorial loop before they decided to bring it up to date and publish it. It's all about store loyalty programs: which stores have them, what their benefits are, and what, if anything, they cost. I review all the top-rated loyalty programs from department stores, drugstores, eateries, supermarkets, and specialty stores to determine which ones deserve a spot on your crowded keyring (or phone).

12+ Retailers With the Best Customer Loyalty Programs

The second is a companion to my earlier piece on the effects of inflation. This one focuses specifically on how inflation affects your retirement portfolio and what you can do to minimize its effects. I explain how to adjust your retirement plans for inflation and how to increase both your contributions and your rate of return to make sure you keep up. The piece covers the investments that pay off best in the long-term (mostly stocks, especially those that pay dividends), those that make the best hedges against inflation (such as real estate and inflation-adjusted bonds), and those that aren't necessarily good choices (commodities, precious metals, and art).

How to Combat Inflation’s Negative Effects on Your Retirement Savings