Sunday, May 31, 2020

Homemade hand sanitizer / deodorant

One of the challenges of the ecofrugal life is that it can make simple things more complicated. For example, this past week I ran into a very simple problem that most people would solve by just running to the store and buying something. But because that wasn't an ecofrugal option, I ended up having to make something instead.

About six years ago, after a series of experiments with different homemade deodorants, I started using alcohol-based hand sanitizer as my primary deodorant. This was a more ecofrgual option than most store-bought deodorants, because (1) it wasn't tested on animals, (2) it produced less non-recyclable packaging waste, and (3) it was considerably cheaper. An 8-ounce bottle of the stuff lasted me several months, and it only cost about a buck.

Until now, that is. With the rise of COVID, hand sanitizer has become a hot commodity, and stores just can't keep the stuff in stock. Ever since the outbreak started, I've been keeping a nervous eye on my one bottle of hand-sanitizer deodorant as the level crept lower and lower. Eventually it reached the point where I couldn't get any more out with the stupid pump top (which I hate anyway because it's not recyclable and it prevents me from turning the bottle upside down to drain it). I had to start removing the top and attempting to extract some with my fingers each morning, which was a pain.

I tried my local drugstore and supermarket, one other supermarket, and two other drugstores, and most of them had no hand sanitizer at all in stock. One store had some, but in 750-milliliter bottles (clearly from a distillery that's switched gears during the pandemic) for $10, which is about three times the normal price. Of course, all these stores had deodorant, which hasn't been in short supply, and I could have just bought some, but I hated the idea of letting the pandemic force me into less ecofrugal habits. So instead, I decided to try something I'd heard about from a friend: mixing up my own hand sanitizer. The main ingredients were rubbing alcohol and aloe vera gel, both of which I already had at home, so it wouldn't cost me anything to try.

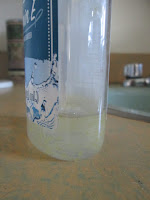
A quick search turned up several recipes online from sources such as Healthline, Wired, Popular Science, and Everyday Health. Most of these called for a ratio of two parts isopropyl alcohol to one part aloe. They also stressed that it was important to use alcohol with a concentration of at least 90 percent in order to achieve a mixture with 60 percent alcohol, which is the level needed to kill the coronavirus. The stuff I had at home was only 70 percent alcohol, but since I was only relying on the stuff to deodorize rather than sanitize, I figured it didn't matter if it was a little weak. So I just measured two tablespoons of alcohol and one tablespoon of aloe vera gel into the nearly-empty container I was already using.

Most of the recipes also called for essential oils, such as tea tree, lavender, or citrus. However, it wasn't clear whether these were supposed to enhance the antibacterial properties of the gel or just make it smell nicer. I didn't have any of these handy, but we did have a lemon in the fridge, and the peel of that is a perfectly good source of nice-smelling essential oil. So Brian helpfully took off just a little bit of the zest for me — maybe a quarter-teaspoon — and I added that to the mix as well and shook it up.

So far, I've only used this DIY deodorant once, but it seems to work about as well as the commercial hand sanitizer did. And I've still got about half a bottle of rubbing alcohol left and most of a bottle of aloe vera gel, so I'm hoping this will be a sufficient supply to continue mixing up my homemade deodorizing gel as needed until the shortage resolves itself.

But if it isn't, I can always revert to one of the other DIY deodorants I tried during my series of experiments: milk of magnesia. This stuff worked reasonably well for me, and it's not one of the things there's been a run on during the pandemic. The only reason I stopped using it the first time around was that I discovered it to have an unwelcome laxative effect. However, since then, I've actually developed a magnesium deficiency and started taking supplements for it daily — so if I find the topically applied magnesium is having the same effect this time around, I can simply cut down on the amount I take orally to compensate. In fact, who knows — using the magnesium topically as a deodorant might just eliminate the need for the supplements entirely, killing two birds with one stone. That's what I'd call an ecofrugal solution.

Sunday, May 24, 2020

Vegan Recipes of the Month: Three spring dishes

In last week's entry, I mentioned that our asparagus was one of the brightest stars in our May garden, and I promised you'd be seeing one of the new asparagus recipes we'd tried recently as our Recipe of the Month for May. But as it turns out, I was wrong. You're getting that recipe plus two more featuring spring crops: another type of asparagus pasta, and a strawberry-arugula salad. All three are vegan, and all three were tasty enough to be worth making again, should we have the opportunity.

Recipe #1: Asparagus, Leek, and Mushroom Pasta
Adapted from Cooking Light

Years ago, my sister-in-law got us a subscription to Cooking Light as a Christmas present, and before it expired, we clipped out and filed a bunch of recipes that we meant to try. Unfortunately, once they were in that overstuffed file, they kind of got lost, and so we never got around to most of them. So, when Brian asked me to look for some new asparagus recipes, I went through the "pasta" section of the accordion file and unearthed one called "Asparagus, Spring Onion, and Mushroom Pasta" from the April 2004 issue.

The recipe suggested using pappardelle, dry white wine, and expensive, exotic mushrooms — "morel, cremini, oyster, or a mixture" — but he went with linguini, cooking sherry, and plain old white button mushrooms, which were what we had. It also called for either spring onions, scallions, or baby leeks; Brian was able to extract only one small leek from our vegetable garden, where it had somehow overwintered successfully from last year, so he scaled down the recipe to roughly half its size for every ingredient except the pasta. This allowed us us to get a full meal out of it with leftovers to spare, and it didn't seem to us like it was short on the veggies.

His adapted version looks like this:
  1. Trim and thinly slice 1 small leek. Cut the ends off 1/2 pound of thin asparagus and slice into two-inch pieces. Cut 1/2 pound of mushrooms into bite-size pieces. Chop 1 1/2 teaspoons parsley.
  2. Heat 1 tablespoon olive oil in a large skillet over medium-high heat, add the mushrooms, and cook while stirring for about 5 minutes.
  3. Add leek and cook another 1-2 minutes, or until softened.
  4. Add asparagus pieces and saute another 2 minutes.
  5. Add 2 tablespoons sherry and simmer until liquid evaporates, about 1-2 minutes.
  6. Add 1/4 cup vegetable broth and bring to a boil.
  7. Add 2 Tbsp. plant-based butter and toss until melted into veggies.
  8. Meanwhile, cook 1/2 pound linguine or fettucini in a large pot of boiling salted water until al dente. Drain.
  9. Add veggies to drained pasta, with 1 1/2 teaspoons chopped parsley. Add salt and pepper to taste.
Early as it is in the gardening season, this adapted recipe contained an impressive three ingredients from our garden: the asparagus, the leek, and the parsley, which he was able to trim from this year's plants. And, although we obviously haven't tried the dish with the fancy ingredients the original recipe called for, we didn't feel our cheaper version lacked at all for flavor. With mushrooms, leek, sherry, and broth, it had plenty of umami, plus the distinct flavor of the asparagus that's unlike any other vegetable. It's definitely worth putting into our rotation for asparagus season in years to come.

However, it will have some competition from this other new asparagus pasta dish:


Recipe #2: Garlic Lemon Asparagus Pasta

Brian cobbled this one together from his recollections of various other pasta dishes he's made over the years that used some combination of asparagus, garlic, and lemon. Some of these had a cream sauce, so he substituted thickened almond milk. Here's what he ended up with:
  1. Zest and squeeze 1 lemon, mince 4 cloves garlic, and break 8-10 ounces of fresh asparagus into 1-inch pieces. Be sure to remove any tough parts from the bottoms of the asparagus stalks.
  2. Cook 1/2 pound of penne or other pasta al dente in 8 cups of water with 1 Tbsp salt. Try to time it to finish at the same time or just after everything else is done.
  3. Thoroughly mix 1 cup unsweetened almond milk (regular might be okay, but avoid the vanilla stuff), 1 tablespoon flour, 1/2 tablespoon nutritional yeast, and 1/4 teaspoon salt. I put everything in a jar, close the top, then shake vigorously. It also helps to sift, sieve, or sprinkle the flour in so that it doesn’t get lumpy. Set aside.
  4. Sauté the garlic in 1 tablespoon olive oil in a skillet over low heat for a few minutes. Try not to let it get brown.
  5. Turn the heat up to medium-high and add the asparagus. Sprinkle the lemon juice on top and sauté until the asparagus is bright green. Should only take about two minutes or so.
  6. Add the almond milk mixture and stir vigorously. It should thicken quickly. Add the lemon zest, stir briefly to combine, and then remove from heat.
  7. When the pasta is cooked and drained, combine it and the asparagus mixture and stir to coat thoroughly. Serve immediately.

As you can see reasonably well from the picture, the resulting pasta had a creamy sauce, and the bright flavor of the lemon complemented the asparagus nicely. We sprinkled it with a little "spaghetti salt," a Parmesan substitute Brian makes by combining a tablespoon of nutritional yeast, half a tablespoon of flour, and a quarter-teaspoon of salt, and grinding it all up together with a mortar and pestle — but it would also be fine with just a touch of ordinary salt and pepper. So this one's another keeper.

Recipe #3: Strawberry and Avocado Salad
From Savory

This one was simply lifted from the April 2020 issue of Savory, the freebie food magazine from Stop&Shop. We made only one significant change to the recipe: it called for 6 cups of arugula, which was more than we could manage to glean at this stage from our just-started spring garden. (Waiting until we had more arugula available wasn't an option because the strawberries we'd picked up at the supermarket wouldn't have lasted that long). So we replaced half the arugula with winter lettuce, which we had a patch of in the garden from last year. All the other ingredients — strawberries, avocado, red onion, scallion, and lemon-mustard-poppy-seed vinaigrette — were just as specified in the recipe.

Of the three new recipes we tried this month, this is probably the one we'd be least likely to make a regular part of our repertoire. It's not that it wasn't tasty; the tangy-sweet strawberries and peppery arugula complemented each other nicely (though it would probably have been better still with all arugula instead of a mixture), and the creamy avocado, crunchy red onion, and tender greens created a nice contrast of textures. It's just that this dish calls for both fresh strawberries and avocado, two fairly expensive produce ingredients we can't grow ourselves. So we're likely to make this one again only if we can find both of those things fairly cheaply at the store at a time when we have plenty of arugula in the garden, or possibly if we're having guests for dinner that we'd like to impress (a situation that isn't likely to come up any time soon, sadly). And if we do make it again, I might be inclined to leave out the poppy seeds in the dressing. They add interesting flavor and crunch, but they also invariably get stuck in your teeth, and to me, the annoyance outweighs the benefits.

So there you have it, folks: not one, not two, but three tasty, vegan recipes that take advantage of the first early produce of the spring garden. Next month, as more of our crops come in, you can probably expect to see recipes or other content featuring such late-spring delicacies as snow peas, lettuce, and basil — and possibly even a few of our new honeyberries, which Brian noticed today were just starting to ripen. (Of course, that meant that he had to get some netting over the bushes in a big hurry before the birds got to them, which was kind of a hassle. In future years, we'll know to do this in early May, so we won't need to rush.)

Tuesday, May 19, 2020

Money Crashers: 10 Nutritious Family Dinners You Can Make for Under $10

For my latest Money Crashers article, the editors asked me to update a piece on inexpensive family dinners. I thought this would be a breeze, since as you know, I have tons of recipes for those — and, indeed, many of the dishes in the article have previously appeared here on the blog, particularly in my post on the One Harvest challenge. But as it turned out, I had to adapt my recipes quite a bit to make them fit Money Crashers' preferred recipe style, which requires everything — the size and weight of ingredients, the size of pans and bowls, the heat level, the amount of time something should be cooked, how it should look when it's done — to be spelled out in as much detail as possible.

So if you choose to make any of these dishes, please know that you have my permission to deviate from these highly precise instructions if necessary. If you want to use a large potato instead of a medium one, or use a pan that isn't the exact size specified in the article, I promise you can do so without ruining the dish. With the exception of the two baking recipes (cornbread and biscuits), these recipes are really much more flexible than the article makes them sound.

10 Nutritious Family Dinners You Can Make for Under $10 – Recipes

Monday, May 18, 2020

Household Hacks: An ecofrugal soap-dish solution

Since the COVID outbreak started, Brian and I (well, mostly Brian) have been washing our hands more regularly and more thoroughly than we used to. As a result, our bar of soap was more or less constantly damp, and left to soak in its own juices in the soap dish, its outer surface rapidly disintegrated into mush. Not only did it look disgusting, a lot of the soap was going to waste, building up as muck on the soap dish rather than actually being used on our hands.

I could have solved this problem by switching to liquid soap, as Millennials have supposedly done, but that approach seemed even more wasteful. Not only does it come in a plastic bottle rather than a simple wrapper, it usually has a non-recyclable pump top that makes it impossible to get all the soap out of the bottle — so we'd end up wasting even more of it. And besides, I knew it was possible to use bar soap without having it all disintegrate in the dish; after all, we'd done it for years before COVID hit. All I had to do was find some way to drain the water off it so it wouldn't stay wet all the time.

Now, there are lots of little soap dish inserts designed for this very purpose, made of everything from silicone to stainless steel. But finding one the right size for our little built-in soap dish posed a difficulty, especially when it isn't possible to go to a store and browse. So I thought about what materials we had available, and I remembered those little mesh tubes that our garlic comes in. Brian always saves these rather than throwing them out, even though the only use we've found for them is improvised cat toys, so he has quite a large collection at this point that isn't being used for anything else. So I simply picked out the three that seemed most snugly rolled up, tucked them into the soap dish, and rested the bar of soap on top of them.

This worked reasonably well. The plastic mesh material allowed the liquid to drain off the soap, so it didn't turn to goop, and it didn't accumulate soap and dirt residue so fast that it quickly became gross-looking itself. Cleaning it once a week, when doing the rest of the bathroom, was sufficient, and reasonably easy to do (just rinse under the tap). The only problem was that the little tubes had a tendency to stick to the soap bar, coming up with it whenever we lifted it to wash with. But I mitigated this problem by stitching the three tubes together, using just a few stitches at each intersection point, with waterproof dental floss rather than thread.

This simple DIY solution seems to work as well as anything we could have bought in a store, it fits our odd-sized soap dish, and it didn't cost us a cent. And, since it used up something that would otherwise just have gone to waste, it's the perfect example of ecofrugality.

Sunday, May 17, 2020

Gardening hits and misses

As I've observed before, sometimes our ecofrugal life seems like a series of little ups and downs. For each thing that goes unexpectedly wrong due to some combination of bad luck and bad planning, another goes unexpectedly right. So, instead of sharing one big story this week, I decided to talk about a bunch of these little hits and misses — the warp and weft of the ecofrugal life. And, as luck would have it, all of them involve plants.

Miss: A vegetable do-over

We'll start with our biggest miss this week. Remember all those seedlings we put in last weekend? Well, for some reason that we still aren't quite sure of, they didn't fare well at all. Brian had done his best to harden them off (expose them to outdoor light and temperature) over the week or so before planting them, but once they were actually in the ground, their leaves started to turn pale and dry — a sure sign of sunscald. Our seedlings have experienced a touch of this in past years, but never to such a degree. Brian could only guess that the problem was that the weather before planting was mostly cloudy, while the week after was particularly sunny. On top of this, we had a couple of unseasonably cold nights (though no actual frost) that probably didn't do our tender pepper plants any good.

Fortunately, Brian always starts twice as many seeds of each type as we actually need so that we'll have backup plants for situations like this. So we spent a big chunk of yesterday morning replacing all the pepper plants, as well as one of the new Opalka tomatoes, with their backups. The other plants, though not as healthy as usual, looked stronger than the seedlings that had been confined to little tubes all week, so we left them in place. Brian added little cages of chicken wire over the new peppers to protect them from critters (since one of the four lost plants had been bitten off rather than merely wilted) and to filter the sunlight that reaches them until they're a little bigger.

Meanwhile, Brian is holding on to all the remaining extra seedlings, rather than giving them away as we usually do (which would be a challenge anyway on account of social distancing). That way, if the new Opalka tomato doesn't make it either, we can still replace it with a different variety. He's dug out a new bed for them all next to the house, which he's calling "the burn ward."

Hit: Potato plants 

However, there's one crop in the garden that's looking incredibly robust: our new potato plants. The buckets are now full to the very top, with a layer of mulch on top of the dirt, and the plants are spilling out in a burst of exuberantly green foliage. I don't know whether the health of the plants is any indicator of how many actual potatoes we can hope to get off them, but it's quite encouraging to look at.

Hit: Asparagus

Another crop that's producing well is the asparagus. After a late start, it's now producing in abundance. We've already eaten about a pound and a half of it, and we've harvested this much more just in the past week. We've had so many meals featuring asparagus that Brian actually asked me if I could find some new asparagus recipes, since we were already getting a little tired of the ones we had. So I obligingly dug out an asparagus and mushroom pasta recipe that had been sitting for years in our recipe file, which you'll most likely be seeing later as our Recipe of the Month for May.

Miss: An ill-fated plant

In order to start the seeds for my new flower bed this year, we had to clear a larger space for seedlings than usual in our south-facing guest room window. Thus, the houseplant that normally lives there, a cat-friendly aluminum plant, had to be moved to a downstairs window for the duration. I was sorry to displace it, because the plant itself was so handsome and healthy-looking, and it was also in a really neat-looking pot from Ten Thousand Villages: vaguely dodecahedral in shape and made of unglazed terra cotta.

But well before the seedlings were ready to plant, it became clear that neither the plant nor its pot was doing at all well in its new home. Not only was its foliage drooping, no matter how much water it got, but the outer surface of the clay pot was starting to come off in big flakes. Once we had room for it again, I brought the pot back upstairs, but the plant's condition didn't seem to improve. Large clumps of it were simply dead, and when I tried to remove those clumps, pieces of the little healthy foliage remaining came off with them. Plus, the pot was still a mess, and we feared that eventually it would fall apart altogether.

So, yesterday while on a walk, I popped into the Rite Aid and picked up a new pot for the aluminum plant (marked down to $5, as spring is nearly over). But when Brian tried to transfer what was left of the plant to the new pot, he got a nasty shock: None of the healthy-looking foliage that was left on the plant was actually connected to the soil at all. No wonder it wasn't looking well.

We pulled off what pieces of the plant we could salvage and put them in water to see if we can get any of them to take root, but we aren't pinning our hopes on it. The good news is that, after a little bit of work, Brian was able to remove most of the damaged parts of the clay pot and found that the structure of it was still intact — so, for the time being, he's planted two leftover Johnny Jump-Up seedlings from our flowerbed in it. Sources list these as only "mildly toxic" to cats, and our cats have never been in the habit of nibbling on the aluminum plant when we had it in the guest room, so we're hoping if we put the violas in the same place, they and the cats will be able to coexist.

Hit: Rose is arose

Although we're currently down one houseplant, we're certainly not lacking for fresh flowers. Our rosebush, after weeks of teasing us with buds that looked almost ready to bloom, has finally burst into full, riotous blossom. Just look at these beauties! We've got one in our cat-safe vase now, and if these keeps up, we may soon be harvesting whole bunches of them to display in all our rooms.

Our aluminum plant may not survive, and perhaps this year's tomato crop won't be everything we'd hoped for. But between this abundance of beautiful blooms and the ten pounds of flour we were fortunate enough to find at the supermarket yesterday (despite shortages), we'll have both bread and roses — everything you really need for a fulfilling ecofrugal life.

Tuesday, May 12, 2020

Money Crashers: 2 articles on financial advisors, and 1 update

Two new articles of mine have just popped up on Money Crashers, and one older piece has been updated. The two new pieces both deal with financial advisors, and they approach the advisor-client relationship from two ends: starting and ending. The first piece, 14 Questions You Should Ask a Financial Advisor Before Hiring, talks about how to find a financial advisor who's right for you by knowing what questions to ask at the job interview. And the second, 5 Signs It’s Time to Fire Your Financial Advisor, talks about how to know when your financial advisor isn't meeting your needs and it's time to find someone else.

The third piece is an update of my article on price matching policies from 2016. One of the seven chains covered in that original piece (Toys 'R' Us) is no longer around, and the other six (Walmart, Target, Best Buy, Home Depot, Lowe's, and Staples) have all made significant adjustments to their policies. So with this freshly updated piece, you can get all the details you need before you decide where to shop.
6 Retail Stores That Offer Price Match Guarantees & Adjustment Policies

Sunday, May 10, 2020

Inch by inch, square by square

Today isn't an official Gardeners' Holiday, but it's one of the biggest days in our gardening calendar. It's the last frost date — the day after which there's deemed to be no significant danger of frost in our climate zone. And that means it's also the day the majority of our crops can go into the garden.

So Brian and I spent the better part of this morning transplanting the remaining seedlings that had been started indoors (four varieties of tomatoes, three varieties of peppers, and our Vanilla marigolds) and also starting new crops from seed (two kinds of basil, two kinds of cucumbers, two kinds of green beans, just one variety of butternut squash, and some dill). Plus one new square of lettuce. Plus the zucchinis, which were supposed to go in a week ago but got overlooked because they were way down at the bottom of the list. Our garden went from less than 13 percent planted to 99 percent planted, with only one square of summer lettuce left to go in next week.

Here's a shot of the garden as we left it, fully planted and freshly watered. Of course, you can't see the crops that are currently just seeds in the ground, but you can see patches of green where the new seedlings went in, and where our arugula, lettuce, scallions, and leeks are already growing. I was a little concerned about the fact that some of the tomato and pepper seedlings looked so weak and floppy, but Brian reminded me that we've had some in the past that were even punier than these and still went on to be healthy, productive plants. We'll just have to wait and see.

Speaking of productive plants, one crop that's already growing at an incredible rate is the new potato plants in their buckets at the corners of the garden. Since we started them, Brian has been topping up the buckets with compost to keep the stems buried, since you want as much stem underground as possible to encourage tuber growth. Pretty much every time he went out in the garden for anything, the plants had made their way to the top of the buckets and needed another helping of compost, and now, less than a month after we started them, they've reached just about to the top. So it won't be long before they outgrow the buckets, and then we'll need to figure out which direction to train the actual potato vines in — out through the garden fence so that we won't step on them, or into the garden area to protect them from hungry groundhogs. We've never done this before, so we have no idea which is better. Maybe we'll do two plants inside and two outside to see what works.

While working out in the garden, I noticed one other plant that looked like it was gearing up to produce something: our hardy kiwi vines. It's been six years since we planted these, and this year, for the first time, they've developed buds that suggest they're ready to flower. However, Brian urged me not to get too excited: after examining both plants, he'd determined that the flower buds were only on the female kiwi plant (Anna), not on the male (Meader). And since it takes two to do the pollination tango, that means we won't be getting any actual kiwis this year.

This isn't too surprising, since Burpee says, "Male plants need to be older than the females to perform their function" (i.e., girls grow up faster than boys do). But since the site also claims the vines normally take only one to three years to begin producing fruit, and we've had these for six years, it is a bit of a disappointment. But still, between our potato plants and the honeyberry bushes that are showing their first fruits, we won't lack for new flavors from the garden to enjoy.

Friday, May 8, 2020

Money Crashers: 13 Best Educational Tools & Apps to Teach Kids About Managing Money

Here's another new Money Crashers post. It was originally conceived as just an update to an older article on websites for teaching kids about money, expanded to cover money-management apps as well. But now, with so many kids studying at home, I guess it can also double as useful information for parents looking for more things their kids can learn about online.

The piece covers 13 tools for teaching kids about money. The first six are websites and apps that teach about general money skills — from counting coins to starting a business. There are tools here for kids of all ages, from pre-literate preschoolers to teens. The last seven are apps for helping kids manage their own money — the modern equivalent of the old-fashioned piggy bank. These apps can perform a variety of tasks, from tracking chores and allowance payments to budgeting. Some are linked to a parent's bank account, so the kids are still dependent on Mom or Dad for access to their own money; others give the kids access to their own money via prepaid cards they can use in stores or online. One even lets them invest their money in stocks — yes, real ones — with a parent's approval.

Check them out here: 13 Best Educational Tools & Apps to Teach Kids About Managing Money

Tuesday, May 5, 2020

Money Crashers: How Much Does a Divorce Cost? – Types & Ways to Save

Here's a new Money Crashers post on a topic that has, sadly, been deemed COVID-adjacent: divorce. According to the New York Post, attorneys in New York City — the epicenter of the COVID outbreak in America – are being "flooded" with calls from couples who have decided, after weeks of being cooped up together 24/7, that they just can't stand each other anymore. And ABC says divorce attorneys anticipate a similar surge nationwide.

Getting a divorce may or may not be the right choice for all these couples, but they've already made one expensive mistake: hiring a lawyer to handle it. According to a 2019 Nolo survey, people who used lawyers to handle their divorces in 2019 paid an average of $13,000, or a median of $7,500. That's a significant sum to lose at a time when you’re preparing to split your assets in half and take on the expense of living on your own again — particularly in the middle of a recession.

Fortunately, there are cheaper alternatives. The key to saving money on a divorce is to use lawyers as little as possible, and in particular, to keep it out of court if you can. If you and your partner agree on all the major issues, you can potentially save thousands with an uncontested divorce (average cost $4,100) or a DIY divorce (possibly as little as $500). If you still have some issues to work through, hiring a mediator (average cost $970) can cost much less than battling it out with lawyers (average cost $11,300). And if you absolutely need a lawyer, you can save by paying them only for the jobs that really require legal expertise and not for routine tasks like phone and email correspondence (average cost $4,600).

Here's hoping that none of you readers need information about divorce any time soon. But if you do, here's hoping for the next best thing: a quick, easy, and relatively inexpensive route to a fresh start.

How Much Does a Divorce Cost? – Types & Ways to Save

Saturday, May 2, 2020

Gardeners' Holidays 2020: Flower Planting

Yesterday was the first May Day in 22 years that I haven't spent dancing up the sun with my Morris team. There was one year we had to do it inside due to thunderstorms, but it took a global pandemic to keep us from dancing together at all. However, we came up with the best substitute we could, holding a Zoom meeting at dawn so we could dance for each other in our own homes and even assembling a May Day video to share with all the folks who couldn't be there to see us perform.

Luckily, there's still one spring holiday that the pandemic couldn't stop: the start-of-spring Gardeners' Holiday. In the past, this has usually been a celebration of asparagus or rhubarb, the two crops that are actually ready to harvest this early. And we did indeed pick some of each yesterday: about four ounces of rhubarb, which went into a crisp last night, and six ounces of asparagus, which we're enjoying tonight roasted with potatoes, eggs, pine nuts, and rosemary.

On top of that, there's one new crop that hasn't come in yet, but is showing signs that it will soon. Our new honeyberry bushes, which we spent this Gardeners' Holiday a year ago prepping the ground for, flowered this spring, and when I went out this morning to hang laundry, I discovered that they actually had tiny green berries on them. So, if all goes well — meaning, mostly, if we're able to keep the birds from getting them all through strategic use of netting — we might actually be able to enjoy our newest fruit crop as early as next month.

But the real star of this year's Gardeners' Holiday wasn't a food crop at all. After years of unsuccessful attempts to cultivate a flowerbed in the front yard — first with a mixture of annual and perennial wildflower seeds, then with perennials only — I finally decided that the only way we were ever going to get a satisfactory mix of flowers in that spot was to pick just a few specific plants that were well adapted to clay soil, plant them in specific spots, and mulch everywhere else. We selected six plants, started four of them at home from seed, and ordered the others from Wit's End Gardens. After some weather-related delays, they arrived on Thursday, very neatly packed and healthy-looking, and so we spent most of today getting them into the ground.

This process involved several stages. First, we pulled out all the existing plants in the area we'd designated for the flowerbed. Brian dug up a few that he's hoping to save — a couple of purple coneflowers that, sadly, weren't in the places where we needed them, and one Siberian wallflower — and set them aside to replant in a little patch in front of our shed. We yanked the rest, then went over the plot with a hoe, and finally dug the entire thing to a depth of a few inches just to make sure we got everything.

After smoothing out the dug-up dirt (with me using a small rake, and Brian just pushing it around with his hands), we took all the plants we had in pots and "dry fitted" them into the spots where we wanted to go. I had already made up a sketch of where I wanted them based on their likely height and spread; however, once we'd roughly placed the pots according to this plan, I had to go over the whole bed with a ruler, carefully measuring and adjusting their placement to make sure they all had as much room as they needed. Eventually we got them all into their designated spots, and we were ready to dig.

Trowels in hand, and treading carefully to avoid stepping on any of the plants, we dug holes for each plant one at a time. For this stage, we relied on the guidance of Liz Ball's Philadelphia Garden Book as to how deep and wide to dig each hole and what to add to it. The sedum and yarrow plants got some sand and gravel mixed in with the dirt to improve drainage, along with a helping of rotted cow manure for fertilizer; the others got just the manure. We watered each plant after placing it and, once we had them all in, covered the whole thing with an even layer of the mulch we bought in March. The tallest plants (purple coneflower and sedum) are in the back, the coreopsis and yarrow in the middle row, and the Lenten rose (hellebore) and little Johnny-jump-ups (violas) in the front.

The project wasn't quite complete at this point, because we still needed some sort of border to demarcate the edges of the flower bed. This would serve a couple of purposes; it would let us know for sure at what point encroaching plants could be considered weeds, and it would keep Brian from straying too close to the flowers with the mower or string trimmer. He originally planned to put up a simple row of stakes connected with twine, but I thought of a better idea. Years ago, when we first dug up the bed where our raspberry canes are now, we found buried against the side of the house a whole bunch of old phone line insulators — mostly clear or blue glass, plus a couple of ceramic ones. We had no idea then, and have none now, what they were doing in there, but they were kind of cool-looking, so we saved them and used them for various projects around the garden. First, we used them to mark off the locations of our newly planted cherry bushes; later, when those were big enough that we no longer considered them at risk, we moved some of them to mark the bases of our hardy kiwi vines. And since those are now big enough to fend for themselves as well, I collected the lot and deployed them around the edges of the new flowerbed, spaced about a foot apart. To make it look nice, I alternated blue and clear ones in the front, then used the remaining clear ones around the side. They're not a true barrier, but they should serve the purpose of reminding us where the flowerbed stops and the weed free-for-all starts.

Now, I guess, all we have to do is keep them well watered, yank out any weeds that make it through the mulch, and hope they eventually grow up into a more presentable flowerbed than we were able to get with the wildflower seeds. I'm mostly concerned about the sedum and hellebore plants, the ones we had to special order; if any of the others don't make it, we can always try growing new ones from seed. So as long as those four purchased plants and at least a few of the others survive and produce blooms, I'll consider this project a success.

Friday, May 1, 2020

Money Crashers: 5 Ways to Reuse Items to Save Money and Reduce Waste

Here's another Money Crashers piece on an environmental topic. This one didn't get published in time for Earth Day (or even Earth Week), but you could say it is sort of COVID-adjacent; according to the New York Times and Vox, the one-two punch of a pandemic coupled with a recession is encouraging lots of people to adopt new frugal habits that the green set has already been following for years. (Until I read the Vox piece, I literally did not know there were people who just threw out the ends of a loaf of bread rather than eating them.)

According to these articles, people reluctant to spend money and/or leave the house are becoming increasingly inclined to make the most of the stuff they have. They're rinsing and reusing bottles, Ziploc bags, and aluminum foil. They're putting the cut ends of scallions in water to regrow them (a trick I myself only learned a few years ago) and starting vegetable gardens.

So I guess this is the right cultural moment for this piece: 5 Ways to Reuse Items to Save Money and Reduce Waste. In it, I explore the five ways you can save money through reuse:
  1. Replacing disposable items (e.g., water bottles or napkins) with reusable ones
  2. Repairing damaged ones, from torn clothing to old cars, rather than replacing them
  3. Shopping secondhand and/or swapping through sites like Freecycle
  4. Taking part in the sharing economy, which lets you share anything from books to bikes
  5. My personal favorite, creative reuse: putting waste materials to new uses, like blue-jean aprons and canning jar lamps
The articles in Vox and the New York Times aren't overly optimistic that these new frugal microtrends — the "novel frugality," as Vox calls it — will last long after the pandemic is over. But personally, I'd like to hope that maybe they can be not just a temporary blip, but the beginning of a long-term shift in behavior. After all, when this crisis is over, we'll still be facing an even bigger threat from global warming, and the more of these earth-friendly frugal habits we can hold onto, the better our chances are of surviving it.