Showing posts with label household hacks. Show all posts

Sunday, July 21, 2024

Make or buy: personal care products

I'm always pleased when I can figure out how to replace one of the products in my personal care routine with a homemade alternative. It's not just that these homemade products cost less than store-bought alternatives; they're also more sustainable. Since I decide what goes into them, I can make them with nontoxic, low-impact, cruelty-free ingredients, and they produce no packaging waste whatsoever. As an added perk, I know they can never be discontinued—something that invariably seems to happen to any commercial product I get really attached to.

But much as I like to make my own products, I don't do it for everything. It's possible to find recipes online for almost any kind of product (with one exception that I'll get into later), but some of them are so much hassle that I can't imagine the savings would be worth it. Others aren't that hard to make, but they just don't work very well. And a few DIY recipes call for ingredients so costly or hard to find that once you add up all the costs, including shipping, it's actually more expensive to make a product than to buy it.

I've written several blog entries over the years about my successes and failures with homemade personal care products, but I've never gathered them all together into one place. So, for this entry, I thought I'd offer a complete rundown of which products I do and don't make for myself, and why. And since Brian and I share a lot of the same products, I figured I might as well cover his choices as well.

So, starting with the basics:

Soap: Buy

For showering and washing hands, we use Trader Joe's honey-oatmeal bar soap. It costs $1.99 for two four-ounce bars, and the packaging is minimal: just a thin plastic wrapper. And while it does contain some palm oil, I've discovered that this ingredient isn't actually so harmful as it's made out to be. The reason it's used in so many products is that oil palms are a lot more productive than other oilseed crops; if we replaced all the palm oil we use with alternatives like coconut or soy, we'd need a lot more land to grow those crops, possibly resulting in even more deforestation. So making my own soap from a recipe like this one, which calls for a mixture of olive and coconut oil, wouldn't necessarily be greener. 

What it would definitely be is a lot more work. Not only would it involve working with lye, which is highly hazardous stuff, it would also require a bunch of special equipment—including molds, a soap cutter, a candy thermometer, an immersion blender, and a set of spatulas—all devoted exclusively to soap-making use and never used for foods, because lye. And how much could it possibly save me? According to this soap-making site, the ingredients alone come to roughly $1.22 per bar, which is more than we're paying now for the TJ's stuff. The only possible advantage would be to avoid a couple of grams of plastic waste, and when you weigh that against all the stuff I'd have to buy, I find it hard to believe it would be a more sustainable choice.
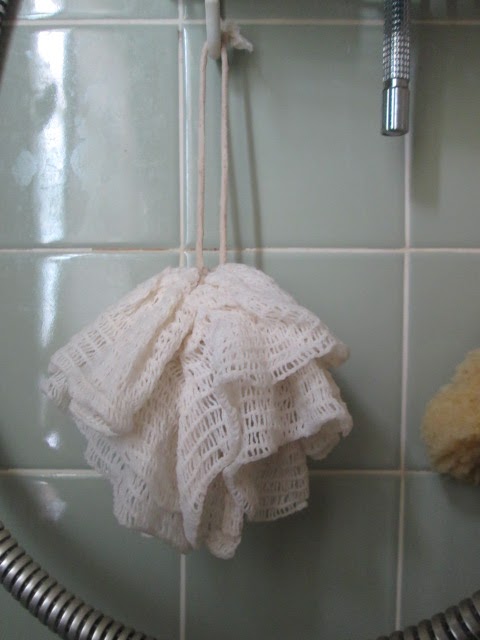
Face wash: Make

Unlike soap, face wash is incredibly easy to make from scratch. In fact, I just whipped up a batch and the entire process, from getting out all the ingredients to cleaning up and putting everything away, took 8 minutes—less time than it would take to go to the store and buy some. My recipe calls for only three ingredients, all of them easy to find in stores: aloe vera gel, honey, and olive oil. A half-cup batch of it costs me about $1.50 and lasts at least a month. And it leaves my skin smoother and softer than any commercial face wash I've ever tried. Making my own is an absolute no-brainer.

Moisturizer: Buy and make

During the day, I use a moisturizer that contains sunscreen. The way I see it, if I didn't do this I'd just have to buy a separate facial sunscreen anyway, and this way is less work and less irritating to my skin. I also don't consider either sunscreen or SPF moisturizer to be something I can reasonably make myself. Although there are recipes for homemade sunscreen online, experts generally say you shouldn't trust them. So I just use e.l.f. Holy Hydration SPF 30, which I can buy at the local drugstore. It costs around $13 for a little pot that lasts me a couple of months, and it works well for my often finicky skin. I just have to keep my fingers crossed that they'll never discontinue it.

At night, however, sun protection isn't a concern. I've tried various night creams containing different ingredients, including some that claimed to miraculously halt the signs of aging (spoiler alert: they don't). As far as I can tell, none of them works any better than straight aloe vera gel, which costs me around $5 for a 16-ounce bottle at Target. So that's what I use now, on top of my rosacea meds. It's not a miracle cream, but it does keep my skin moist, which is all you can really expect a moisturizer to do.

Shampoo: Buy

I don't generally use shampoo on my dry, curly hair, but Brian uses it on his long, flowing mane. He recently traded in his store-brand shampoo from Target, which cost around 4 cents per washing, for a low-waste bar shampoo from Trader Joe's that's even cheaper: about 3.5 cents per washing. There's no bottle to throw away, only a cute little cardboard box that can be reused. And it's much easier to use up every drop than it is with the liquid shampoo: he simply presses the last flimsy sliver of the old shampoo bar against the new one, the same way we do with our bar soap.

Now, it's theoretically possible that we could find a homemade shampoo that would cost even less and produce even less waste than this bar shampoo. Unlike me, Brian has never tried (and failed) to wash his hair with plain baking soda. But since he already has a shampoo that's quite cheap, produces little waste, and agrees with his hair and his scalp, I don't see replacing it as a high priority.

[Edit, 12/14/24: Sadly, the last time we tried to buy a shampoo bar at Trader Joe's, it was no longer available. A friend who works there confirmed that it was not just sold out but fully discontinued. Fortunately, we were able to find another brand, Love Beauty and Planet, that's costs $4.99 at Target for a four-ounce bar. That's a little less convenient and a little more expensive, but it's still only about 4.4 cents per washing, only about 10 percent more than the store-brand shampoo he used to use. That's a small enough price difference that we're willing to pay it for the sake of discarding fewer plastic bottles. However, Brian hasn't actually tried the new bar yet because he's still finishing up his last bar of the Trader Joe's stuff, so we don't know how well it will work for him.]

Conditioner: Buy

Although I don't use shampoo, I use quite a lot of conditioner. In fact, it's pretty much my only styling product. After showering, I let my hair dry until it's just damp, then comb in some conditioner with my fingers. A quick finger-fluff, and I'm good for the day. 

Since conditioner is such a major part of my beauty routine, I'd love to be able to make my own. Over the years I have attempted several different recipes, from extremely simple (apple cider vinegar, pure olive oil, canned coconut milk) to more complex concoctions (coconut oil with shea butter and honey, coconut oil with distilled water and guar gum). But sadly, none of them gave me good results for more than one day. 

So, for now, I'm sticking with Suave Almond and Shea Butter, which costs about $5.50 for a 28-ounce bottle. I've never timed how long this bottle lasts me, but it's at least a couple of months, which means it costs around 9 cents per use at most. As far as I'm concerned, it's not worth trying any more DIY recipes unless they can meet or beat that price.

Hair tonic: Make

Conditioner isn't the only product I use on my hair. As menopause descended upon me, I noticed my hair was growing decidedly thinner, and I considered shelling out for a product with Rogaine. But given that it costs around $55 for a 3-month supply and you have to keep using it forever, I wasn't sure it was worth it. Instead, I decided to try another treatment I'd read about online: rosemary essential oil. At least one study suggested it worked just as well as Rogaine and caused less scalp irritation. And at just $8 for a 10-mL bottle, it would certainly cost less to try.

Unfortunately, the articles I found online about rosemary oil were a little bit vague about how to use it. They said to dilute it with a carrier oil and rub it into the scalp a few times a week, but they didn't specify how strong to make the solution and they disagreed on how long to leave it on. (The Cleveland Clinic suggests applying it at night and washing it out in the morning, while Elle says leaving it on that long can cause irritation.) So, taking a wild guess, I mixed ten drops of rosemary oil into two tablespoons of coconut oil and started applying that every evening at bedtime.

I've been doing this for about six months, and it does appear to be working. There's less of my scalp visible and more short hairs growing in on the top and at the temples. And I still have most of that initial $8 bottle left. On the down side, it does seem to be causing a bit of scalp irritation, so I've backed off from using it every night to every two or three nights. That means my $8 investment will last me even longer, making it decidedly a better value than Rogaine.

Toothpaste: Buy

Toothpaste, even more than sunscreen, is not really possible to make at home. Sun-blocking ingredients such as zinc oxide are at least possible to buy over the counter, even if they're hard to distribute perfectly throughout a homemade mixture. But cavity-fighting ingredients such as fluoride are not. Thus, although there are recipes for homemade toothpaste online, I would never consider using one. 

We've been relying for years on Trader Joe's toothpaste, which is one of very few brands that (a) is cruelty-free, (b) contains fluoride, and (c) does not contain sodium lauryl sulfate (SLS), which tends to give Brian canker sores. And, until recently, it was also available at any Trader Joe's store for a very affordable price: just $3 for a 6-ounce tube. 

But about a month ago, we went looking for a new tube of toothpaste at Trader Joe's and couldn't find any. We thought it was just temporarily out of stock, but a friend of ours who works there said that the store has actually had problems with its supplier and needs to find a new one. Unless it finds one before our current tube of toothpaste runs out, we will have to find a different brand. 

We have a couple of sample-size tubes of SLS-free Sensodyne that we got from our dentist, and we can use those as a stopgap measure, but I don't want to buy it because it's not cruelty-free. So we might end up having to switch to a pricey, hard-to-find brand that has to be specially ordered. Needless to say, I am not happy about this, but I'm not unhappy enough to risk my teeth on a homemade toothpaste.

Deodorant: Make and buy

I've always found it frustrating to buy deodorant. It's very difficult to find a brand that's cruelty-free and actually works. And even the few brands that meet these criteria come in plastic tubes that can't be recycled and that inevitably make it impossible to use up every bit of the product.

I've tried many homemade deodorants over the years, most of which either didn't work (baking soda, vinegar, rubbing alcohol, hydrogen peroxide) or had unfortunate side effects (milk of magnesia). Eventually I figured that I could get pretty decent results with alcohol-based hand sanitizer. During the pandemic, when hand sanitizer became incredibly difficult to find in stores, I learned to make a homemade version from rubbing alcohol and my trusty, multipurpose aloe vera gel. But even that wasn't a truly waste-free solution. 

So, earlier this year, I switched to a simple DIY deodorant made from baking soda, cornstarch, and coconut oil. It works about as well as the hand sanitizer, costs even less, and produces no waste at all. Its only fault is a tendency to separate a bit, but I can easily remedy that by stirring it up with a toothpick before applying it.

Brian has also had problems over the years with commercial deodorant. He dislikes most of the scents that it comes in and finds them irritating to his skin. For a while he tried just going without it altogether, but that proved not to be satisfactory on days when he was riding his bike to work. So for now, he just switches off between the two brands he can find that come in a fragrance-free version (Speed Stick and Arm & Hammer), stocking up on them whenever he can find a good price. 

However, I've suggested that he should also give my new baking-soda mixture a try. If it works for him as well as it does for me, maybe he can also strike this commercial product from his shopping list. Watch this space for updates.

[UPDATE, 9/30/24: Brian has found that the new baking-soda deodorant does indeed work reasonably well for him. He has now finished up the last of his commercial deodorant, and we won't be needing to buy any more.]

Perfume: Make

For most of my life, I wasn't in the habit of wearing perfume regularly. I'd tried a few different brands over the years, but I never found one that really felt like my own signature scent. But early in the pandemic, feeling in need of a mood booster, I decided to try experimenting with creating my own. I sent away for a few bottles of essential oil and a little roller bottle and experimented until I found a ratio I liked: 20 drops of sandalwood, 10 of vanilla, and 5 of cinnamon, then fill the bottle up with carrier oil. (At first, not knowing if I would like the results, I used plain canola oil out of the pantry, but eventually I invested $4 in a little bottle of sweet almond oil from the drugstore.) 

I paid $4 each for the essential oils, and the supplier threw in an extra bottle of the sandalwood for free, so that initial supply has lasted me through the entire four years since. So, all told, I've paid $16 for four years' worth of perfume—a price I doubt any commercial fragrance could beat. And it's a signature scent that is truly my own.

Cosmetics: Buy

There are only two cosmetics I use at all regularly: concealer to hide any stray pimples and white nail pencil under my fingernails. I use the pencil not so much to whiten the space under nails as to create a barrier there so dirt doesn't accumulate. Otherwise, my fingernails always seem to get dirty by the end of the day, even if I haven't touched dirt anywhere.

I'd be happy to make either of these products from scratch—particularly the nail pencil, which is increasingly difficult to find in stores—but I've never found a good recipe for either one. Recipes for DIY concealer always call for too many hard-to-find ingredients, like "non-nano titanium dioxide" and "zeolite ultrafine clay," and I've never found any recipe at all for the nail pencil. When I search for "homemade nail pencil," I find lists of tips on ways to whiten my nails with baking soda or lemon juice, which isn't what I'm trying to do. And when I search for "how to keep dirt out from under nails," I find tips on how to clean the dirt out after it accumulates, which isn't what I want either. I've experimented with substitutes like white crayon, which isn't exactly homemade but would at least be easier to find in stores, but it doesn't seem to work. 

Fortunately, neither of these store-bought products is all that pricey. I think I paid $4 for my last tube of Wet N Wild concealer, which has lasted me quite a while, and $10 for a set of three nail pencils. So my beauty routine isn't exactly breaking the bank.

Conductive gel: Make

My one major concession to vanity over the past couple of years was shelling out $150 for a mini microcurrent device. Every evening, I spend just a couple of minutes running this little gadget over my neck and jawline in the hope that it will help me keep my over-50 skin firmer. Does it work? Hard to say for sure, but at least my skin doesn't seem to be getting any saggier since I started using it, and that's enough for me to keep at it. 

However, I would not be willing to stick with this routine if I had to shell out $59 an ounce for the fancy "conductive serum" that the manufacturer recommends. Before buying the device, I searched online to see if there were cheaper alternatives, and many people said all you really needed was plain aloe vera gel with a pinch of table salt. That's what I currently (har!) use, and I can't detect any difference between it and the (tiny) sample of pricey serum that came with the device.


And that's it for my personal care routine (and Brian's). It's not as complicated, and certainly not as expensive, as many people's, but I'm still happy to learn about ways I could make it even simpler and cheaper. So if you happen to know of any fabulous DIY recipes for the few products I'm currently buying, please share them in the comments.

Sunday, July 24, 2022

Household hacks: How we're keeping cool(er)

I've lived in New Jersey pretty much all my life, and so I'm used to hot, humid summers. Daytime temperatures over 90 degrees F are so common that they're not even worthy of comment, and there have always been summer heat waves when it gets into the upper 90s for a few days at a time. But nothing in all my years of New Jersey summers prepared me for the kind of heat we've been having this past week. 

Most of the state has been under a heat advisory for the last seven days, with the daytime heat index reaching 100 to 105 degrees. It's not too bad in the evening and early morning, but between 10am and 8pm, the outdoors is pretty much unbearable. Brian has been unable to ride his bike to work all week for fear that he'd just keel over from the heat on his ride home. And it's going to get worse before it gets better; tonight, it's unlikely to drop below 80 degrees all night long.

Most New Jerseyans, I imagine, are dealing with this by staying in their air-conditioned homes, cars, and workplaces for most of the day. But our house only has A/C in two rooms: a built-in wall unit in the living room and a window unit in the office. They can't do a thing to help us with cooking or eating in the kitchen or sleeping in the bedroom. And even in the rooms where we have A/C available, we prefer not to deploy it unless it's a true emergency, which I define as over 90 degrees indoors during the day or 85 at night. As we've learned from past experience, running the A/C all day is hugely expensive; one summer when we had guests staying with us for just one week and put an air conditioner in their room to keep them comfortable, our electric bill for the month more than doubled. And of course, for those who aren't getting their electricity from clean energy sources like we do, using more power also contributes to climate change, which means heat waves like this will only get more frequent and more severe in the future.

So, just as we do to stay warm in the winter, we're relying on a variety of household hacks to keep us at least tolerably cool until the heat wave breaks. Here's a roundup of our best cooling tips:

Summer Strategy #1: Use windows selectively

As soon as it cools down in the evening, we open windows throughout the house to to let in the cooler air. In the morning, as soon as the outdoor temperature gets higher than the indoor temperature, we close them all down to a crack. (We leave just a little gap for ventilation, because otherwise the house gets too stuffy.) We also lower the shades to block out solar radiation. During this latest heat wave, we've taken it a step further and started keeping the door to our guest room closed, since that room has south- and east-facing windows with blinds that don't fully block out the sun.

Summer Strategy #2: Use fans everywhere

We have an Eco Breeze fan in our office that I received as part of my payment for writing some ad copy for the company. It has a built-in thermostat that automatically switches it on as soon as the outdoor air gets cooler than the indoor air, and back off when the indoor air gets down to a preset temperature (or when the outdoor air heats up again). It also has the advantage that, unlike other window fans, it can run even in rainy weather. It's basically like a window A/C unit with all the cooling parts taken out. I probably would never have bought one if it hadn't been given to me, but now I consider it indispensable. The only reason I haven't bought more of them is that, like a window A/C, it permanently occupies a window all summer long.

For the rest of the house, we rely on lower-tech cooling. At night, we keep a window fan running in our bedroom's one window. When Brian gets up in the early morning, he usually shuts off the fan and closes the curtains to keep the room dark, but during this heat wave he's been compromising by turning off only one of its twin fans and closing just one curtain. He also sets up our huge exhaust fan in a kitchen window to vent hot air out of the house, replacing it with cooler air that flows in through the windows.

Once the outdoor air gets warmer than the indoors (which has been happening pretty early this week), we stow all the window fans and spend the rest of the day relying on stationary fans. We keep the ceiling fan in the kitchen running whenever we're in there, and in every other room, we have desk fans pointed at us wherever we happen to be. There's a little one that sits on my desk, one in the living room next to the couch (which Brian moves to his desk if he's working from home), and one in our bedroom that we keep pointed at the bed to keep air moving directly over us as we sleep.

Summer Strategy #3: Sip cold drinks

In weather like this, it's important to stay hydrated, so we both chug plenty of cold water all day long. You may have heard that hot drinks are actually more cooling, but that's only because they stimulate sweating; in New Jersey's humid climate, where the sweat never evaporates properly, they're counterproductive.

Summer Strategy #4: Minimize stove and oven use

In the wintertime, we use the oven as much as possible to keep the kitchen warm. In summer, quite the other way, we try to keep oven use and even stove use to a minimum. We rely on a combination of cooking on the grill (if it's not too broiling hot to be outdoors), using the pressure cooker to minimize stovetop time, quick-cooking dishes such as pasta, and cold salads that require no cooking at all. And if we absolutely have to bake something (such as our traditional anniversary cake), we do it either at night or early in the morning, with the exhaust fan running continuously to vent out the heat.

Summer Strategy #5: Chill out in the basement

Even with a fan pointed directly at us, there have been nights this week when our living room futon felt uncomfortably warm. The soft surface traps body heat, so it feels a bit like sitting in a hot bath. So, a few times this week, we have abandoned the living room and retreated to the basement, where it's as much as 10 degrees cooler, to play games or watch TV on Brian's laptop.

Summer Strategy #6: Apply ice

Another way I try to mitigate the heat when lying in bed or sitting on the couch is to grab a gel ice pack (the kind used for icing an injury) out of the freezer. I apply it directly to my pulse points (neck, wrists, thighs) for a quick burst of cold. I've tried other strategies for cooling the pulse points, such as a cooling neck band and wristbands that you soak in cold water, but I haven't found them all that helpful. With the humidity this high, the moisture can't evaporate, and the coolness of the water is offset by the damp material clinging to my skin and impeding airflow. And before long, they warm up to body temperature and provide no benefit at all.

By combining these six strategies, we manage to stay reasonably comfortable for most of the day, but things get challenging at bedtime. We've stripped down the bed to the minimum, with just the sheets and the duvet cover minus duvet, and stripped down ourselves to the minimum of clothing as well, but the mattress itself still traps body heat, so every part that's in contact with it feels overheated. In weather like this, I would happily run an air conditioner in the bedroom if we had had one, but we don't, and we've had trouble figuring out how to add without blocking off the room's only window for the whole summer.

On the very hottest nights, we sometimes sleep on the futon in the office, which has A/C, or in the basement, where it's naturally cooler. But this doesn't necessarily lead to a better night's sleep, because if we shut the cats into the room with us, they pounce on our feet, and if we shut them out, they scratch and meow at the door all night. So throughout this heat wave, I've been trying to tough it out in the bedroom with fans and ice packs, but with limited success.

I recently saw a suggestion in Consumer Reports that a cooling mattress topper can help. However, they're not talking about the "passive" kind of cooling with heat-absorbing gel, which they say doesn't work very well; they're recommending "active" systems with a little water cooler under the bed and a pump to circulate cool water through a network of tubes in the pad. These devices cost over $700 for a full-sized mattress, they include a bulky unit that needs to be stored under the bed, they use electricity (though not as much as an air conditioner), and they require regular maintenance to fill, drain, and clean the water tank. I've looked into some less expensive bed-cooling devices from the Cooling Store , such as the water-filled "Chillow" and a gel cooling pad, but I just don't know how well they would work.

One thing that definitely won't work is this alleged "portable AC" that I've been seeing ads for all over the Internet. From the description, it's pretty obvious that this is not an air conditioner at all, but an evaporative cooler, also known as a swamp cooler, which is supposed to cool you down simply by blowing air over water to evaporate it. In the first place, there's no reason to pay $90 for one of these when you can get something similar for less than half the price at Target or Walmart (and those models are honest about what they are, rather than misleading customers by claiming to be air conditioners). You can even make your own with less than $20 worth of parts. But we have no reason to do any of these things, because swamp coolers are pretty much useless in high humidity.

So, having weighed all the options, we've decided it's time to bite the bullet and add an actual air conditioner to the bedroom. I managed to find a small over-the-sill model that can fit in our bedroom window without obstructing it too much, so it can still admit light. At $430, it's significantly cheaper than the mattress cooler, and a lot more likely to be effective. It also has a fan-only mode, so it can also take the place of our old window fan (which would probably have needed replacing soon anyway) on summer nights when it isn't overpoweringly hot. And since it's Energy Star-certified, it won't completely destroy our ecofrugal cred to run it on the few nights a year when it is.

Besides, according to Hallmark, appliances are the traditional 18th-anniversary gift, so it's only fitting.

Sunday, July 17, 2022

Household hacks: More ecofrugal bath hacks

Five years back, I shared a series of ecofrugal household hacks for the bathroom. These included cleaning techniques and simple repairs for various items in the house's smallest room, such as the toilet flapper and toothbrush holder. All of them cost little or no money and required no nasty toxic chemicals, and many of them made use of materials that would normally go to waste.

In the years since, I've come up with several new tips and tricks for the loo along the same lines. I've already shared some of these, but I figured I might as well gather them all in one place for convenience. Thus, I proudly present Household Hacks for the Bathroom, Volume 2.

Hack #1: Reduce toothbrush waste

For years, Brian and I were loyal users of the Fuchs Ecotek toothbrush, with its a snap-out replaceable head. Using these allowed us to reuse the same toothbrush handles (which don't really wear out) for years on end, replacing and discarding only the smaller heads. When I discovered in 2020 that the Ecotek was no longer available, I went on a deep dive to figure out what would be the most ecofrugal replacement for it. 

A year later, with the help of a scientific paper from the British Dental Association, I settled on the Snap toothbrush from Greener Step: a replaceable-head model similar to my old Ecotek. Its only real downside is that, unlike the Ecotek, it has a wide, curvy handle that's no doubt meant to be ergonomic, but that doesn't fit into our built-in toothbrush holder, which can only hold old-fashioned flat handles. So, to accommodate it, we made a second wire add-on for the toothbrush holder.

Hack #2: Store your razor in a cup of oil

On the subject of reducing waste, one item in the bathroom that had always frustrated me was my cartridge razor. It wasn't so much the amount of waste it produced, since I could make one cartridge last quite a while; it was the cost of the replacement cartridges and the fact that the handles themselves inevitably broke after a while. So, last year, I bit the bullet and got a safety razor. This was much cheaper to use, but I still didn't get as close a shave as I wanted with it, and I kept nicking myself. So I eventually invested in a pricier Twig razor, which takes single-edged blades.

One problem with this new razor was how to store it. Its wider handle wouldn't fit through the gaps in my shower basket, and while the edge of the basket has hooks for hanging a razor, I was afraid of getting cut if it fell off. So I decided to kill three birds with one stone by storing my new razor head-downwards in a little cup of oil. This keeps the blade out of harm's way, prevents it from rusting, and keeps it well lubricated. The cup itself is just a repurposed moisturizer jar, and the oil is plain old canola oil out of the pantry. (I imagine it will eventually go rancid, but since I'm not planning to consume it, who cares?) 

Hack #3: Replace your plastic shower poof with a washable one

Another piece of waste in the bathroom I'd always wanted to eliminate was my plastic shower poof. I like the nice lather I'm able to work up with one of these, but I don't like the fact that it frays with use and eventually has to be thrown out. (I don't care so much about the bacteria it supposedly harbors, because let's face it, your skin is exposed to bacteria all the time; in fact, keeping them out of your body is more or less what skin is for.)

I've tried various more eco-friendly alternatives, but none of them was quite satisfactory. A washcloth didn't produce a good lather and didn't extend my reach enough for me to reach all parts of my back with it. A natural loofah was too abrasive. And a sea sponge from Bed Bath & Beyond cost 15 bucks and disintegrated after a few months of use.

My latest plastic alternative, and the one I suspect I'm going to stick with, is a washable bath puff made from cotton. (The exact one I bought on Etsy is no longer available, but here's a similar one.) It doesn't lather up quite as well as my old plastic one, but it looks sturdier, exfoliates nicely, and can be washed if it starts to mildew.

Hack #4: Make a bath compost pail from a coffee can

This is actually two hacks in one. The first is the idea of keeping a small compost pail in the bathroom to hold biodegradable waste: cat and human hair, spilled cat litter, cotton swabs (the kind with a cardboard core), and the scraps of newspaper used for cleaning the bathroom mirror. This makes it easy to compost all that stuff without having to carry it out to the bin while still dripping wet from the shower.

My first bath compost bin was an empty Blue Bunny ice cream container, which I spray-painted silver to blend in better with its surroundings. This held up for a few years, but the paint started to flake off, and eventually the plastic top cracked from repeated use. And by the time I discarded it, I couldn't simply replace it with another ice cream tub because Brian and I were no longer buying ice cream.

However, I had started buying coffee in cans at the supermarket, so my new bin is a small coffee can with a scrap of old wrapping paper taped around it. One problem with this design is that the metal rim on the bottom leaves rust stains on the vanity, but I circumvented that by saving the plastic top from a second coffee can and adding that to the bottom. 

The first can I used for this purpose was all metal, but it eventually succumbed to rust. So I switched to a coffee can from Lidl, which is made mostly of cardboard with only a small rim of metal at the top and bottom. These cardboard cans gradually break down from exposure to moisture, but that's no problem: when one gets too worn out to use, there's always another can to replace it with.

Hack #5: Make a soap dish insert from garlic sleeves

Along with its built-in toothbrush holder, our bathroom has a built-in soap dish. This is handy, except that any bar of soap that gets used frequently throughout the day will never get a chance to dry out between uses. As a result, it gets all slimy and gross, and it disintegrates quickly.

You can buy various sorts of inserts to fit inside the soap dish so the soap can drain, but we discovered that you can easily make one from those plastic mesh sleeves that garlic cloves come in at the store. Our original design had three of these rolled up into little doughnut shapes and stitched together with dental floss, but they tended to come apart over time. So we modified it to squeeze four of the little tori together in a sort of rhombus shape, each one attached to its two neighbors. Having two attachment points for each helps it hold together better.

This DIY soap dish insert keeps the soap dry for essentially no cost. It does accumulate soap scum and dirt
over time, but it's easy to clean up with a quick rinse under the faucet.

Hack #6: Store surplus meds in a drawer

Our upstairs bathroom is pretty tiny, and it doesn't have a lot of storage space. We have enough room for our towels and cleaning supplies, but one thing we had trouble finding space for was extra bottles of various medicines. (We end up with these for a variety of reasons. Some are from refilling prescriptions online, which requires us to order a three-month supply at once; some are from buy-one-get-one sales at the drugstore; and some are products that we buy online, stocking up to save on shipping.) We tried piling these in a bin in the linen closet, but it was always overflowing, and it was a hassle to go digging through it when we needed anything.

Eventually, it occurred to me that there was one bit of storage space in the bathroom we weren't using fully: a small drawer under the sink on the left-hand side. There was nothing in it but a flashlight, and there was enough room for that to squeeze in with the other items in the right-hand drawer, such as Brian's beard trimmer.

So now this drawer is given over entirely to surplus meds, and we can see all of them at a glance. We still occasionally run out of room in there, but we can usually stick an extra bottle in the medicine chest if we have to.

Hack #7: Use clips to squeeze the air out of a tube dispenser

This is the hack I've come up with most recently, and consequently the one I'm most pleased about. I've recently started using a couple of products that come in a particularly annoying kind of package: a flexible plastic tube. This isn't like a toothpaste tube that you can squeeze the air out of; it automatically reinflates as soon as you let go of it. And you can't just roll up the tube to push the product forward like you can with a toothpaste tube, because it automatically unrolls as it reinflates. Consequently, it gets harder and harder over time to get any product out of the tube. When you squeeze it, you generally get nothing but air. To get anything else, you have to press hard with both hands, whereupon you squeeze out a huge glob of the product that goes all over the place and not where you want it. So most of it just ends up going to waste.

There are various products on the market designed to fix this problem, ranging in price from around $3 to as much as $40. But to buy one of these, I'd probably have to order it online, and the shipping cost would raise the price to at least $8. I figured there had to be a cheaper DIY solution.

I tried various tools, including large paper clips and binder clips, and eventually found two that are fairly effective and easy to use. For the smaller of the two tubes, I just clipped a small barrette across the tube. This prevents it from reinflating, allowing me to squeeze the product out by sliding the barrette down along the length of the tube.

I had two of these barrettes, but the other one was too small to accommodate the larger tube. So instead, I rolled it up, pressing the air out as I went, and then clipped it in place with a clothespin.

Thanks to these simple tools — neither of which cost me a cent — I should be able to get all the contents out of both these pesky tubes. And in future, I'll try to avoid buying any product in this kind of idiotic packaging.

Monday, May 18, 2020

Household Hacks: An ecofrugal soap-dish solution

Since the COVID outbreak started, Brian and I (well, mostly Brian) have been washing our hands more regularly and more thoroughly than we used to. As a result, our bar of soap was more or less constantly damp, and left to soak in its own juices in the soap dish, its outer surface rapidly disintegrated into mush. Not only did it look disgusting, a lot of the soap was going to waste, building up as muck on the soap dish rather than actually being used on our hands.

I could have solved this problem by switching to liquid soap, as Millennials have supposedly done, but that approach seemed even more wasteful. Not only does it come in a plastic bottle rather than a simple wrapper, it usually has a non-recyclable pump top that makes it impossible to get all the soap out of the bottle — so we'd end up wasting even more of it. And besides, I knew it was possible to use bar soap without having it all disintegrate in the dish; after all, we'd done it for years before COVID hit. All I had to do was find some way to drain the water off it so it wouldn't stay wet all the time.

Now, there are lots of little soap dish inserts designed for this very purpose, made of everything from silicone to stainless steel. But finding one the right size for our little built-in soap dish posed a difficulty, especially when it isn't possible to go to a store and browse. So I thought about what materials we had available, and I remembered those little mesh tubes that our garlic comes in. Brian always saves these rather than throwing them out, even though the only use we've found for them is improvised cat toys, so he has quite a large collection at this point that isn't being used for anything else. So I simply picked out the three that seemed most snugly rolled up, tucked them into the soap dish, and rested the bar of soap on top of them.

This worked reasonably well. The plastic mesh material allowed the liquid to drain off the soap, so it didn't turn to goop, and it didn't accumulate soap and dirt residue so fast that it quickly became gross-looking itself. Cleaning it once a week, when doing the rest of the bathroom, was sufficient, and reasonably easy to do (just rinse under the tap). The only problem was that the little tubes had a tendency to stick to the soap bar, coming up with it whenever we lifted it to wash with. But I mitigated this problem by stitching the three tubes together, using just a few stitches at each intersection point, with waterproof dental floss rather than thread.

This simple DIY solution seems to work as well as anything we could have bought in a store, it fits our odd-sized soap dish, and it didn't cost us a cent. And, since it used up something that would otherwise just have gone to waste, it's the perfect example of ecofrugality.

Sunday, May 13, 2018

Household Hacks: Summer wardrobe edition

Summer is icumen in, it would appear. In the past week or so, we've had a couple of days that got up close to 90 degrees, and I started pulling some of my summer garments out of storage. Unfortunately, in the process, I discovered that a couple of them were worn out, which threw me face to face with that age-old ecofrugal dilemma: repair or replace?

The first problem popped up on the first day I ventured out in sandals. My current summertime solution to the shoe conundrum is a pair of sturdy Columbia sandals in a "big kids" size 5. Because boys' and girls' shoes are both the same size and width, this shoe fits just fine on my wider foot; it's a bit long, perhaps, but the adjustable straps allow me to keep it snug. And as a bonus, kids' shoes are usually a bit cheaper than those designed for adults, so I was able to pick these up for only $30 or so at Famous Footwear.

After being worn nearly every day for the better part of two summers, the soles of these sandals were seriously worn down. In the middle of the ball of the foot, especially, there was a spot where the rubber was nearly worn through. I'd noticed last summer that they were starting to wear and tried to patch them with Sugru (the stuff we used to repair our old toilet brush), but it didn't stay put. So when I first put them on this summer and found I could nearly feel the pavement through them, I thought they were probably done for. Given that I'd worn them regularly through two summers, you could hardly say I hadn't gotten my money's worth out of them, but I was still disgruntled at the thought of having to shop for a new pair. I'd originally bought these at Famous Footwear, but the selection there is ever-changing, and I couldn't be sure of finding them.

So I decided to have one more go at patching them, this time using a product that's more or less designed for the purpose: Shoe Goo. Unfortunately, I didn't think to take a "before" picture of them, but even in this "after" picture of the repair job, you can see the wavy texture of the worn patches. What's not clear from the picture is how well they'll hold up. I've used Shoe Goo on worn shoes before and managed to get another couple of months of wear that way, but it eventually gets dirty and peels off. So it's not clear whether this fix will be enough to keep this pair of shoes going through the summer, but at least it will save me from having to hunt for new ones in a hurry.


I also ran into difficulties the first really warm night of the year, when I switched to my summer sleeping attire—an old tank top and a pair of men's boxers. I've had these for a few years now, and the waistband elastic, as you can see here, is almost completely kaput.


What I'd normally do in this situation is add a drawstring, as I did with these shorts three years ago. However, the way this waistband is designed makes that technique impractical. It's all one solid piece of elastic, so there's nothing to slip the drawstring through.

Now, these are actually cheap enough that buying a new pair would be no big deal. But the idea of tossing out the old ones just irked me. The fabric was all still perfectly good; it was only the elastic that was worn. It seemed like throwing them away just for that would be a blot on my ecofrugal escutcheon.

So I did a little experimenting and eventually found that if I could just wrap them a little tighter in the front and secure them somehow, I should be able to get them to stay put. So I folded over a big flap of fabric in the front, stitched it together, and attached a button...


...and cut a small buttonhole through the waistband opposite.


The finished result isn't exactly elegant, but it should be enough to keep them from falling off, which is all that really matters for night wear.


So with those two quick fixes, I should be more or less set for summertime. I don't know how well either of them will hold up, but even if I end up having to buy new sandals or sleep shorts before the summer is out, at least I'll know I didn't give up without a fight.

Sunday, January 7, 2018

Household Hacks: How we're keeping (somewhat) warm

Here on the East Coast—and in many other parts of the country as well—we are now about two weeks into a deep and prolonged cold snap. Ever since Christmas, we have not seen outdoor temperatures over 20 degrees, either here in Jersey or back at my in-laws' place in Indiana. Every day the news reports new record low temperatures somewhere in the country. Meteorologists are amusing themselves by making up new and terrifying terms, like "bomb cyclone," to describe the brutal weather conditions.

In the face of the bitter cold outside, our little boiler is struggling to keep up. Ever since we got home, the thermostat has been set to 68 degrees 24/7 (rather than our usual regimen of 67 by day and 56 by night), and we're still lucky if the indoor temperature ever creeps above 65. So we've been using a variety of tricks to keep ourselves warm. If you're also stuck shivering at home, perhaps some of them will help you as well.

Winter Warmer #1: Layers—lots of layers.

As I type this, I am wearing a total of four layers of clothing: a turtleneck, a pullover, a fleece zip-up that I picked up at Goodwill over Christmas vacation, and my wearable blanket over that. I also have fleece-lined leggings on under my trousers, two pairs of socks under my fuzzy slippers, and a hat. The only part of me I don't have under wraps is my hands, since I can't manage to type with gloves on. (Look, I['ll show you. See what; I[ mean>?")

Winter Warmer #2: Baking.

In the summertime, we tend to choose meals that we can prepare without heating up the kitchen too much. We grill, eat cold salads, or use the Crock-Pot and the pressure cooker, and avoid running the oven as much as possible. During this cold snap, we've switched to the opposite strategy, running the oven as much as possible. In the past week, Brian has baked bread, apple crisp, cookies, and lasagna, and after each recipe he leaves the oven door open to spill as much of that heat into the kitchen as possible.

Winter Warmer #3: The pressure space-heater.

An old trick for warming up the house is to heat up a pot of water on the stove. As it slowly cools, its stored heat will transfer to the air (along with moisture, which will make it feel warmer). The problem is, if the pot stays on the stove, only the kitchen will get noticeably warmer. Brian had the thought that if he could heat a pot and then move it into whichever room we happened to be using, it would serve as a little space heater, radiating warmth in our immediate surroundings. However, he was reluctant to try this with our big stock pot for fear of spilling the water.

The solution he hit on was to use the pressure cooker instead. Every day this week, he has put the pressure cooker on to boil with nothing in it but water. Once it comes up to full pressure, he lets it vent, then moves it to a hot pad atop my desk, where it gently radiates heat as I work. I have to be careful not to touch the hot pot early in the day, but by evening it's completely cool to the touch (although even then, we've found the water inside is still slightly warm). He's also tried setting the hot pot on the coffee table as we watch TV in the evenings, where we can put up our feet next to it.

Winter Warmer #4: Hot tea.

While the pressure-cooker heater is helping to heat my outside, I also warm myself from the inside out by sipping hot tea throughout the day. This may sound confusing if you've heard that sipping hot drinks in hot weather is actually cooling, but as this article from the Guardian explains, that's because their heat stimulates increased sweating (which is why this trick doesn't really work in humid climates). On a day like this, there's no way a cup of tea will be enough to cause sweating, so its warmth will instead stay in your tummy and help you keep your core temperature up. Plus, holding the hot cup helps keep my exposed hands warm.

Winter Warmer #5: Heavy-duty bedding.

Even with all these warm-up tricks, it's a struggle to keep warm during the day. But at night, we have no problems at all. We stay toasty warm with a combination of fleece sheets and a lightweight comforter from IKEA. When we bought this comforter, we hesitated between two different weights; this one, which was labeled as a "cooler" comforter suitable for warm weather, and a mid-weight one that was slightly pricier. We settled on the cheaper one, figuring that we could keep it on the bed year-round without overheating, and in the winter we could always add another blanket to keep warm.

To our surprise, this "cooler" comforter turned out to be very warm indeed—so warm that we have to remove it entirely in summertime, leaving only the empty duvet cover. Maybe in Sweden it would be comfortable all summer long, but definitely not in New Jersey. And even in winter, it's so warm that we haven't needed to put a blanket on the bed since we bought it. If this is IKEA's idea of a warm-weather comforter, I can hardly imagine how warm their cold-weather ones must be.

We'd probably stay warm enough under this comforter even with plain cotton sheets, but there would still be those few minutes of unpleasant chill upon first sliding between them. Even flannel ones have a fairly smooth surface that feels cold to the touch at first. By contrast, our fleece sheets, with their high, fluffy loft, feel as warm as blankets against our skin. Tucked in between these, with our warm sweat pants on and our plush comforter over top, we stay snug as the proverbial bug all night long. The only difficult part is getting out of bed when the alarm goes off.


Fortunately, the cold spell is scheduled to break at last on Tuesday, with temperatures soaring up to a balmy 40 degrees. At that point, we'll be able to venture outside again during the daytime and finally give our boiler a break at night. But I'll be filing away these frugal winter-warmth tricks for future reference, since both extreme lows and extreme highs seem to be part of the new normal.

Sunday, March 26, 2017

Household Hacks: Even easier DIY cat toy

So, remember how a couple of weeks ago I said I had come up with the world's easiest DIY cat toy?

Well, I spoke too soon. Brian has come up with another toy that is also made of reused materials and is even simpler than the my paper twists. Plus, the cats are even more enthusiastic about it. The only catch is, to get the materials for it, you have to consume five heads of garlic.

At our house, this is no problem. Garlic is a staple for us, and so we routinely buy several heads at a time. They come bundled up together in a little mesh bag, like this. Brian thought these little bags looked like they might be useful for something, so he took to saving them. He'd just roll them up into little balls like this, rather resembling a jellyfish, and toss them in a larger mesh bag (the kind onions come in) for storage.

At some point, it occurred to him that these little balls were the sort of thing our cats might like to play with. They were lightweight and slightly irregular in shape, so when you tossed them, they'd bounce and roll in unpredictable ways—which seems to be the best way to hold the cats' interest. But he hesitated to give them one, because he thought they were so small the cats might somehow manage to swallow them.

Recently, however, we picked up a bag of garlic that was much larger than the stuff we usually buy. It wasn't quite as jumbo-sized as the stuff they call elephant garlic, but it was definitely bigger than average. And consequently, it came in a bigger bag. So Brian decided this bag made a large enough ball that we could safely give it to the cats and see how they reacted.

The answer, as it turns out, was "with great enthusiasm." If you toss this mesh ball for them, they will chase after it even more eagerly than they do the paper toys. They especially love when it goes rolling in a vaguely off-kilter path down the hall, so they can go bounding after it. The best part is that when they catch up to it and snatch at it, the mesh often catches on their claws, causing them to snake them until it comes free—which, of course, sends it flying off again, so they can chase it all over. So all we have to do is toss this toy once, and they will amuse themselves with it for—well, not for hours on end, but at least for several minutes.

I tried to get a few pictures of the cats playing with this toy, but unfortunately, our cats just love the camera. As soon as it comes out, they become far more interested in that than they were in whatever they were doing, and so all you can get is pictures of them staring into the camera and trying to bite it. So you'll just have to take my word for it: they love this thing.

Better still, after observing how our cats play with this extra-large garlic-bag ball, Brian has concluded that probably there would be no harm in letting them play with the smaller ones, as well. So once they manage to lose this toy or chew it to pieces (they've already pulled a couple of small strings loose), we have several more to replace it.

And that also means that if you want to try this toy on your cats, you don't necessarily have to seek out an unusually large bag of garlic to make it. Just buy a regular bag of whatever size your supermarket carries, eat all the garlic, and roll up the bag like this: start by turning up one end, then roll it over a second time, and just keep rolling until you've got the little jellyfish shape shown above. Then send it skittering down the hall, and watch your kitties pounce.

Saturday, March 11, 2017

Household Hacks: The world's easiest DIY cat toy

Our two cats are a bit picky about toys. We've tried all sorts of mice sold at the big pet superstores, and the only one they ever showed any partiality for was a little stuffed critter covered in black-and-white spotted fabric. Winnie loved that little mouse, but she kept batting him under doors and furniture where we'd have to retrieve him, and at some point he got completely lost. And, of course, the store no longer carried any like him, so we've never been able to find a good replacement.

The only other pet-store toy they really liked was these little spirals, which are just pipe cleaners encased in sheaths of colorful fabric. Both cats would bat enthusiastically at these, and run after them when they went skittering away across the floor; when they caught one, they'd lie down and clutch it in their paws and pull at it until it came uncoiled. It was very cute, and I appreciated the fact that it distracted them from gnawing on other long narrow objects that they might otherwise take a shine to, like my computer cables.

Unfortunately, they played with these toys so energetically that they quickly wore holes in the fabric covers, and the pipe cleaners came poking out. Once that happened, we no longer felt safe letting the cats play with them unsupervised for fear that they'd hurt themselves on the wire or even swallow part of it. (It may sound like we're just being paranoid, but several reputable pet sites, such as Catster, warn about this as a danger, and we have read horror stories about cats being rushed into surgery over a swallowed pipe cleaner.) I tried stitching the fabric back up, but they just tore it open again, and eventually we had to give up on the toys.

We tried to get more at the pet store, but they were no longer available, and we couldn't even find anything similar online. The closest we could find was this larger blue spiral, but the cats didn't seem to appreciate it like the fabric ones. It's made of a much stiffer material, and when dropped, it just lands on the ground and sits there; it doesn't bounce or roll in the same unpredictable way that made the pipe cleaners so appealing (like having real prey to chase.)

We made several attempts at making our own spiral cat toys, but they didn't work too well. Brian tried taking a piece of wire from a coat hanger, which he thought would be less hazardous, and sewing it up in a piece of scrap fabric—but like the blue coil, this toy was too stiff and stable to interest them much.

I thought a pipe cleaner might be okay if I could just wrap it up securely in one of those stretchy fabric bandages they use at the blood bank—but once I'd wound it several times around the pipe cleaner, it was too thick and ungainly to make a very good coil. Plus, Brian was still concerned that they'd manage to get the wire out from under the wrappings, so he didn't want to let them have it without supervision.

So one day, in a desperate attempt to come up with something to distract Winnie from the computer cables, I hit on the idea of trying something similar with a strip of newspaper. I just tore off a long strip from the edge, like this...


...and twisted it up into a long, thin string, like this.


I wasn't able to make this into a coil shape like the original fabric spirals, because it wouldn't stay put, but I found just tying it into a little bow made a lightweight shape that the cats enjoyed batting around. It seems to move in the same random way as the pipe cleaners, so they like tossing it, catching it, grabbing it, and generally amusing themselves without supervision. They also like to pull on the ends and try to untie it, but if they succeed, that's no problem; I can just grab it and tie it back up in a minute.


Needless to say, these little paper toys don't hold up all that well. After being subjected to claws and teeth for a week or so, they get pretty limp and ragged-looking, and they're not as much fun to play with. But that's okay; when they wear out, they can just go straight into the recycling bin (or the compost, if they're really torn to shreds) and I can easily whip up a new one in a few minutes.

So this is pretty much the ultimate ecofrugal cat toy. It costs nothing, it's made entirely from scrap material, and it can go right back in the bin when it's worn out, creating no additional waste. And if the cats don't love it quite as much as the spirals, they will at least occupy themselves with it long enough to let me get some work done.

Sunday, February 26, 2017

Household Hacks: 7 easy household hacks for the bathroom

Brian and I have a disagreement about the word "hack"—specifically, its use to mean a handy shortcut for everyday life. Brian objects to it on the ground that it's overused, sometimes even in contexts where it really doesn't apply at all (such as these kitchen tips from XKCD.) But personally, I like it. To me, it conjures up images of Alexander cutting through the Gordian knot—a quick, direct solution to a complicated problem. Even the shortness of the word feels appropriate for a short, simple workaround.

Over the past few months, I've noticed that we seem to have come up with a lot of household hacks specifically for use in the bathroom. Some are for cleaning, some for grooming, and some for repairs, but all of them are specifically bath-related. So I thought I'd sum them all up in one post, as a sort of tribute to the Spirit of Hacking.

Hack #1: Clean hair from the sink drain with a plastic bag tie
Every so often, the drain in our sink gets a little sluggish. That's a sure sign that it's clogged up with hair (and usually bits of nasty grime that are clinging to the hair), and it won't run smoothly again until it's cleaned. We have a special tool for this purpose, known as a Zip-It: a long, flexible plastic shaft with little barbs on both sides. You feed this thing carefully down into the drain, and the barbs catch on the hairs so you can pull them back out. The Zip-It emerges from the drain trailing long strands of hair and associated gunk like seaweed off a lobster trap, which is disgusting, but effective.

The Zip-It is only $2.50 at Home Depot, and it's both easier and safer than those vile chemical drain cleaners, which eat through the hair with caustic chemicals that can damage your plumbing (and possibly you, if you splash any on yourself). But if you don't happen to have one on hand when a clog pops up, you can achieve similar results with a plastic garbage bag tie (the kind with rows of little jagged teeth on it, like this). Feed it down into the drain, and you can pull up the hairs from the top few inches of the pipe. It won't penetrate the pipe as deeply as the Zip-It, but it's easy to do, and it should clear away enough of the clog to get the drain running again.

Hack #2: Clean the tub with a dish wand
I used to drive myself crazy trying to get our bathtub clean. My go-to ecofrugal cleaners, vinegar and baking soda, seemed to have no impact at all on the film that clung to the base of the tub. I moved on to various commercial cleaners, including sprays, liquids, and powders; I experimented with different tools, going at the scum with a rag, a sponge, a scrubby pad, a brush, and even a special "shower scrubber" tool with an extendable handle and pivoting head, designed specifically for cleaning the tub from a standing position. (This was worse than useless, as every time I put any real pressure behind it, the head would just flip over.) No matter what I used or how vigorously I scrubbed, I could never get the tub completely clean. All I had to do was scrape my fingernails along the edge, and they'd come away with that whitish film under them.

I turned for help to my pals at the Dollar Stretcher forums. One of them enthusiastically recommended "Ajax grapefruit scented dish soap," applied with a long-handled brush while the tub and tiles are wet, and another suggested a mixture of Palmolive and sudsy ammonia in a spray bottle. Not having either of those brands on hand, I decided to try grabbing an old dish-scrubbing wand filled with generic dish soap and applying that to the wet tub right after my shower. This worked much better than anything else I'd tried. At first, I followed up with a vinegar-and-water spray to rinse all the soap residue off, but eventually I got the idea to add equal parts dish soap and vinegar to the scrubbing brush and apply everything all in one go, then rinse it off.

This is now my regular weekly routine for cleaning the tub. I keep the dishwand hanging at the ready on the towel bar, so once a week, I can just grab it right after I turn off the shower and give everything a quick scrub before rinsing it. That way I don't have to mess around getting into grubby clothes specially for cleaning. I have since seen blog posts saying this vinegar-and-dish-soap concoction works in spray form as well, which might be even easier...but since it took me so long to find a method that worked, I'm not inclined to mess with it.

Hack #3: Remove stains from porcelain with oxygen laundry booster
A few years ago, we switched to a walnut-based cat litter from Blue Buffalo. In most ways, we love it: it clumps firmly, doesn't track as much as the wheat stuff, and controls odor so well that we have never had to change the litter once since we started using it. We just keep scooping out the clumps and adding more litter, and the box keeps not stinking. This makes it a much better value than any other brand we've tried, despite its high cost per pound, because none of it goes to waste.

There's only one problem with it: the walnut fragments tend to leave a darkish stain on the inside of the toilet bowl. My usual cleaning method—vinegar-water spray and a quick scrub with the brush—had no effect. Once again, I tried upgrading to stronger cleaners, including some with chlorine bleach, but to no avail. Brian tried going at the stains with steel wool and was able to get them out temporarily—but that just ended up scratching the porcelain, so fresh stains soaked in faster than ever.

So when I got a coupon for a free carton of OxiClean, I figured it couldn't hurt to try that too. Cleaning bathrooms wasn't one of the listed uses for this product, so my hopes weren't high. But to my amazement, after I'd sprinkled it on and let it sit for a while before brushing and flushing, the stains had faded to near-invisibility. I now repeat this routine once a week, and the porcelain remains in a state of near-pristine whiteness. And I've discovered, after some experimentation, that cheaper brands of oxygen-based laundry booster, such as All, do the job just as well.

Hack #4: Strop your razor on your forearm to maintain its edge
I've mentioned this hack before in my Saving on Shaving post. As this post at Tools for Woodworking explains, stropping a blade isn't quite the same thing as sharpening it on a stone; it's more like smoothing a surface with sandpaper, gently abrading away nicks and scratches. I've seen tips on how to prolong the life of your razor blade by stropping it on a leather belt, a leather-soled shoe, or even an old pair of blue jeans—but the simplest method of all is this one, which I discovered on LifeHacker. You simply give the blade several backwards strokes against the bottom of your own forearm, which you can do right in the shower before you shave.

This method, combined with regular drying and lubrication of the blade, worked well enough for me to keep the cartridges on my old Rite Aid razor going for months on end. Sadly, that razor gave up the ghost last year, and I've yet to find a really satisfactory replacement. I tried samples from both Dollar Shave Club and Harry's, and their fancy four-or-five-blade razors just didn't give me as smooth a shave as my old, obsolete three-blade razor (not to mention that the one from Harry's literally fell apart on its third use). So for now, I'm using an el cheapo MicroTouch razor, which claims to be able to go a month on a single blade without any special interventions. I'm continuing to dry and hone the blade regularly, and while I can't exactly claim to be impressed with the results it's giving me, it is at least holding up pretty well.

Hack #5: Fix a running toilet with a drinking straw
I discovered this trick back in 2013, when we had a problem with our toilet. Basically, the flapper kept getting stuck open because the chain would either get stuck underneath it or snag on it so it couldn't close. Shortening the chain didn't work (it ended up too short, so the flapper couldn't close at all), so I adopted a trick from Wikihow: I detached the chain, fed it through a soda straw, and reattached it. This worked only partially; the rigid chain-and-straw unit was now forcing the flapper closed too quickly, before the bowl had fully filled. So Brian adapted the hack by cutting the straw in half at the middle, allowing the chain to bend. This fix worked so well that even after we eventually replaced the flapper, we reinstated the straw on the chain to keep it from snagging again.

Hack #6: Adapt your toothbrush holder with coat hanger wire 
Brian devised this toothbrush hack back in 2014, when I was trying a new brand of toothbrush that wouldn't fit in our old-fashioned toothbrush holder. This toothbrush holder dates from a simpler time when all toothbrushes had straight, smooth handles, and today's chunky, molded hand-grips just won't fit through the holes. And since it's built into the wall, replacing it isn't really an option, and leaving it unused seems like a waste.

So I hit on the idea that the way to make the toothbrush fit in the holder would be to add on some kind of construct that would allow it to slide in from the side. After a little trial and error, Brian managed to achieve this by bending a piece of coat-hander wire to make a loop that would fit around the handle, then threading the ends of it through the hole in the front, under the bottom, and out on the other side. As built, this dingus can only accommodate one bulky toothbrush, but you could modify it to add a second loop on the other side if you wanted to hold two at once. Or you could just run a second set of wires through a different hole.

Hack #7: Fix a trash can that won't close with a felt pad
Ever since we adopted our two mischievous kitties back in 2015, we've kept finding new things around the house that need to be cat-proofed. Our cat-safe vase is the most notable example, but we've also had to replace a couple of wastebaskets because the cats would either chew on the wicker basket itself or fish things out of it. The worst culprit was the bathroom wastebasket, which contained enticing strands of dental floss that the cats viewed as wonderful toys. We, on the other hand, viewed them as potential garottes for unsuspecting feline throats, and we were determined to keep them out of the kitties' paws. So we bought a small covered waste bin, the kind with a lid that you can open by stepping on a pedal.

This sort of worked, but there was a problem: sometimes the lid would get stuck in the open position, allowing the kitties to go Dumpster diving for dental floss. We tried shimming the can up in the back so it would naturally tilt forward and force the lid closed when you weren't actively stepping on the pedal, but that didn't seem to be enough. So Brian tackled the problem from the other direction; instead of forcing the lid down, he decided to force the foot pedal up.

His repair is simplicity itself. He cut a couple of strips from a felt pad, the kind you put on the bottoms of chair legs to keep them from scratching the floor, and stuck them to the lip of the trash can underneath the pedal. Now, when you step on the pedal, it lowers enough to open the lid, but it doesn't go all the way to the floor, and as soon as you remove your foot, it pops back up again, closing the lid.

This hack went through a couple of iterations before he got it to work. First he tried one layer of felt, but that wasn't enough to push the pedal back up, so he had to add a second layer on top. And he initially tried sticking the felt pads on with just their own adhesive, but they didn't stay put, so he ended up pulling out the big guns and sticking them on with epoxy. Now those pads aren't going anywhere, and those kitties aren't getting their paws on any more dental floss.


So there you are: seven simple hacks for the smallest room in the house. If you know of any more ecofrugal hacks for the bathroom that you think deserve a wider audience, please feel free to share them below; I'm always looking for more ideas.