Showing posts with label cheap luxuries. Show all posts

Wednesday, January 22, 2025

Thrift Week 2025, Day 6: Fragrance

Back on Day 3, I named Dom Perignon as a classic example of a luxury good, costing about $330 for a 750-mL bottle. But on a milliliter-for-milliliter basis, that stuff doesn't hold a candle to high-end fragrance. A 2023 article in (once again) Town & Country magazine lists a dozen perfumes that cost hundreds or even thousands of dollars per ounce. The most expensive scent on the list, Haute Luxe by Roja Dove, costs $3,500 for a 3.4-ounce (97-mL) bottle. That's $36 per milliliter—82 times as much as France's most iconic bubbly.

According to T&C, these pricey perfumes are "worth every cent." While the editors concede that "your signature scent doesn't need to cost an arm and a leg," they also claim that an "ultra-luxury fragrance" offers benefits a more "attainable" one can't, such as:

  • The "finest ingredients in the world" that went into it.
  • The skills of the "master perfumer" who created it.
  • The design and "natural materials" of the the bottle.
  • A "one-of-a-kind scent" that most people won't have.

All that sounds impressive, but really, a fragrance only has to do one thing: make you smell good. If it doesn't do that, then the luxurious ingredients, the fancy bottle, and the efforts of the master perfumer are simply wasted. And, conversely, if you can get a much cheaper scent that smells just as good to you, then the lack of fancy ingredients and "craftsmanship" matters not one whit. The proof of the perfume is in the sniffing.

So, if you want to "find your signature scent" without spending a bundle on it, where do you look? Well, you could disregard T&C's guide in favor of this one from Cosmopolitan, which recommends the best "affordable fragrances that smell luxe." But its definition of "affordable" is up to $70, which is still a bit much to risk on a scent you don't actually know you'll like. So if you want a chance to try before you buy, you could pick up a few test vials from Microperfumes, which sells tiny samples (just 0.75 mL) of different fragrances for as little as $3 apiece. Or, if you already know what fragrance you like but you don't like the price tag, you can search for a knockoff version at a site like Perfume Parlor. With a quick search there, I found a duplicate of that $36-per-milliliter Haute Luxe that costs only 56 cents per milliliter (with a 2-mL test vial available for just $4). 

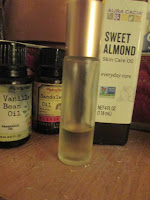
Or, if you want a truly "one of a kind scent" that no one else is wearing, you can do what I do and make your own. My signature scent is a blend of three essential oils—sandalwood, vanilla, and cinnamon—mixed with a carrier oil in a little roller bottle. Last summer, the tiny bottles of essential oil that I bought back in 2020 finally started to run low, so I restocked with some bigger bottles from an online supplier: 2 ounces of sandalwood for $4, 1 ounce of vanilla for $6, and half an ounce of cinnamon that looked like an unbeatable value at just $1. Unfortunately, when I cracked it open, I realized why it was so cheap: it had a weird, acrid smell that was nothing at all like cinnamon. Thus, for the past few months, I've been making my perfume with just sandalwood and vanilla—all about those base notes, with no middle or top.

So, as my Treat for Today, I ventured out in the brisk January air to go to the local Rite Aid and drop $9 plus tax on a new bottle of cinnamon essential oil. (As Rite Aid is going through a bankruptcy right now, its shelves are looking a little picked over, but fortunately this particular essential oil is still well stocked.) It's a 1-ounce bottle, so at the rate I use it, I'll still have half of it left when my new bottles of vanilla and sandalwood oil run out. (At that point, I'll have to decide if I want to replace the sandalwood oil, which I've recently learned comes from a rare and over-harvested plant, with something more sustainable—like, ironically, a synthetic fragrance oil.)

Tuesday, January 21, 2025

Thrift Week 2025, Day 5: Beauty

Another way the very rich are different from you and me: They don't age as visibly. Partly, of course, this is because they can afford more nutritious food (see Day 2) and better health care. But also, they can invest in luxury skin care, spa treatments such as facials, "tweakments" such as Botox and fillers, and even plastic surgery. All that stuff decidedly doesn't come cheap. According to Real Self, a site that reviews beauty treatments, you can expect to pay an average of:

  • $35 for a prescription skin-care product containing Retin-A (tretinoin), which can gradually brighten your skin and improve elasticity if you use it regularly for at least 4 to 6 weeks
  • $208 for a HydraFacial, which reduces the appearance of fine lines for 1 to 3 months
  • $535 for a syringe of Botox, which can smooth away wrinkles for 3 to 4 months
  • $1,112 for a "vampire facial," which uses tiny needles to inject your skin with platelet-rich plasma pulled from your own blood, smoothing away skin damage over the course of multiple treatments and lasting 9 to 18 months
  • $3,229 for a "liquid facelift" that combines Botox with dermal fillers, improving wrinkles and moderately lifting sagging skin for up to 2 years
  • $16,690 for a full facelift—the most expensive option, but the only one that will last 10 years or more

None of these, obviously, will fit into a tight budget. Even the $35 topical treatment, with its modest effects, will run you $420 a year if you restock monthly. The rest, if you keep them up regularly, will most likely cost a grand or more per year. 

The most economical approach to beauty, obviously, would be to decide to love yourself wrinkles and all. But I'll admit that's not easy. Throughout my late forties, I found myself growing more and more dissatisfied with the face in the mirror, which didn't look like the way I thought of myself. I kept browsing the list of pricey treatments on Real Self, but I could never convince myself that any of them would be worth the money.

Finally, on my 50th birthday, I decided to spring for something that looked like it could give me just a little bit of a boost. I invested $150 (on sale) in a mini microcurrent device that claimed it could "significantly improve skin firmness & elasticity" in just a few minutes a day. The evidence for the effectiveness of microcurrent wasn't terribly strong, but I'd seen a few studies suggesting it could have at least a small benefit, and even if it didn't help at all, I wouldn't be out as much money as I would for a pricey professional treatment. I did a little research first to make sure that it would work without the expensive serums the company sells to go with it and found that a homemade conductive gel made from aloe vera gel with a bit of ordinary table salt could get the job done.

So did it work? Well, you can judge for yourself. Here's the "before" picture I took of my face in January 2023 (shot in the bathroom mirror because I'm hopeless at selfies):

And here's the one I took in May, after a few months of using the device nearly every day.

It's not a dramatic difference, to be sure, but many of the before-and-afters on Real Self are just as subtle, and for treatments that cost considerably more.

Another beauty booster I considered was collagen supplements. Once again, there were some studies suggesting that taking them regularly could improve skin texture and elasticity. But there were two problems: first, most brands contain bovine collagen, which isn't vegetarian-friendly, and second, even a relatively inexpensive brand like Vital Proteins costs around $1.25 a dose—over $450 a year if you take it daily. (You can get "marine collagen" made from fish instead, which would work with my flexitarian diet, but it's even more expensive.) Searching for a vegan alternative, I happened on some research about the benefits of aloe sterols found in plain old aloe vera gel. I found an aloe vera supplement that cost only pennies a dose and started taking that daily. Once again, the effects are subtle at best, but it certainly isn't doing me any harm, and it could potentially have benefits for my blood sugar as well. So, for such a low cost, I see no real downside to keeping it up.

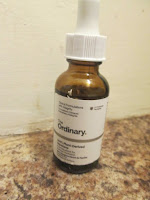
The latest addition to my low-budget beauty routine is my Treat for Today: a little bottle of plant-derived squalane oil. This stuff is derived from squalene, a natural oil produced by your skin, and Cleveland Clinic reports it's good for hydration and can "slow the signs of aging." This little bottle from The Ordinary cost me only $10, and a little of it goes a long way; just five or six drops is sufficient to moisturize my entire face and neck. I use it in the evening, after using the microcurrent device and before applying my rosacea meds, and I don't need any additional moisturizer on top of that. It hasn't miraculously firmed up my skin, but it does leave it nice and soft, and for less than ten cents a dose, it adds an affordable touch of luxury to my evening routine.

Do I truly have the skin of a rich person? Almost certainly not. But is my budget beauty routine keeping me in pretty good shape for 52? Almost certainly yes. I mean, hey, Cameron Diaz and Jennifer Garner don't look that much better without makeup than I do, and they're the same age I am now.

Monday, January 20, 2025

Thrift Week 2025, Day 4: Clothing

When you picture a rich person, how are they dressed? Designer labels from head to toe? According to the Washington Post (gift link), Town & Country magazine, and the Style Theory channel on YouTube, that's a bit wide of the mark. There certainly are well-to-do folks who dress that way, but the really rich tend to go for "quiet luxury." Their clothing doesn't bear any obvious brand labels; in the words of O. Henry, it "properly proclaim[s] its value by substance alone and not by meretricious ornamentation." You'd have to look at it very closely to notice the details that make it so expensive: the luxe fabrics, the impeccable stitching, and crucially, the flawless fit. They often have garments altered, made to measure, or even custom made to fit them exactly.

So how do you get this look for less? The Style Theory video suggests starting with off-the-rack garments from mid-tier brands like Banana Republic or J. Crew, then getting them tailored for "an additional $20 or so" to give you that custom-fit look. But several comments on that video argue for my preferred approach: starting out with thrifted garments. In the first place, secondhand clothes from those same medium-priced brands will cost less than new ones; in the second place, they'll most likely be better made, as all but the highest of high-end clothing lines have cut back on quality in recent years to churn out clothing faster and more cheaply. You can take those secondhand clothes to the tailor and end up with a custom-fitted garment for the same price as you'd have paid for a lower-quality new garment straight off the rack. (This is also a handy strategy for those of us who have trouble getting a decent fit in new clothing. Rather than hunting all over for that elusive pair of pants that fits over the hips without gapping at the waist, we can just buy one that fits in the seat and have it taken in to close the gap.)


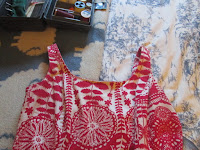
Now, while this thrift-shop-plus-tailoring approach costs a lot less than buying high-end brands to start with, that doesn't mean it's cheap. As I recently discovered, high-quality secondhand garments can actually cost significantly more than new ones from cheaper brands (though they may give you more quality for your dollar). Also, depending on what you want done, tailoring can cost quite a lot more than the $20 benchmark quoted in the Style Theory video. I was originally planning to have my Treat for Today be taking an item to the tailor: a red sundress I'd bought for $19 on eBay that was too big in the shoulders. I'd managed to make it wearable by pinning up the straps and loosely basting them into place, but the excess fabric made an awkward lump that I had to hide under a jacket. I figured for around $30 more, I could have the straps professionally adjusted and get myself a perfectly fitted dress for under $50 total. But when I got the dress to the tailor shop, they informed me that this simple alteration would actually cost $50 all by itself. (I also inquired about the cost of adding pockets to the dress, and that would have raised the price tag to $100.)

At that price, I wasn't sure this alteration would really qualify as an affordable luxury. So, before springing for it, I brought the dress back home and did a little investigation to see how hard it would be to shorten the straps myself. When I found a YouTube video showing a method that didn't require a sewing machine and looked well within my modest abilities as a seamstress, I decided to take the plunge. 

First, I turned the dress inside out, put it on, pinned the straps up to the right length, and stitched them in place. Then, I added an extra step not shown in the video: I turned the dress right side out again and tried it on to make absolutely sure I had the shoulders adjusted correctly. I knew once I took the next step—cutting the fabric—there would be no going back, so I followed the old carpenter's rule: measure twice, cut once.

Then I took the dress back off and, with some trepidation, made the fateful cut. I stitched the fragments of fabric down as shown in the video, then did the same on the other side. And when I turned it back right-side out and put it on again, lo and behold, it fit! With my rudimentary sewing skills, about a quarter's worth of thread, and about half an hour of work, I'd managed to make a perfectly respectable job of an alteration that would have cost $50 to have done professionally. My work may not look quite as neat as the tailor's would have, but you'd have to look quite closely at the straps to notice it, and how likely is anyone to do that?

So this is my actual Treat for Today: an elegant summer dress that fits me perfectly and only cost me $19 plus half an hour of work. In fact, I'm so encouraged by this success that I might just take a crack at adding those pockets myself, too. But that looks like a job that requires the use of the sewing machine, so I'll probably want to practice my machine skills a bit first. (And yes, I realize the dress looks a bit silly worn with a winter hat and long johns, but give me a break, it's January.)

Sunday, January 19, 2025

Thrift Week 2025, Day 3: Drink

It was perhaps a bit misleading for me to call the theme of this year's Thrift Week "Champagne tastes on a beer budget," because actually, I'm not that big a fan of bubbly. I'm happy to drink a toast in it to celebrate someone's wedding or graduation, but it's not a drink I'd choose for myself. I prefer alcoholic beverages (and, for that matter, nonalcoholic ones) with a bit of sweetness to them, like a nice tawny port.

However, a high-end tawny port doesn't exactly come cheap either. Some of the top-rated tawny ports at Vivino sell for over $300 a bottle, rivaling the price of Dom Perignon. So while it's not literally a champagne taste, it's one that could be equally pricey to indulge.

Fortunately, it doesn't have to be. The tawny Brian and I like best, Hardy's Whiskers Blake, sells for as little as $14 a bottle. It's not technically a port since it's not made in Portugal, but as far as I'm concerned, its dark, velvety flavor leaves nothing to be desired. Wine Spectator, which awards it an impressive 94 points out of 100, describes it as "Succulent and smooth...tremendously complex...layered with caramel, walnut, coffee, almond and orange peel flavors, long, elegant and spicy in the mouth." The highest-priced tawny on that same site, a 40-year-old Taylor Fladgate that costs $210, gets only 90 points, so I think we're missing nothing by choosing this bargain bottle.

The only problem with Whiskers Blake is that it's a little hard to find. The only store anywhere near us that carries it is in Somerville, half an hour's drive from here—a bit far to go just for a bottle of wine, particularly in weather like we're having this weekend. So instead, my Treat for Today is a tipple we picked up on our last trip to Trader Joe's: Joe-Joe's Peppermint Wine Cocktail. It's a sweet, creamy drink with a strong peppermint flavor. The bottle cost only $8.99, and a little of it goes a long way. Because it's so strong, I tend to sip it slowly, so I can easily nurse a couple of ounces over the course of an hour or two while curled up on the couch watching Critical Role or Taskmaster. And a dollop added to a cup of hot cocoa, along with a puff of coconut whipped cream, turns an everyday sip into an indulgent treat.

By the way, if your tastes actually do run toward Champagne, don't worry: there are budget-priced picks for you too. Sparkling wines from outside the Champagne region, such as Prosecco, Cava, or Cremant, are much cheaper than the real thing and just as fizzy and fabulous. Check out Gear Patrol and Reverse Wine Snob for recommendations costing as little as $8 a bottle.

Saturday, January 18, 2025

Thrift Week 2025, Day 2: Food

When you ask people to name a luxury good, many of them will probably think of traditional rich-people foods like caviar or lobster. And thirty years ago, this would indeed have been an accurate reflection of a multi-millionaire's diet. According to a 2018 story in Quartz, the 1991 Lifestyles of the Rich and Famous Cookbook featured these two luxury foods right on the cover, alongside such other delicacies as chocolate-dipped strawberries and capital-C Champagne in crystal goblets. But in the years since, the article notes, the lifestyles of the wealthy—including their food choices—have changed dramatically. Today, rich-people food is all about "wellness": cold-pressed juices, organic produce, "fermented lamb and local lichens" served at a high-end restaurant on a remote Scottish island.

Healthy whole foods like these are indeed more expensive than processed foods, especially if you're looking for local and organic produce and the green halo associated with it. (As it turns out, this halo is mostly illusory; local and organic foods have roughly the same carbon footprint as conventionally grown ones. Some reputedly earth-friendly foods, like grass-fed beef, are actually significantly worse than their cheaper equivalents.) But the cost doesn't have to be prohibitive—particularly for those lucky enough to live near a Lidl store

Over the course of our two most recent visits to Lidl, we picked up ten pounds of mandarin oranges, a cauliflower, half a pound of Brussels sprouts, three bell peppers, a pound of mushrooms, two eggplants, an avocado, a head of broccoli, a bunch of scallions, a bag of red onions, and an English cucumber, all for a grand total of $25.86. That works out to $12.93 per week—slightly less than the $13.06 per week the average low-income household (under $15,000 per year) spent on fresh fruits and veggies in 2023. (To be fair, we also bought some produce from other stores, but our total food spending was still less than half the limit set by the USDA's Thrifty Food plan.) And if you're looking for more traditional luxury foods, like caviar, Lidl carries those too—at prices that, while a bit steep, won't break the bank.

Which brings me to my Treat for Today: a half-pound of smoked salmon, purchased on our most recent Lidl trip for $8.39. Admittedly, anything that costs $16.78 a pound is still an extravagance, but as extravagances go, it's a pretty affordable one. Served on Brian's home-baked no-knead bread with sliced cucumber, accompanied by a salad of red leaf lettuce with walnuts, dried cranberries, and our favorite honey-garlic balsamic vinaigrette, it's a meal that wouldn't look out of place in the pages of a modern Lifestyles of the Rich and Famous Cookbook. And you don't have to be either rich or famous to enjoy it.

Friday, January 17, 2025

Thrift Week 2025: Champagne tastes on a beer budget

One of the biggest challenges of writing about frugality is that so many people associate the word with phrases like "tightening your belt" or "doing without." In other words, deprivation. Even people who are trying to promote a frugal lifestyle sometimes fall into this trap. Scroll through the underconsumption core videos on TikTok (quickly, before the ban goes into effect), and you'll see people showing off their broken phone cases or trash-picked dishware, provoking cries of outrage in the comment section. This kind of content may play well with folks who are already fully on board with the idea, but it doesn't make a frugal lifestyle look appealing to those who enjoy their little luxuries and don't want to give them up.

That's why I've decided to make this year's Thrift Week all about ways to live the life of a rich person on a modest budget. Each day, I'll look at one particular category of luxury spending, then explore ways to enjoy the same kind of luxury while spending much less. And I'll put my money where my mouth is by treating myself to one of the cheap luxuries on my list each day—giving myself a whole week's worth of birthday presents in the process.

One thing that rich people definitely spend money on is entertainment. The latest Consumer Expenditures Survey shows that as folks move up the income scale, they spend larger sums on entertainment—not just in dollar terms, but as a percentage of their total spending. That makes sense, since it's a non-essential expense that folks on tight budgets would be likely to cut back on. And lots of really high-end entertainment experiences, like tickets to the Super Bowl or a Taylor Swift concert, cost thousands of dollars—an expense only the well-to-do can afford to shoulder on a regular basis.

Now, according to happiness economists, this is a sound decision. Their studies show that spending a given amount of money on an experience generally produces more happiness than spending a comparable sum on material goods. Which is all well and good, but I haven't seen any studies that suggest that the more you spend on a specific experience, the more you enjoy it. Yes, a Swiftie will probably get more happiness out of paying $4,000 to go see Taylor with her mom than she would out of spending the same sum on a diamond necklace. But will she get four hundred times as much happiness out of buying those tickets as she would from paying $10 for a one-month Disney+ subscription and having a watch party with her friends? 

Based on our experience going to our first big stadium show, I kind of doubt it. We spent a total of $241 on that show, including transportation and food, and still found it to be, at best, only marginally more enjoyable than watching at home for free. Granted, we could have paid a lot more than that, and maybe if we'd shelled out $500 for VIP tickets and another $200 for parking and concessions we would have enjoyed the show more. But then again, maybe not. A lot of the things that made the show frustrating—the venue's bag policy, the long lines, the late drive home—wouldn't have been any better no matter how much we'd spent.

By contrast, we can go to the Troubadour concert series on any given Friday night and see a good show—possibly even a great one—for only $15. And that's exactly what my Treat for Today was: a $15 ticket to see Cheryl Wheeler at the Troubadour. (Brian didn't buy a ticket, but he volunteered to bake, so he got his admission for the cost of a $3 pan of home-baked brownies. On top of that, by volunteering tonight, he earned a "tick" that he can use to get in free for a future show. Most of the time, when we go to the Troubadour, Brian bakes and then uses one of his previously earned "ticks" for me, so we both get to see the show for that same $3 worth of brownie ingredients—a truly unbeatable deal. But we knew tonight's show was likely to be a sellout, so I had to pony up for a real ticket to be sure of getting a seat.) Cheryl was a trip as always, and the opener, Kenny White, turned out to be an unexpected treat who would have been worth the price of admission all by himself.

Granted, this particular entertainment bargain only works if you happen to be a folk music fan living in New Jersey. (And if you are in that category, you should definitely take advantage of it.) But the Troubadour is just one of many smaller, lesser-known venues across the country that are putting on terrific shows at reasonable prices, often featuring artists you've never heard of but should have. Try looking for listings of events in your local paper, if you still have one, or on your city or county website. Check out nearby colleges and even high schools. Check your local library. You may be surprised at how many live shows you can attend for cheap, or even free. They may not be as exciting as Taylor, but they deliver a lot more bang per buck.

Sunday, July 21, 2024

Make or buy: personal care products

I'm always pleased when I can figure out how to replace one of the products in my personal care routine with a homemade alternative. It's not just that these homemade products cost less than store-bought alternatives; they're also more sustainable. Since I decide what goes into them, I can make them with nontoxic, low-impact, cruelty-free ingredients, and they produce no packaging waste whatsoever. As an added perk, I know they can never be discontinued—something that invariably seems to happen to any commercial product I get really attached to.

But much as I like to make my own products, I don't do it for everything. It's possible to find recipes online for almost any kind of product (with one exception that I'll get into later), but some of them are so much hassle that I can't imagine the savings would be worth it. Others aren't that hard to make, but they just don't work very well. And a few DIY recipes call for ingredients so costly or hard to find that once you add up all the costs, including shipping, it's actually more expensive to make a product than to buy it.

I've written several blog entries over the years about my successes and failures with homemade personal care products, but I've never gathered them all together into one place. So, for this entry, I thought I'd offer a complete rundown of which products I do and don't make for myself, and why. And since Brian and I share a lot of the same products, I figured I might as well cover his choices as well.

So, starting with the basics:

Soap: Buy

For showering and washing hands, we use Trader Joe's honey-oatmeal bar soap. It costs $1.99 for two four-ounce bars, and the packaging is minimal: just a thin plastic wrapper. And while it does contain some palm oil, I've discovered that this ingredient isn't actually so harmful as it's made out to be. The reason it's used in so many products is that oil palms are a lot more productive than other oilseed crops; if we replaced all the palm oil we use with alternatives like coconut or soy, we'd need a lot more land to grow those crops, possibly resulting in even more deforestation. So making my own soap from a recipe like this one, which calls for a mixture of olive and coconut oil, wouldn't necessarily be greener. 

What it would definitely be is a lot more work. Not only would it involve working with lye, which is highly hazardous stuff, it would also require a bunch of special equipment—including molds, a soap cutter, a candy thermometer, an immersion blender, and a set of spatulas—all devoted exclusively to soap-making use and never used for foods, because lye. And how much could it possibly save me? According to this soap-making site, the ingredients alone come to roughly $1.22 per bar, which is more than we're paying now for the TJ's stuff. The only possible advantage would be to avoid a couple of grams of plastic waste, and when you weigh that against all the stuff I'd have to buy, I find it hard to believe it would be a more sustainable choice.

Face wash: Make

Unlike soap, face wash is incredibly easy to make from scratch. In fact, I just whipped up a batch and the entire process, from getting out all the ingredients to cleaning up and putting everything away, took 8 minutes—less time than it would take to go to the store and buy some. My recipe calls for only three ingredients, all of them easy to find in stores: aloe vera gel, honey, and olive oil. A half-cup batch of it costs me about $1.50 and lasts at least a month. And it leaves my skin smoother and softer than any commercial face wash I've ever tried. Making my own is an absolute no-brainer.

Moisturizer: Buy and make

During the day, I use a moisturizer that contains sunscreen. The way I see it, if I didn't do this I'd just have to buy a separate facial sunscreen anyway, and this way is less work and less irritating to my skin. I also don't consider either sunscreen or SPF moisturizer to be something I can reasonably make myself. Although there are recipes for homemade sunscreen online, experts generally say you shouldn't trust them. So I just use e.l.f. Holy Hydration SPF 30, which I can buy at the local drugstore. It costs around $13 for a little pot that lasts me a couple of months, and it works well for my often finicky skin. I just have to keep my fingers crossed that they'll never discontinue it.

At night, however, sun protection isn't a concern. I've tried various night creams containing different ingredients, including some that claimed to miraculously halt the signs of aging (spoiler alert: they don't). As far as I can tell, none of them works any better than straight aloe vera gel, which costs me around $5 for a 16-ounce bottle at Target. So that's what I use now, on top of my rosacea meds. It's not a miracle cream, but it does keep my skin moist, which is all you can really expect a moisturizer to do.

Shampoo: Buy

I don't generally use shampoo on my dry, curly hair, but Brian uses it on his long, flowing mane. He recently traded in his store-brand shampoo from Target, which cost around 4 cents per washing, for a low-waste bar shampoo from Trader Joe's that's even cheaper: about 3.5 cents per washing. There's no bottle to throw away, only a cute little cardboard box that can be reused. And it's much easier to use up every drop than it is with the liquid shampoo: he simply presses the last flimsy sliver of the old shampoo bar against the new one, the same way we do with our bar soap.

Now, it's theoretically possible that we could find a homemade shampoo that would cost even less and produce even less waste than this bar shampoo. Unlike me, Brian has never tried (and failed) to wash his hair with plain baking soda. But since he already has a shampoo that's quite cheap, produces little waste, and agrees with his hair and his scalp, I don't see replacing it as a high priority.

[Edit, 12/14/24: Sadly, the last time we tried to buy a shampoo bar at Trader Joe's, it was no longer available. A friend who works there confirmed that it was not just sold out but fully discontinued. Fortunately, we were able to find another brand, Love Beauty and Planet, that's costs $4.99 at Target for a four-ounce bar. That's a little less convenient and a little more expensive, but it's still only about 4.4 cents per washing, only about 10 percent more than the store-brand shampoo he used to use. That's a small enough price difference that we're willing to pay it for the sake of discarding fewer plastic bottles. However, Brian hasn't actually tried the new bar yet because he's still finishing up his last bar of the Trader Joe's stuff, so we don't know how well it will work for him.]

Conditioner: Buy

Although I don't use shampoo, I use quite a lot of conditioner. In fact, it's pretty much my only styling product. After showering, I let my hair dry until it's just damp, then comb in some conditioner with my fingers. A quick finger-fluff, and I'm good for the day. 

Since conditioner is such a major part of my beauty routine, I'd love to be able to make my own. Over the years I have attempted several different recipes, from extremely simple (apple cider vinegar, pure olive oil, canned coconut milk) to more complex concoctions (coconut oil with shea butter and honey, coconut oil with distilled water and guar gum). But sadly, none of them gave me good results for more than one day. 

So, for now, I'm sticking with Suave Almond and Shea Butter, which costs about $5.50 for a 28-ounce bottle. I've never timed how long this bottle lasts me, but it's at least a couple of months, which means it costs around 9 cents per use at most. As far as I'm concerned, it's not worth trying any more DIY recipes unless they can meet or beat that price.

Hair tonic: Make

Conditioner isn't the only product I use on my hair. As menopause descended upon me, I noticed my hair was growing decidedly thinner, and I considered shelling out for a product with Rogaine. But given that it costs around $55 for a 3-month supply and you have to keep using it forever, I wasn't sure it was worth it. Instead, I decided to try another treatment I'd read about online: rosemary essential oil. At least one study suggested it worked just as well as Rogaine and caused less scalp irritation. And at just $8 for a 10-mL bottle, it would certainly cost less to try.

Unfortunately, the articles I found online about rosemary oil were a little bit vague about how to use it. They said to dilute it with a carrier oil and rub it into the scalp a few times a week, but they didn't specify how strong to make the solution and they disagreed on how long to leave it on. (The Cleveland Clinic suggests applying it at night and washing it out in the morning, while Elle says leaving it on that long can cause irritation.) So, taking a wild guess, I mixed ten drops of rosemary oil into two tablespoons of coconut oil and started applying that every evening at bedtime.

I've been doing this for about six months, and it does appear to be working. There's less of my scalp visible and more short hairs growing in on the top and at the temples. And I still have most of that initial $8 bottle left. On the down side, it does seem to be causing a bit of scalp irritation, so I've backed off from using it every night to every two or three nights. That means my $8 investment will last me even longer, making it decidedly a better value than Rogaine.

Toothpaste: Buy

Toothpaste, even more than sunscreen, is not really possible to make at home. Sun-blocking ingredients such as zinc oxide are at least possible to buy over the counter, even if they're hard to distribute perfectly throughout a homemade mixture. But cavity-fighting ingredients such as fluoride are not. Thus, although there are recipes for homemade toothpaste online, I would never consider using one. 

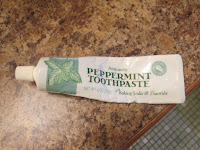
We've been relying for years on Trader Joe's toothpaste, which is one of very few brands that (a) is cruelty-free, (b) contains fluoride, and (c) does not contain sodium lauryl sulfate (SLS), which tends to give Brian canker sores. And, until recently, it was also available at any Trader Joe's store for a very affordable price: just $3 for a 6-ounce tube. 

But about a month ago, we went looking for a new tube of toothpaste at Trader Joe's and couldn't find any. We thought it was just temporarily out of stock, but a friend of ours who works there said that the store has actually had problems with its supplier and needs to find a new one. Unless it finds one before our current tube of toothpaste runs out, we will have to find a different brand. 

We have a couple of sample-size tubes of SLS-free Sensodyne that we got from our dentist, and we can use those as a stopgap measure, but I don't want to buy it because it's not cruelty-free. So we might end up having to switch to a pricey, hard-to-find brand that has to be specially ordered. Needless to say, I am not happy about this, but I'm not unhappy enough to risk my teeth on a homemade toothpaste.

Deodorant: Make and buy

I've always found it frustrating to buy deodorant. It's very difficult to find a brand that's cruelty-free and actually works. And even the few brands that meet these criteria come in plastic tubes that can't be recycled and that inevitably make it impossible to use up every bit of the product.

I've tried many homemade deodorants over the years, most of which either didn't work (baking soda, vinegar, rubbing alcohol, hydrogen peroxide) or had unfortunate side effects (milk of magnesia). Eventually I figured that I could get pretty decent results with alcohol-based hand sanitizer. During the pandemic, when hand sanitizer became incredibly difficult to find in stores, I learned to make a homemade version from rubbing alcohol and my trusty, multipurpose aloe vera gel. But even that wasn't a truly waste-free solution. 

So, earlier this year, I switched to a simple DIY deodorant made from baking soda, cornstarch, and coconut oil. It works about as well as the hand sanitizer, costs even less, and produces no waste at all. Its only fault is a tendency to separate a bit, but I can easily remedy that by stirring it up with a toothpick before applying it.

Brian has also had problems over the years with commercial deodorant. He dislikes most of the scents that it comes in and finds them irritating to his skin. For a while he tried just going without it altogether, but that proved not to be satisfactory on days when he was riding his bike to work. So for now, he just switches off between the two brands he can find that come in a fragrance-free version (Speed Stick and Arm & Hammer), stocking up on them whenever he can find a good price. 

However, I've suggested that he should also give my new baking-soda mixture a try. If it works for him as well as it does for me, maybe he can also strike this commercial product from his shopping list. Watch this space for updates.

[UPDATE, 9/30/24: Brian has found that the new baking-soda deodorant does indeed work reasonably well for him. He has now finished up the last of his commercial deodorant, and we won't be needing to buy any more.]

Perfume: Make

For most of my life, I wasn't in the habit of wearing perfume regularly. I'd tried a few different brands over the years, but I never found one that really felt like my own signature scent. But early in the pandemic, feeling in need of a mood booster, I decided to try experimenting with creating my own. I sent away for a few bottles of essential oil and a little roller bottle and experimented until I found a ratio I liked: 20 drops of sandalwood, 10 of vanilla, and 5 of cinnamon, then fill the bottle up with carrier oil. (At first, not knowing if I would like the results, I used plain canola oil out of the pantry, but eventually I invested $4 in a little bottle of sweet almond oil from the drugstore.) 

I paid $4 each for the essential oils, and the supplier threw in an extra bottle of the sandalwood for free, so that initial supply has lasted me through the entire four years since. So, all told, I've paid $16 for four years' worth of perfume—a price I doubt any commercial fragrance could beat. And it's a signature scent that is truly my own.

Cosmetics: Buy

There are only two cosmetics I use at all regularly: concealer to hide any stray pimples and white nail pencil under my fingernails. I use the pencil not so much to whiten the space under nails as to create a barrier there so dirt doesn't accumulate. Otherwise, my fingernails always seem to get dirty by the end of the day, even if I haven't touched dirt anywhere.

I'd be happy to make either of these products from scratch—particularly the nail pencil, which is increasingly difficult to find in stores—but I've never found a good recipe for either one. Recipes for DIY concealer always call for too many hard-to-find ingredients, like "non-nano titanium dioxide" and "zeolite ultrafine clay," and I've never found any recipe at all for the nail pencil. When I search for "homemade nail pencil," I find lists of tips on ways to whiten my nails with baking soda or lemon juice, which isn't what I'm trying to do. And when I search for "how to keep dirt out from under nails," I find tips on how to clean the dirt out after it accumulates, which isn't what I want either. I've experimented with substitutes like white crayon, which isn't exactly homemade but would at least be easier to find in stores, but it doesn't seem to work. 

Fortunately, neither of these store-bought products is all that pricey. I think I paid $4 for my last tube of Wet N Wild concealer, which has lasted me quite a while, and $10 for a set of three nail pencils. So my beauty routine isn't exactly breaking the bank.

Conductive gel: Make

My one major concession to vanity over the past couple of years was shelling out $150 for a mini microcurrent device. Every evening, I spend just a couple of minutes running this little gadget over my neck and jawline in the hope that it will help me keep my over-50 skin firmer. Does it work? Hard to say for sure, but at least my skin doesn't seem to be getting any saggier since I started using it, and that's enough for me to keep at it. 

However, I would not be willing to stick with this routine if I had to shell out $59 an ounce for the fancy "conductive serum" that the manufacturer recommends. Before buying the device, I searched online to see if there were cheaper alternatives, and many people said all you really needed was plain aloe vera gel with a pinch of table salt. That's what I currently (har!) use, and I can't detect any difference between it and the (tiny) sample of pricey serum that came with the device.


And that's it for my personal care routine (and Brian's). It's not as complicated, and certainly not as expensive, as many people's, but I'm still happy to learn about ways I could make it even simpler and cheaper. So if you happen to know of any fabulous DIY recipes for the few products I'm currently buying, please share them in the comments.

Tuesday, April 10, 2018

Money Crashers: How Feeling Poor Hurts You – and How to Stop It

One of the keys to living a frugal life is to avoid feeling deprived. Many people seem to think that living frugally is all about "doing without," but to me, the whole point of frugality is to avoid wasting money on the things you don't really care about, so you can have more to spend on—or save up for—the things you do. A frugal life, lived right, should make you feel rich, not poor.

Now I've learned just how important this attitude really is. Apparently, there's a wealth of research out there to show that feeling poor makes you less satisfied with your life, damages your mental and physical health, and leads to risky financial decisions that can make you actually poor if you weren't before.

My latest Money Crashers article is all about the risks of feeling poor and how to counteract them. I discuss what can make you feel poor—regardless of your actual income—and the ways feeling poor can hurt you financially, emotionally, and physically. Then I discuss ways to break out of this trap by: 
  1. changing your perspective to focus on how well-off you are already;
  2. taking steps to strengthen your finances so you'll know you'll have more in the future; and
  3. making yourself feel rich by indulging yourself with cheap luxuries and giving money to charity.
Learn more about these techniques here: How Feeling Poor Hurts You – and How to Stop It

Monday, March 19, 2018

Money Crashers: Avoid Frugal Fatigue with Cheap Luxuries

I've always made a point of stressing, on this site and off it, that frugality isn't the same thing as deprivation. Ideally, in fact, living a frugal life means you have more money and time to spend on the things that really matter to you. As I put it in this 2010 entry, "we really can have our cake and eat it too, as long as we're willing to bake it ourselves."

The problem is that a lot of people don't really know how to cut back without going to extremes. They'll try to trim their budgets down to the absolute bare bones, and then after a few weeks of feeling deprived, they snap and go on a spending binge. Then follows self-recrimination, a vow to turn over a new leaf, another period of self-denial...and the cycle repeats itself.

The best way to avoid this problem—sometimes known as "frugal fatigue"—is to make sure you allow yourself to indulge a little while you're saving money. There are plenty of treats that you can enjoy for very little money or even no money at all, such as fluffy TV shows, hand-picked flowers, homemade coffee treats, cozy bedding, library books, online puzzles, and other forms of cheap entertainment. Little luxuries like these make a frugal lifestyle a joyful and abundant one.

This is the theme of my latest Money Crashers article. I outline the causes and symptoms of frugal fatigue and then offer a list of cheap luxuries that can alleviate it, such as fresh flowers, fancy toiletries, home-cooked gourmet meals, and even the extra-plushy toilet paper. I give prices for each item on the list and discuss ways of lowering the cost still more, so you can stretch your "mad money" as far as possible.

Read all about these luxuries that won't break the bank here:

Wednesday, April 15, 2015

Savings Challenge, Week 7: Saving on shaving

I seem to be going through a long dry spell with the Bankrate 52-Week Savings Challenge. Three weeks ago, it was making your own dog food, and we don't have a dog; two weeks ago, it was the financial fast, an idea I'd already considered and deemed unproductive; and last week, it was the spending journal, which I already do routinely and thus couldn't try out for the first time. And now this week, Bankrate reporting Mark Hamrick leads off with "This will be a rare tip aimed at men, so apologies to the ladies," before presenting his recipe for homemade shaving oil.

Now, simply having a challenge that's "aimed at men" wouldn't necessarily make it useless for me, since I happen to be married to one; I could simply make up a batch of the homemade shaving oil for him. The real problem is that, until I saw this challenge today, I'd never even heard of shaving oil, and neither had Brian. Apparently it's something you put on before your shaving cream to get a closer shave with less irritation. But these benefits come with a hefty price tag: according to the article, shaving oil can cost $10 or more per ounce, and that's in addition to whatever you already spend on shaving cream.

Now, if you are already in the habit of buying shaving oil, then making your own could indeed save you a tidy sum of money. Hamrick's recipe uses about $11 worth of basic ingredients (grape seed oil as a base, castor oil as a thickener, and eucalyptus oil for fragrance) to produce around $150 worth of shaving oil. Hamrick estimates that by using it, he's saving at least $200 per year. But the thing is, this implies that he used to be spending upwards of $200 per year on shaving oil. Brian, by contrast, doesn't currently spend one red cent on shaving oil, and neither does any other man I know. So it's hard to see how this tip can really be a money-saver for most men. It might still be worthwhile as a cheap luxury, but adding a luxury item—even a cheap one—to your existing budget is never going to save you money.

So, rather than spending $11 on ingredients to make up a batch of a product we don't currently use, I'm instead going to discuss a few tips of my own that Brian and I actually do use to cut (ha ha) the cost of shaving:
  • Clean the blade. I use a cartridge-type razor for shaving my legs, and over time, it gets clogged up with hair, making it much less effective. So I always rinse it carefully after each use, and that helps me go longer on a single blade.
  • Reduce rust. I simply dry the blade carefully with a towel to keep it from rusting, but other folks use more extreme remedies, like coating the blade in Vaseline (though I'm not sure how you do that without cutting yourself) or storing it in a cup of oil. Which, come to think of it, would also keep it nicely lubricated, thus serving essentially the same function as a shaving oil.
  • Strop the blade. Stropping a blade, as Wikipedia explains, is not exactly the same thing as sharpening it; it doesn't remove chipped or dulled edges, but instead realigns the edge without removing any material. However, it does serve much the same purpose as sharpening: to give you a closer shave with the same old blade. Various sources around the Web recommend stropping your blade with a leather belt, a leather-soled shoe, and even a pair of blue jeans, but by far the easiest method I've seen is to strop the blade against the inside of your own forearm. After all, you always have it handy when you're getting ready to shave, so why climb out of the shower to go get a belt or a piece of denim?
  • Skip the shaving cream. I shave in the shower, so i just use my regular body wash. I have to wash with it anyway, so I may as well shave it off my legs instead of just rinsing it off, right? I once tried some shaving cream instead (a visiting friend left a can behind) to see if it gave me an appreciably closer shave, and it didn't, so I see no reason to squeeze one more container into the shower bin.
  • Grow a beard. This is Brian's preferred method, though it has less to do with saving money and more to do with (1) how it looks and (2) not having to bother with shaving every day. Unfortunately, he isn't one of those fortunate guys whose beard grows in precisely down to the chin and leaves the neck perfectly clean, so he still ends up having to shave his neck—but most of the time, he just cuts the hair down to short stubble, using his beard trimmer with the guard off. Only when he needs to look extra snazzy does he get out a proper razor—which is to say, borrow mine—and shave completely smooth.
So how much do we actually save on shaving this way? Well, the only thing I actually pay for is my razor cartridges, which cost about a dollar apiece, and the pack I'm using now has lasted me for—well, I'm not exactly sure, because I can't remember when I bought it. At least a year, anyway.

As for Brian, he just uses an electric beard trimmer. As I mentioned last week, the rechargeable, cordless models he used to buy always seemed to die after a year or two, their batteries gradually weakening until they could no longer hold enough charge to last through a trim (and there doesn't seem to be any way to replace the battery once this happens). So this time, we decided to invest in a corded model. We couldn't find any reviews for beard trimmers at ConsumerSearch, my usual go-to site, but this report at the Sweethome (a sister site to the technical site the Wirecutter) recommended the Wahl Peanut, which it says is "tough enough to survive a few years at a time in a high-volume shop" and should provide "many years of service" for individual users at home. So we're hoping this $39 investment (which was actually $23.25 out of pocket, because we cashed in some credit card rewards) will be good for five to ten years at least.

So, assuming Brian's trimmer lasts at least five years, and my 8-packs of razor cartridges are lasting me at least one year, that means the annual cost of shaving is, at most, $12.65 for the two of us. Which, coincidentally, is about what we'd have to spend on the ingredients to try out a batch of that "money-saving" homemade shaving oil. So even if those ingredients are good for a whole year's supply of the stuff, adding it to our shaving routine would roughly double its annual cost. Thanks, but no thanks.

[EDIT, 4/26/15: Since writing this article, I decided to try swiping my razor, after I've rinsed and dried it, through the coconut oil I keep in the shower for my skin. I was only thinking that it might help a bit with preventing rust, but I've noticed since I started doing it that I seem to get an appreciably closer shave than I used to, as well. So perhaps there is something to this shaving oil idea, after all. But apparently, you don't need to buy $13 worth of ingredients to get the benefits.]

Friday, April 10, 2015

Household Hacks: DIY cat-safe vase

One big difference I've discovered between having two young, active cats and having one elderly, sedate cat is that our new kitties get into everything. A case in point: the vase of flowers we usually have on our kitchen table. We used to cut flowers from our garden throughout the year—roses, forsythia, phlox, whatever happened to be in bloom—and put them on the table in a nice glass goblet we'd picked up from a yard sale. This was one of my favorite cheap luxuries, and the fact that they came out of our own garden just added an extra little thrill. And since Amélie was a timid cat who never cared much to jump up on the kitchen table, the flowers were always perfectly safe.

When we brought home Winnie and Gwen, however, we quickly discovered that top-heavy vases and adventurous kitties do not make a good combination. There were no actual flowers in the goblet at the time; instead, I'd made a tasteful arrangement of bare twigs to tide us over the bleak period between Christmas greenery and the first blossoms of April. Unfortunately, these twigs apparently looked just like cat toys to the furballs, because we kept finding them—or pieces of them—scattered around the house. I thought perhaps it was just the twigs that were too tempting for them, so I removed them, leaving the empty goblet to fill with flowers as soon as there were any to pick—only to be awakened one morning by the "thunk" of the goblet itself toppling over.

At this point, I concluded that in order for flowers to coexist with cats, they'd have to be in a more bottom-heavy container that would be hard for them to knock over. So the next thing I tried was a few wildflowers in a simple mason jar. The jar itself stayed put, but the flowers didn't; we found them the next morning pulled halfway out of the jar, their petals scattered across the table. At this point, I began to suspect that any flowers put anywhere the cats could reach them were liable to be treated as kitty snacks.

This was a big problem, because when cats nosh on flowers, the flowers aren't necessarily the only victims. There's a whole long list of flowers that are toxic to cats, and it turns out that many of the perennial flowers in my new wildflower mix are on that list. So after I went to all the trouble of planting a flowerbed out front to supply us with cutting flowers all summer long, it looked like I wouldn't be able to actually bring any of the flowers inside—or any other flower, for that matter, without carefully checking it against the ASPCA's plant database first. And since there are wildflowers in our yard that I don't actually know the names of, that means that I'd probably have to give up on the idea of fresh flowers for the table altogether, except during the brief period when our roses (one of the few flowers known to be cat-safe) are in bloom.

Faced with the choice between possibly poisoning my cats or giving up on bringing nature into my home, I started searching frantically for a third option. A search for "cat safe flower vase" led to a thread on Apartment Therapy with several suggestions:
  1. Get a heavy-bottomed vase the cat can't tip over. (Good, but not good enough, since I also want to keep the cats from eating the flowers.)
  2. Train the cats to stay off the table by squirting them with a water pistol whenever they hop up there. (Since our cats routinely hop up onto the sink and stick their heads in under the running water, I suspect this wouldn't be much of a deterrent for them.)
  3. Get them some "cat grass" to munch on, so they'll leave other plants alone. (I don't know whether they'd like the cat grass or not, but I'm pretty sure they will never leave anything alone that's within their reach.)
  4. Buy only flowers that are nontoxic for cats. (That might be a reasonable idea if I were buying flowers, but I'd like to be able to harvest the ones I already have.)
For us, the most useful idea on the list seemed to be to keep the flowers in some sort of covered container, like a terrarium, so the cats couldn't reach them. However, the one specifically suggested on the site, this IKEA mini greenhouse, looked way too big for our kitchen table. So I started keeping my eyes open, while shopping and walking around town, for something else that might be more reasonable. The spring window display at our local Ten Thousand Villages had a very nice-looking "Secret Garden Terrarium" that was a reasonable size, but the $40 price tag was a little less reasonable. We attempted to cobble together a covered vase from a small canning jar with a larger one inverted over the top, but the patterns on the outside of the glass—together with the fog of condensation that formed on the inside—made it nearly impossible to see the flowers, which sort of defeated the purpose of having them on the table at all. What we really needed, I thought, was something like a hurricane lantern—a glass globe with a narrow chimney at the top, so it provides ventilation but isn't accessible to little prying paws. But where, I wondered, would we find something like that?

Well, as it turns out, at our local thrift shop. I popped in there today and, browsing among the racks of miscellaneous glassware, I discovered not one but two vaguely bell-shaped glass contraptions, open at the top and bottom. I assume them were originally part of some sort of candelabrum, since they both had drips of candle wax on them, but they looked big enough to fit over the top of a small drinking glass, which could hold a smallish bunch of flowers—so they'd be visible but protected beneath the glass shield. I thought we might have a glass at home that was small enough, but just in case, I checked the rest of the glassware rack and picked out one that would definitely fit under the dome. Two dollars for the pair, and I was off home to experiment.

As soon as I got home, I picked a small nosegay of wildflowers—some purple deadnettles and some little white critters that I don't know the name of—and popped them into the small glass with some water. Then I put the dome over the top and confirmed that it meets my requirements in one way, at least: it's actually possible to see the flowers under the glass. What's still unclear is just how well this set-up will protect the flowers from our inquisitive felines. Early signs are good: this afternoon, Winnie hopped right up on the table next to the improvised vase, and she neither knocked it over nor attempted to extract the flowers from under it. But the real test will come tonight, as we sleep, while the cats roam and explore at their will. If we get up tomorrow morning and find the whole apparatus intact, flowers and all, then I'm willing to declare my little makeshift cat-safe vase a success.

Thursday, March 12, 2015

Dance, dance, the changing of the sheets

As you know, I like to mark the changing of the seasons with all sorts of rituals—some traditional, some of my own invention. I celebrate Christmas/Hanukkah/Yule in the winter and Easter/Passover/Ostara in the spring, but I also mark my calendar for made-up events like First Washday, First Picking, and my whole series of Gardeners' Holidays. Just recently, however, I realized that I have another seasonal ritual that I've never actually bothered to commemorate: the changing of the sheets.

One of our favorite affordable luxuries, during the winter months, is a set of cozy fleece sheets, so warm and thick they feel more like blankets. They're a little pricier than flannel sheets, but they're well worth it on a cold winter night. Flannel will do a reasonably good job of holding in your body heat, but when you first slide between the sheets, their smooth surface still feels cold to the touch, and it takes several shivery minutes for it to feel really warm. Fleece sheets, by contrast, have a soft, plush surface that feels warm the minute you nestle into it. So these sheets grace our bed pretty much full-time from late December through early March, with only an occasional break of a few hours for a quick spin through the washer and dryer.

A week ago, with the thermometer at 20 degrees and a foot of fresh snow on the ground, these sheets were most welcome. But now, that snow has mostly melted away, and the daytime highs are creeping past fifty and even edging up toward sixty. In the space of a few days, winter has given way to early spring, and the fleece sheets now feel sweaty rather than cozy. So it's time to toss them in the wash and downgrade to flannel, which will still keep out the chill but won't overheat us. Admittedly, it's a bit ironic for the bed to be sporting sheets with a snowflake design when the snowy season has just ended, but since we can't actually see the pattern when we're asleep, it's not nearly as important as having sheets that are a comfy, mid-grade weight.

Around the start of May, when the chill has faded from the air and not only snow but frost has vanished from the ground, these flannel sheets will, in their turn, give way to our regular, summer-weight percale sheets. We've got several sets of those, so we'll actually be able to change them throughout the summer, which is a lot more convenient than rushing to strip the bed first thing in the morning and get the sheets washed and hung so they'll be dry by bedtime. But once summer fades into fall, the flannel sheets will reappear once again, to grace the bed with their snowflake pattern until the actual snow flies and it's time for the fleece to return.

So there it is: the whole cycle of the seasons, outlined in shifting swaths of fabric. It may not be as poetic an image as the great Wheel of the Year or the transformation of a tree from bare branches to blossoms to green leaves to colored leaves and back to bare again, but it's the same story, told through a more homely medium. Winter to summer to winter, a cycle with no beginning and no end, but with stages along the way for us to mark and murmur, "How time flies."

Tuesday, June 24, 2014

My own private Starbucks, summer edition

Last winter, as you may recall, my sister's birthday gift to me was a moka pot—a little miniature percolator that does the job of an espresso machine and takes up a lot less room. I tried it out at the time and found that, with the help of some microwave-steamed milk, it could make lattes and mochas as good as anything Starbucks had to offer. I had to wait for summer, however, to test it out on the frozen-coffee treat that really keeps me coming back to the mermaid: the Frappuccino. Well, summer is here, and I am pleased to report that, after one or two false starts, I've managed to produce a homemade frappe that is, if not quite identical to a Frappuccino, at least a reasonably tasty substitute.

My first attempt at a homemade Frappuccino wasn't a rousing success. I started with this recipe from Squawkfox.com, but I couldn't find the xanthan gum that the blogger said was the "secret ingredient" that keeps the blended brew from separating. Fortunately, the recipe said that a teaspoon of pectin would also do the job, and I was able to find that at the grocery store with canning supplies. However, when I tried it in my moka-Frapp, I found that it imparted a strange, sour taste. Granted, this may have been my fault for disregarding the First Rule of Recipes: the first time you try a new one, follow it exactly. I figured that this recipe was basic enough, and similar enough to things I'd made before, that I could get away with winging it a bit: substituting sweetener for sugar, throwing in a spoonful of chocolate syrup, and just tossing in a generous dash of pectin rather than measuring out an exact teaspoon. So perhaps if I'd been more precise in my measurements, it would have come out fine. Nonetheless, I decided it wasn't worth risking a second attempt, especially since as far as I could tell, the pectin did nothing to keep the drink from separating. (The recipe makes enough for two large glasses, and while the half I drank right away stayed well-blended, the remainder left over in the blender had completely lost its cohesion by the time I came back to it.)

So the next time around, I decided to halve the recipe, so there wouldn't be any leftovers to deal with. This meant that I only needed half a pot of espresso, since my moka pot makes two shots' worth, so I just measured out the contents (which came to about 6 ounces), poured half into the blender, and saved the other half in a jar for future use. Then I added my other ingredients: half a cup of skim milk, two packets of aspartame sweetener, a tablespoon of dark chocolate syrup, and a cup of ice cubes. I blended that on low speed until I couldn't hear the ice cubes rattling around anymore, then kicked it up to the "smoothie" setting to get everything good and frothy.

Here's my homemade moka-Frapp in my new reusable tumbler, picked up on sale so I can take my new frosty treats with me on the go. As you can see, it fills the tumbler nearly to the top, and a rough measurement shows that this means the volume of the drink is roughly a pint—the same size as a Starbucks Grande. However, a Grande-size mocha Frappuccino costs about four dollars and has 400 calories (including 15 grams of fat, and 60 grams of sugar.) My homemade moka-Frapp, by contrast, costs a mere 42 cents: 20 cents for the coffee, 10 for the milk, 8 for the chocolate syrup, and 4 for the sweetener. It weighs in at a dainty 90 calories (40 for the milk and 50 for the chocolate syrup), with no fat and only 15 grams of sugar. Even if I go nuts and pile a couple of tablespoons of whipped cream on top, that only adds 5 cents to the price tag and 20 calories to the calorie count. Oh, and mine is made with Utz-certified Fair Trade coffee, thank you very much.

So does this mean I'll be kicking the coffeehouse habit entirely? Well, probably not. For one thing, the urge for a coffee treat sometimes strikes without warning while I'm away from home, and for another, there's something to be said for the coffeehouse atmosphere. There's just something very relaxing about those simple yet tasteful furnishings, the heady aroma of coffee and exotic syrups, the sound of some trendy new album playing on the stereo, and all those Yuppies and students staring intently at their cell phone screens. But when what I really want is the Frapp and nothing but the Frapp, it's nice to know that I can just whip up my own, take it to the nearest park, pull out a home-printed crossword puzzle, and take less of a toll on both my wallet and my waistline.