Wednesday, December 28, 2016

Money Crashers: Should I Repair or Replace a Broken Appliance?

One of the basic premises of the ecofrugal life is that it's usually better to repair an item, if you can, than to replace it. Repairing is usually cheaper; it prevents waste; and it saves the energy and other resource costs of making a replacement item. That's an ecofrugal win-win-win.

However, every rule has its exceptions. Sometimes repairing an item isn't possible, or is so difficult as to make it impractical. Sometimes it actually costs more than replacing. Sometimes it's cheaper, but only just, and the additional years of life you'd get out of the repaired item aren't enough to justify the cost. And sometimes keeping your old item can actually cost you money, as in the case of an old appliance that uses vastly more energy than a newer model. In a case like that, replacing would actually be both cheaper and greener in the long run.

Back in 2011, I did a whole series of posts exploring this "Repair or replace?" dilemma. It started with the case of Brian's old bike, which needed a moderately pricey repair to keep it running, and how that compared to my old computer, which I'd chosen to replace when an upgrade failed to get it up to a reasonable working speed. I went on to examine other specific cases—a damaged pair of boots, an old coat in need of alteration—and concluded with a set of general rules I'd found for deciding when repair is a better option than replacement, and vice versa. (This whole series is now marked with the label "repair or replace," so you can view all the posts on one page if you like.)

Recently, I decided to sum up my findings from all those posts with my readers in a single article on Money Crashers. It compares the benefits of repairing and replacing in detail and then outlines a series of questions to help you decide which is the better option in any given case. In brief, the questions are:
  1. How hard is it to repair?
  2. How do the costs compare?
  3. How worn out is it?
  4. Is it costing you money?
  5. Will its value increase?
  6. What's the disposal cost?
  7. Do you love it?
This, in short, is the article I wish I'd had handy for reference back when we first started having trouble with Brian's bike five years ago. If you have anything broken lying around your house and you just can't decide whether it's worth repairing, perhaps this article can make your decision about repairing it a little easier than ours was back then.

Should I Repair or Replace a Broken Appliance? – Here’s How to Decide

Wednesday, December 21, 2016

Gardeners' Holidays 2016: The Changing of the Garden

As you can see from today's cute Google Doodle, today is the start of winter, and thus time for the final Gardeners' Holiday of the year. This year at our house, The Changing of the Garden is extending beyond the vegetable garden and into the front yard. As you know, we've had very uneven results trying to grow flowers in front of the house. They looked great to start with, but eventually they all flopped over in a strong storm, and they never really recovered. Our first attempt to tame the unruly flowers with of stakes and string proved unsuccessful, and our second attempt this spring was doomed from the start because by that point, the bachelor's buttons had completely taken over, crowding out everything else. I finally got fed up and decided to yank them all out, and once they were gone, we discovered there was nothing left but a few scraggly daisies and poppies. It looked less like a bed of wildflowers and more like an abandoned plot of land in which a few wildflowers had managed to pop up.

So we decided that this fall, we'd just pull everything out and reseed the bed, this time with an all-perennial mix that doesn't have any of those pesky cornflowers in it. However, this plan was complicated by the installation of our new front stoop. We didn't want to put the seeds in before the stoop was completed, for fear the workers would just end up ploughing up the area and disrupting all the seeds. Unfortunately, while the steps themselves went in at the start of December, the railings didn't get installed until this Monday. (First we had to wait for the new railings to be constructed, and then our appointment to have them put in kept being rescheduled on account of freezing temperatures that made it impossible to use the water-cooled drill.)

So it wasn't until Monday afternoon, after the ironworkers were gone, that we finally managed to get seeds in. We ended up having to use our big spade to dig up—or more accurately, chip away—the area immediately next to the steps, which had been soaked with the spray from the drill and completely frozen over, but we eventually managed to scatter the seeds and compress them into the dirt, leaving them uncovered as the package instructed. Now we just have to cross our fingers that they manage to germinate and give us something nicer-looking than we had the first time around. (We'll probably want to install stakes and string with the new bed, too, as the new perennial mix also has some very tall blooms in it.)

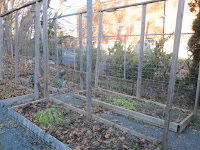
Once that was taken care of, we were able to turn our attention to cleaning up the vegetable garden. On Tuesday, Brian tore out most of the withered remains of this year's crops. It turned out to be impossible to pull out the squash vines without ripping out most of trellis netting with them, so he just ended up pulling the entire mess out, leaving that trellis bare. He'll have to put new trellis netting in next year when we plant our spring crops on First Sowing day.

Before he can do that, however, he'll most likely have to replace the entire garden bed frame. His home-grown design for raised beds constructed of 2-by-4's has held up remarkably well until now, but after eight years, the boards are starting to warp and decay to the point that the bed can no longer hold itself together. So next spring we'll have to replace at least one of the beds, and possibly all four. This time around we'll most likely use pressure-treated wood, which should hold up better to the elements. I was unwilling to use it last time because I kept reading warnings about the dangers of the arsenic used in preserving the wood leaching into your soil. But it turns out this particular chemical, called chromated copper arsenate (CCA), is no longer used in pressure-treated wood sold for domestic use, and newer preservatives appear to be much safer. So I figure at this point, I figure the only real downside to using this material is a somewhat higher one-time cost, and it's well worth it if we don't end up having to replace the beds every eight years.

As you can see from the pictures above, we haven't completely stripped the garden bare. The parsley and the winter lettuce are still green and growing, so we've left them in place in the hope that we can continue to harvest them throughout the winter or, failing that, let them overwinter and pop up again in the spring. We've also left in the Brussels sprouts plants because they actually do have tiny but identifiable sprouts on them, and we can't quite bring ourselves to pull them out if there's even a chance those sprouts could survive to become big enough to eat. It's a long shot, but we have nothing to lose at this point. However, given the distinct lack of success we've had with this crop over the past three years, we're definitely not devoting any of our precious garden space to it next year.

Another crop we've decided to leave untouched, sort of as an experiment, is our raspberry canes. When we first bought these plants back in 2013, we decided to follow the cut-every-year method of growing, which gives you one large crop in the fall instead of a steady stream of berries throughout the summer. We chose this method mainly because it's a lot easier than the more traditional method of growing them, which is to selectively prune the bushes each year, cutting off the two-year old "floricanes" while leaving the one-year-old "primocanes" intact. However, this year, it occurred to Brian that, since we've been cutting everything down each year, we know that what we have out in the bed right now is nothing but primocanes—so why not just leave them there to develop into floricanes and let next year's primocanes come in behind them? That way, we'll get a crop off the floricanes in the summer and off the primocanes in the fall—and after that, we can just cut everything down and start over again. So we're giving that a try, and if it turns out to give us a better yield overall, we'll stick with this two-year cycle from now on.

The other bit of garden-related news is that our new Fedco seed catalogue has arrived. So as per our new holiday tradition, we'll bring that with us on our Christmas jaunt to Indianapolis, perhaps even taking it in the car so I can browse through it and propose new crops to Brian as he drives. By the time we return home, we should have it all figured out what new goodies we want to plant in next year's garden. (We'll probably be devoting a bit more of our time to the garden in 2017, as focusing on the one bit of the planet we can control should be a welcome relief from all the upsetting things happening elsewhere in the country and around the globe.)

So that wraps up our Gardeners' Holidays for 2016. We're off to Indianapolis shortly, and I may or may not have time to update the blog while I'm there—so in case I don't post again this year, a happy Christmas, Hanukkah, Kwanzaa, Yule, or winter solstice holiday of your choice, and I'll see you all in 2017.

Tuesday, December 20, 2016

Money Crashers: 7 Stores With Price Match Guarantees

Just a quick post here for the benefit of anyone who's doing a little last-minute holiday shopping (or any other type of shopping) at department stores. I've recently learned about the wonders of price matching, which makes comparison shopping as easy as showing one store's price to another store and getting it instantly. However, each store has specific rules about which prices it will match (e.g., the items have to be completely identical, or you can only price-match one of each item), so I've written an in-depth guide to help you navigate the ins and outs of price matching at seven major retail chains. The article covers Walmart, Target, Best Buy, Home Depot, Lowe's, Staples, and Toys 'R' Us. Even though we don't shop at all these chains, learning all about their policies has already saved us some cash; last time our printer rejected a refilled ink cartridge, we were able to get a new cartridge at Staples for the Amazon.com price, a savings of nearly 50 percent.

Here are all the gory details: 7 Stores With Price Match Guarantees – Walmart, Target, Best Buy & More

Sunday, December 18, 2016

Money Crashers: Sustainable Clothing on a Budget

Last year, when I decided to make thrift shops the theme of Thrift Week, I was inspired in part by an article I'd read about the ecological perils of modern "fast fashion." Aside from how obviously wasteful it is to wear a garment for a single season and then discard it as outdated, today's ultra-cheap garments are usually made with eco-unfriendly fibers, toxic dyes, and sweatshop labor in brutal conditions.

The real question is, what's the alternative? Fast fashion dominates the malls and clothing outlets, so it's hard to find anything that's more sustainably made. And while there are a few retailers out there that specialize in eco-friendly and humanely produced clothing, these "sustainable" garments often have unsustainably high prices. You could, of course, just buy fewer garments each year, which is what consumers used to do decades ago. But high-end, eco-friendly clothing doesn't necessarily hold up to wear any better than the cheap stuff, so you could end up having to replace your $200 pants every year—a bitter pill for an ecofrugal shopper to swallow.

My latest Money Crashers article explores some solutions to this dilemma. First, I examine just what it means for clothing to be sustainable: what types of fibers, dyes, and workplace policies go into making garments that are easier on the earth and on workers. Then I explore the various ways there are to acquire secondhand clothing (the mainstay of the ecofrugal shopper's wardrobe), including thrift shops, yard sales, online sites, clothing swaps, and Freecycle. And finally, I list several eco-friendly brands on the market that actually have fairly reasonable prices—not as low as you'd find at Target or Walmart, but on a par with department-store brands of similar quality.

Here's the article: How to Buy Sustainable, Eco-Friendly Clothing on a Budget

Tuesday, December 13, 2016

Money Crashers: How to Stop Wasting Money

Since I started writing for Money Crashers, I've been receiving occasional e-mails from companies hoping that I'll want to mention their latest product or service in an article. I usually ignore these, but occasionally they send me something that's interesting enough to catch my attention. One recent example was a link sent to me by someone at HLoom about a survey the company had done on financial waste. It asked 2,000 Americans what they waste most money on and then broke down the results by gender, age, income, and region of the country.

Since ecofrugality is pretty much all about avoiding waste, this piece intrigued me. The part I found most interesting was the question about which wasteful expenses people were and were not willing to cut back on. Mind you, these are expenses that people personally admit are a waste of money—yet in some cases, they apparently prefer to keep wasting money on them. To my ecofrugal mind, that seems like a paradox; if it's money well spent, it's not a waste, and if it isn't, why keep spending it? But apparently the folks who took this survey define the word "waste" a bit differently than I do. (This may be the fault of the survey designers; as far as I can tell, they never explicitly stated what they meant by "waste," so each of those 2,000 people could be interpreting it a different way.)

Some of the responses they gave to this question seemed particularly odd. For instance, most people say they are willing to cut back on restaurant meals and alcoholic beverages, but not on food waste—meals and ingredients that go uneaten. This seems to me like a complete no-brainer; food you're not eating doesn't benefit you in any way, so why would you want to keep spending money on it? But apparently the folks who took this survey are convinced that doing what it takes to waste less food would have such a negative impact on their lives that they'd rather cut back on clothes, cigarettes, or even home heating.

Another puzzling expense people say they wouldn't cut was bottled water. Only about 11 percent of the respondents think they waste money on it, but those who do apparently consider it a worthwhile waste. Even if they know tap water is cheaper (and, in most parts of the country, just as safe and tasty), they just aren't prepared to let go of their bottles.

Anyway, all this seemed like a fertile enough field that I decided to devote a whole Money Crashers article to exploring it. The post examines the areas in which different people are most likely to waste money, how they vary based on demographics, and which forms of waste people are and aren't willing to cut. Then I go on to discuss ways of wasting less money in all these areas—without making the kinds of sacrifices that survey respondents appear to be afraid of.

Here's the full article: How to Stop Wasting Money and Save on Common Everyday Expenses

Sunday, December 11, 2016

Recipe of the Month: Roasted Brussels Sprouts and Potatoes with Pecans

In the past few years, Brian and I have become big fans of Brussels sprouts. (We've even attempted repeatedly to grow them in our garden—but after three years of experimenting and no success producing sprouts bigger than a marble, we've decided our soil just isn't Brussels-sprout-friendly.) Our favorite way to cook them, hands down, is the Roasted Brussels Sprouts recipe from Mark Bittman, which was my Recipe of the Month back in March of 2014. It's incredibly easy to do, and though the results vary somewhat—sometimes the sprouts are tender, sometimes crispy, depending on their size—it's always yummy.

Lately, however, I've begun to think we're getting into a Brussels sprout rut. I know there are other good ways to cook them, but every time we get our hands on a bag, we just default to our old standard. So when the latest issue of Savory magazine (the freebie from Stop & Shop) offered up a feature on Brussels sprouts complete with several recipes, I thought maybe this was a good chance to try mixing it up a little. I clipped a couple of recipes that looked promising, and we settled on the Roasted Brussels Sprouts and Potatoes with Pecans (page 39) as the one we'd like to try first.

However, finding the ingredients proved a little challenging. We usually pick up Brussels sprouts at Trader Joe's, but on our last trip there, we discovered the bagged sprouts they usually offer had suddenly disappeared. They had fresh sprouts on the stalk, but those were about twice as expensive, as well as being more work to prepare, so we decided they weren't worth it. And since we didn't get the sprouts, we concluded there was no point in buying pecans, the other ingredient we needed for the recipe, which we'd planned to pick up on the same trip.

That turned out to be a shortsighted move on our part, however. Last Friday, with Brian off work for the day, we decided to make a foray out to the Amish market in Kingston, and while there, we happened on some Brussels sprouts for just $2.49 a pound, the same price we usually pay at Trader Joe's. So we snapped those up straightaway, figuring we could make the new recipe this weekend after all...only to realize that we didn't have the pecans, and the Amish market doesn't carry those.

So we quickly formulated a plan B. We'd received a flier advertising a new Aldi in our area that was supposed to have its grand opening on Thursday, so we figured we could just stop by there over the weekend, pick up a few sale items, and grab a bag of reasonably-priced pecans while we were at it. This plan, however, turned out to have a fatal flaw: when we showed up at the new Aldi today, right around noon, we found several people standing around outside, making no move to enter. When we approached the door, we could see why: the doors were locked, and there was a big sign on the front apologizing for the delay and redirecting us to another Aldi several miles away. It was really weird, because the lights were on in the store, and as best we could see from the door, the shelves appeared to be fully stocked; there were even several people inside. But no one was being admitted, and there was no indication why.

Disgruntled, we decided we'd just pop by the local Stop & Shop and buy some pecans there, even if we ended up having to pay a premium for them. There, our luck finally turned: we discovered a one-pound bag of pecans sitting all by itself on the shelf, with no price marked anywhere, and when we scanned it at the store's little barcode reader, it turned out to be just $7.99—the same per-price pound we'd have paid if we'd just bought them at the Trader Joe's in the first place.

So tonight, at last, we were able to prepare the recipe. We made some minor modifications to the version presented in Savory; it called for a 20-ounce package of "refrigerated sliced potatoes and onions," which we naturally dismissed as an overpriced and overpackaged absurdity, so Brian just diced up a roughly equivalent quantity of plain old bagged potatoes and red onions. We also used free-range bacon ends from the Amish market rather than the sliced bacon the recipe called for, and we left out the half cup of ricotta cheese it says to use as a topping, since neither of us cares for it much. Brian just added a bit of salt at the end of the roasting instead.

The result was, as we expected, quite tasty. Brian commented that he wouldn't have expected bacon and pecans to be two great tastes that tasted great together, but the flavors actually harmonized quite nicely. The presence of the bacon lent a nice smoky overtone to everything, and the crunch of the pecans contrasted nicely with the tenderness of the veggies. Our only quibble was that the sprouts, after their long, slow roasting, seemed a bit dry. We thought perhaps the ricotta was meant to ameliorate this, but it didn't seem like quite the right flavor for the job to us.

What we really thought would improve it would be some sort of glaze on the sprouts...perhaps one made with maple syrup, since that's another flavor that goes well with both bacon and pecans. And Brian remembered that we happened to have some homemade pancake syrup in the fridge, left over from our last batch of waffles. It had crystallized a bit, but there was enough liquid in there for us each to extract a dab and try it on the sprouts, and we immediately agreed that this was exactly what it needed. So next time we make this, we're planning to drizzle a little maple syrup (or more likely, our faux-maple equivalent) over the sprouts before roasting them, and we think this will elevate the recipe from merely good to truly scrumptious.

So with a little more modification, we're expecting this recipe to become a permanent part of our veggie repertoire. And meanwhile, we still have the other Brussels sprout recipe from Savory to try, possibly expanding our collection of Brussels sprout dishes still more.

Sunday, December 4, 2016

Cat-safe decorations, year 2

Brian and I ran into a slight snag with our ecofrugal holiday decorations this year. Normally, we adorn the front porch railings with evergreen branches (discards from the local Christmas-tree vendors) and white fairy lights...but this year, we couldn't do that because our front porch currently has no railings. After years of seeing the plaster on the old steps slowly crumbling away, we finally gave in and spent a wad of money to have them replaced, along with the two smaller steps in the front and the walk in between. It was pricey, but we decided it was worth the money because we were simply never going to have the time to do such a big job ourselves...and even if we attempted it, we certainly wouldn't get such nice results as the pros.

However, the folks who install the steps don't do the railings; there's a separate contractor for those, and we had a little trouble getting in touch with him, so our new railings were only ordered a week ago and aren't ready yet. At this rate, it's not clear that we'll have any railings to hang our holiday lights on before the holidays actually arrive. So we've had to content ourselves, for now, with trimming the side porch railings and decking the halls indoors. Of course, just like last year, we have to limit our indoor decorations to places that are out of reach for the cats. However, since last year, I've come up with a few new cat-safe places to display holiday greenery.

Some parts of the decorating scheme are unchanged from last year. I still made up a bunch of my usual little flowerpots filled with spruce cones, evergreen, and bright holly berries, trimmed with red and silver ribbon, to display on all the high shelves throughout the house: six on the bookcase in the living room, two in the office, and one in the kitchen on top of the fridge. And the collection of pottery on top of the entertainment center in the living room got the same treatment as before: evergreens in the vases, pine cones in the colander, and red ribbons twined around the dessert dishes. The arrangement in the bathroom was a little harder to get right, since the plant on top of the medicine chest has grown quite a bit since last year, so I had to figure out a way to get its long tendrils to coexist with the trailing red ribbon. But eventually I found a way to overlap them without getting them hopelessly tangled.

One thing I didn't like too much about my decorations last year was that I only had one tiny pot of evergreens in the whole big downstairs room. This year, it occurred to me that if I wanted a bigger splash of color, I could just fill up a bigger vase with evergreens, and attach the last of my red ribbon trailing down the side. And since I had a perfectly good vase that was no longer using on top of the toilet in the downstairs bathroom (since that spot is cat-accessible), I just filled that up and set it on the top shelf of the etagere in the corner. I even pulled out a wee glass bluebird that I'd been keeping in the bathroom and set it alongside the vase for a touch of added color. It's more visible than the tiny little pot, but wish I had a little more of the red ribbon, since I think this would look even nicer with some longer streamers of red ribbon trailing down both sides of the etagere. (I think I could safely let them dangle down about a foot before they'd be within reach of the kitties.) So maybe I'll pop by the dollar store and see if I can find any more. They were all out last year, but the stock there keeps changing, so you never know.

Once I'd figured out that I could add a vase of evergreens in that spot, it occurred to me that I also had some perfectly good containers in the downstairs bathroom that could also hold evergreens—my collection of blue glassware that sits on top of the corner cabinet. So I went through my assortment of evergreen branches and found some long, skinny pieces to fit in the bottles and the bud vase, and some shorter pieces to fill up the little drinking cup. The bowls of the goblets weren't a good shape for evergreens, so I just popped some pine cones in there instead. Then, just for good measure, I set some small pine cones into the tops of the candlesticks as well. And finally, I took the last stray bits of silver ribbon and arranged them along the sides to frame the whole arrangement.

The final change was in the guest room. Last year, I just draped a long length of multi-colored ribbon around the toys on top of the bookcase, but I thought it would really look better if I could add a bit of greenery up there, too. So I pulled out a tall glass goblet—the same one I used to keep flower arrangements in the kitchen before we had to switch to a cat-safe vase—and filled that up with evergreens. For extra color, I took the last tiny bit of red ribbon and twisted it into a bow around the stem of the glass. Then I just cleared a little space among all the toys on the bookcase, and now the toys are all gathered under their very own Christmas tree—right where toys belong.

Since I already owned all the glassware, and the ribbons and pots were saved from last year's decorations, I didn't have to buy anything at all for this year's holiday decorations. The evergreens were all salvaged from the tree-vendors' trash bin, and the pine cones were gathered right here in our neighborhood. So basically, it's all just debris that would otherwise go to waste—and we have instead turned it into beautiful holiday decorations that didn't cost us a penny. An ecofrugal Christmas to all!

Sunday, November 27, 2016

A successful tinkering check

In Dungeons and Dragons, there are two ways to repair something that's broken. You can use magic (such as the Mend spell), or you can make a "tinkering check," using your own knowledge and aptitude to try and cobble something together to make it work. You roll a die, then add a number that reflects your "tinkering skill," and if the total is above a certain number, you succeed in fixing your damaged thingamajig.

Of course, this is a lot easier to do in the game than in real life. In the real world, your success or failure doesn't depend on a die roll: you have to use your ingenuity to figure out a way to fix the thingamajig, and then put some actual effort into making it work. But, by the same token, when you succeed, it's a lot more satisfying than simply rolling well on a die. You know that you've fixed this thing by your own cleverness and the sweat of your brow, and that thanks to your efforts, you won't have to spend money on a new one.

Here's an example of how my husband, the Master Tinkerer, successfully tinkered a small item today. This little device from the drugstore is used for splitting pills, so you can take a smaller dose if that's all you need. Brian calls it my "pillotine." It has two parts: a base with a V-shaped plastic next that holds the pill securely in place, and a hinged lid with a blade attached. You raise the lid, tuck the pill into the V, and bring the lid down, THWACK—and if all goes well, the pill splits neatly in half.

I used this successfully for years, but recently I started taking a magnesium supplement that's a fairly large, fairly hard pill. Splitting several of those apparently put undue stress on the pillotine. One morning when I brought the lid down, instead of the pill giving way beneath the blade, the little plastic support in the base gave way beneath the pill. Turning it over, I found that it had cracked right below the place where the pill sits, and I wouldn't be able to use the gadget again until I found some way to shore it up.

I presented this problem to Brian, and he took the pillotine down to his la-BOR-atory to work on it. At first he considered just filling in the whole space below the damaged plastic part with a wedge of wood, but he realized that if he did that, any pressure applied to the pillotine lid would probably transfer through to the base and leave gouges in whatever surface it was sitting on. So instead, he started looking for something flatter he could glue to the existing plastic base. After rummaging through his collection of objects that appear, to the untrained eye, to be random useless junk, he found a small metal bracket about the right size to tuck into the base of the pillotine. He bent this into the appropriate shape with pliers, glued it to the plastic base with epoxy, and clamped the whole mess shut while it dried.

After several hours, we removed the clamp and gave the pillotine a test run. Rather than start out with one of the extra-tough magnesium supplements, I selected a different type of supplement, with a more elongated shape, which is usually a little easier to split. I lined it up in the V, brought down the blade, and THUNK! It split satisfyingly into two nice, equal pieces. We'll still have to test it once more on the tougher pills, but for now, it looks like it's as good as new—better, in fact, since its new metal base can hold up to more punishment than the original plastic one.

Now, to some people, this might seem like a lot of unnecessary trouble to go to over a gadget that only costs six bucks to replace. And sure, I'll admit that it would have been easier just to throw it out and buy a new one. But I think even for something as small as this, repairing it yourself is worth the effort, for three reasons:

  • It's less wasteful. Why send the pillotine to languish in some landfill, and buy a whole new one made from virgin materials, just because one tiny piece of it was broken? By repairing it, we were able to salvage all the perfectly useful parts—the plastic case, the hinged lid, and the metal blade—rather than spending money and natural resources on brand-new ones.
  • It's more satisfying. There's no skill involved in throwing an old gadget in the trash and buying a new one. But repairing it by the exercise of your wits and your hands is both an interesting creative challenge while you're doing it, and an achievement you can take pride in when you're done.
  • It keeps your tinkering skills in shape. By practicing regularly on little items like this, you can keep your wits and your hands in top condition. That way, when something big breaks that actually would cost big bucks to fix, you can feel more confident about repairing it yourself, because you've had plenty of practice. Or, to put it in Dungeons and Dragons terms: the more successful tinkering checks you make on small items like this, the higher your tinkering skill becomes, and the better your chances of succeeding at repairing the castle's catapult in time to do battle with the invading army of orcs. 
Admittedly, most of us don't have to battle armies of orcs in the real world all that often. But battling the high cost of living is a challenge we all share, and the more you sharpen your skills, the better equipped you are to deal with it.

Wednesday, November 23, 2016

Money Crashers: 5 Ways to Save Money on Holiday Gifts

For years now, I've been grumping about the phenomenon of "Christmas creep": the way the "holiday season" keeps being stretched earlier and earlier, to the point that it completely swamps out Thanksgiving and is in danger of drowning Halloween as well. However, I've come to accept that when you work as a writer, you kind of have to start your holiday stories—or any other type of story that's seasonal—well ahead of time if you want to get them published before the holiday actually arrives. (And sometimes even that doesn't work, as with this article on green gifts that I wrote for Money Crashers last year, which didn't show up on the site until four days before Christmas.)

So, when I proposed another holiday shopping article for Money Crashers, I made a point of submitting it by the middle of November to make sure it got published on schedule. And it turns out, I succeeded perhaps a little too well: the article actually popped up yesterday, a little ahead of Thanksgiving. However, in this case, I guess it's actually appropriate, since part of the article is about how to save money by shopping sales—and like it or not, the best sales do tend to occur during Thanksgiving weekend. So if you're going to be prepared for them, you kind of have to start your planning before Thanksgiving Day.

So I hope you all will look on this article, not as a distraction from tomorrow's holiday, but as a little preview to help you prepare for the next one. It covers everything you need to know about holiday shopping on a budget, including:

  • How to figure out a price limit for holiday gifts
  • How to trim your gift list without causing hurt feelings
  • Holiday gift exchanges (such as "secret Santa") as an alternative to shopping for the whole family
  • When secondhand gifts are and aren't appropriate, and where to find good ones
  • How to make homemade gifts that will actually be appreciated
  • The relative merits of shopping in stores and online for holiday sales
  • How to shop sales strategically
  • How to save money when shipping presents to out-of-town friends 

Learn all about it here: 5 Ways to Save Money on Holiday Gifts for Your Friends & Family

You can also find some useful info in that older article on eco-friendly gifts. It was too late for last year's holiday season, but it can still be of service this year, with green gift ideas for everyone on your list: How to Buy or Make Green, Eco-Friendly Gifts for the Holidays


Monday, November 21, 2016

Money Crashers: What’s the Best Way to Travel During the Holidays?

Every year, Brian and I drive out to his parents' house for Christmas. It's a long trip—about 12 hours, including stops—so we usually leave before dawn to try and make it there by dinnertime. For the return trip, we leave a little later so we can have breakfast and say goodbye to everyone, so we don't get home until around 10pm after stopping for dinner along the road. That gives us maybe an hour to unpack the car and pet the cats and go through our week-long backlog of mail before going to bed.

Some folks might wonder why we bother making such a long trip by car. Wouldn't it be a lot faster to fly? Well, yes, it would—though not as much faster as you might think, since you also have to factor in travel time to and from the airport, as well as waiting time at the airport. But it would also be a lot more expensive: probably over a grand for the tickets, baggage fees, parking, and overpriced airport food. It would also be a lot less pleasant. In addition to spending the actual flight crammed into those narrow seats with a bunch of strangers, unable even to take a bathroom break until the seat belt sign went off, we'd have to deal with all the hassles of driving to the airport, parking, checking baggage, going through security, waiting around at the gate, claiming baggage, and worrying about missing our plane. (No matter how early we leave, we always worry about missing our plane.) Plus, we wouldn't be able to haul much baggage, so all the Christmas presents would have to be shipped ahead of time. Add that to the hefty carbon footprint of air travel, and it's easy to see why we consider a long trip in the car preferable to a short trip by plane.

From time to time, I've wished that we could make this trip by train instead. Trains are usually my favorite way to travel, especially for a medium-to-long-haul trip like this one, because they're a lot more comfortable than either cars or planes. You have enough room to stretch out in your seat; you can look out the window at the scenery; you can get up and walk around any time you like, get up and go get a snack, play cards, and all sorts of things you can't easily do on the road. But when I checked, just out of curiosity, to see how much it would cost to take a train to Indiana, I discovered that the only train that could get us there is an Amtrak that's routed all the way down to D.C. and back through Kentucky before finally making it to Indy 23 hours later. Yes, you read that right—23 hours, nearly twice as long as our trip by car. It definitely wasn't a viable option.

However, as the holidays approached this year, I got to thinking that just because driving works best for us, that doesn't necessarily mean it's best for others. So I decided to do a post for Money Crashers comparing different types of holiday travel. In exhaustive detail, I outline the pros and cons of flying, driving, and bus or train travel, comparing cost, time, convenience, safety, and carbon footprint. Along the way, I offer some general tips about how to make your trip cheaper, greener, and less stressful, no matter how you travel. And I wrap it all up with some general advice on how to calculate the costs and benefits for yourself and figure out which mode of travel is best for your holiday trip.

Here's the full article: What’s the Best Way to Travel During the Holidays? – Cost & Time Considerations. Here's wishing you and yours a pleasant trip.


Sunday, November 20, 2016

The doorknob dilemma

Back in April, when Brian finished the new bifold doors in the office, I predicted that sprucing up the doors would inspire us to tackle a full makeover of that room. As it turns out, I was both right and wrong. I was right in observing that the other parts of the room—in particular, the main door—looked shabby by comparison with the spiffy new doors. And sure enough, not long after finishing the bifold project, Brian decided to take down that door and start the laborious process of sanding it down, refinishing it to match the bifolds, and rehanging it.

The newly refinished door was a vast improvement over the old one. But once it was in place, suddenly the other doors in the hallway started to look dingy by comparison. And so rather than tackle the rest of the office, we decided our next big project should be to refinish all the doors on the upper level. (Well, most of them, at least. The two doors in the guest room—the main door and the closet door—had already been refinished as part of the process of redoing that room back in 2014, so we could cross those off our list right away.)

One advantage of this as a project is that it didn't have to be done all at once. In fact, it pretty much couldn't be, because Brian only has enough room downstairs in the shop to work on one door at a time. So this project proceeded slowly, door by door, over the course of several months. After the office door, he moved on to the bathroom door, which was probably the next-worst-looking of the lot. This meant that we had to have a doorless bathroom for a period of a few days, but it wasn't a big problem; we just made sure to do it at a time when we knew we wouldn't be having any visitors. The only real difficulty was figuring out where in the small bathroom to store our towels, which normally hang on the back of the door, and Brian solved that by temporarily transferring the towel rack to the guest room door, which is just a couple of steps away. The towels could hang out there while drying, and when we needed to hop in the shower, we could just transfer them to the handy wall hooks we added next to the tub.

Once that was done, Brian tackled the two hall closet doors: the coat closet and the linen closet. Since these were both narrower than a room door, he was able to fit both of them onto his worktable at once, so he saved a bit of time by doing them simultaneously. By this time, he'd had enough practice to get the whole process down to a science, so he was able to refinish both doors in three days: one to take them down, haul them outside, sand them, and stain them; one to give them a single coat of finish, doing one side in the morning and one in the afternoon; and one more to give them a second coat and, once that was dry, rehang them.

The trickiest door to deal with was our bedroom door. Unlike the others, it couldn't simply be left off the doorway during refinishing, because our two cats are strictly forbidden to enter the bedroom. Even if it wouldn't have killed us to let them in for just a few days, it would have set a highly undesirable precedent. ("No, no, the bedroom is still off limits! Yes, I know we let you into it last week, but that was an exception!") At first we thought we could just transfer the office door to our bedroom—but when Brian tried that, he discovered that, although the two doors are the same size, their doorknobs apparently aren't installed at exactly the same height. They look the same to the naked eye, but there's a difference of about half an inch—enough to prevent the door from closing properly. Fortunately, we found that the door from the bedroom closet was a close enough match for the main bedroom door that we could actually get it to close (with a little bit of pulling). So Brian just took off the closet door and refinished that first, and then he installed it in place of the main bedroom door while refinishing that one.

So, as of this month, we officially have nice, new, freshly refinished doors in every single room of the house. But of course, there's a fly in the ointment. While the doors themselves look much better now, they're still sporting the same old mismatched collection of doorknobs they had when we first moved in. The office door has a round, shiny brass knob, the bathroom has a keyed one, and the other doors all have generic, builder-grade "bell" door knobs in various stages of wear. And just as the new office door made the old one look bad, the newly refinished doors are now highlighting just how cruddy their old knobs look.

Our makeover of the doors itself was about as ecofrugal as it could possibly be. Brian did all the work, and the only supplies he had to buy were a can of stain and a can of polyurethane (both water-based to minimize odor and VOCs). The entire project cost us probably less than $100. But unfortunately, we can't really work with the existing doorknobs the way we did with the doors. They don't match, they're in crappy shape, and they're a pretty ugly style to begin with. So if we want our shiny new doors to have knobs worthy of them, they'll have to be new knobs. The question is, what kind?

Design sites and blogs are always quick to point out that details like door knobs—the kinds of things that most people don't consciously notice—can actually have a tremendous impact on the overall feel of a room. When the Petersiks at Young House Love repainted all the doors in their new house, they devoted an entire post to the process of choosing new knobs to go with them, complete with a "mood board" showing 14 styles they considered (ranging in price from $16 to over $100 apiece). And I personally agree that it's important for little details like this to be in keeping with the overall architectural character of a house. (For example, the oil-rubbed bronze knobs the Petersiks eventually settled on, with a large rectangular plate behind them, look great on their house's white-painted, six-panel doors, but they'd look ridiculously out of place on our flat, dark wood doors.)

So I knew that, to replace the old knobs, I wanted something that would look like it belonged in a circa-1970 rambler like ours. But the problem is, when you try to search "1970s style doorknob," you get lots of sites that sell door knobs and basically none that talk about what kind of knobs were actually in use during this time. The only type of door knob shown in most pictures of houses from this era is the generic brass "bell" knob we have now, and this thread from Old House Web indicates that this was the standard type in houses of this era.

The only recommendation I could find for something a bit more distinctive was this Weslock door knob, which a door hardware site described as a "funky" style suitable for a '70s house. (You can also see it in this YouTube video on updating an old door, which is sort of the opposite of what I want to do.) I like the look of this knob, and I think it would fit in with our doors, but they cost around $22 apiece. Actually, the best price I've found is $21.50 for the "passage knob," with no lock, and $23 for the "privacy knob," which we'd need for the bathrooms and probably all the bedrooms too. So with three bedrooms, two baths, four upstairs closets, and two other rooms downstairs (the boiler room and the shop), we're looking at over $250 worth of hardware here—quite a bit more than we spent on the doors themselves.

So now I'm wondering: is it really worth the cost? Given that these are still basically just builder-grade doors, would we be better off just buying builder-grade knobs like these, which come in a contractor pack that costs $30 for four knobs? They're not as distinctive, but they're presentable, and we could do the whole house for under $100. This would keep the total cost of the project much more reasonable—but on the other hand, we could use the fact that we spent so little on the doors themselves to justify splurging a little on the knobs. So which makes more sense: keep it simple and cheap, or splurge on something special?

Of course, I could just follow my usual practice and put off making a decision at all, in the hopes that a better bargain will fall into my lap. The obvious downside of that is that we have to live with the crappy knobs in the meantime—but I could always just claim I'm waiting to deal with the knobs until after we've finished repainting all the door casings. Those are at least as crappy-looking as the knobs, so it's easy to make a case that getting them painted should be our first priority. Given how long it takes us to finish a decorating project around here, getting that done could easily take another six months, and who knows what new and marvelous sources of door hardware I might discover in that time?

Saturday, November 12, 2016

Recipe of the Month: Butternut Squash Pizza with Fresh Sage

This month's Recipe of the Month is another original creation of Brian's—sort of. We've harvested a good crop of butternut squash from the garden this year (about 10 squash so far, and a few more still on the vine), and we were thinking it would be nice to make something new with it besides our standard butternut squash soufflé and lasagna. Brian recalled, or at least thought he recalled, that at one point we'd made a butternut squash pizza with fresh sage that was pretty good, so he started hunting through our cookbook collection for the recipe. But after a good 20 minutes of hunting, he couldn't find it in any book on our shelf, nor in the substantial file we have of recipes clipped out of magazines. Either we'd lost it somehow, or he'd just imagined it.

By that time, though, he was really hung up on the idea of butternut squash pizza, and he couldn't just let it go. So, being Brian, he decided to make up a new version on the spot.

He already had a basic go-to recipe for pizza dough, so he started with that. Actually, he modified the standard recipe somewhat: normally, when he makes pizza these days, he uses half white and half whole wheat flour, as a concession to health. But the butternut squash pizza recipe he remembered, or thought he remembered, had a plain white crust, so he used only white flour in the dough. He also threw in an extra tablespoon of gluten to compensate for the fact that he was using all-purpose flour rather than bread flour. As it turns out, this resulted in a considerably puffier dough than he's used to, so when he spread it into the pizza pan, there was a lot of extra crust around the edges. He's not sure why it turned out that way, but since I always think the crust is the best part of the pizza anyway, it was a happy accident as far as I was concerned.

After flattening down the crust as best he could, he brushed it with olive oil and then started adding toppings: mozzarella cheese, fresh sage, sautéed red onion, and thin slices of butternut squash, arranged in a single layer with no overlap. Then he sprinkled on a little salt and baked the whole thing until the squash was soft and the crust was browned—probably about half an hour. And, since it had that big, puffy crust on it, he also steeped some extra sage leaves and salt in melted butter and served that on the side so we could dip the crust pieces in it.

Although the recipe didn't come out exactly as Brian envisioned it, I think it was delicious just as it was. The softened butternut just melted in the mouth, and its sweetness blended with the piquant sage and onion was like the taste of autumn itself. I didn't even mind the extra-heavy crust, since it gave us built-in breadsticks for dipping. The only thing I'd do differently next time is to use olive oil in the dipping sauce, rather than melted butter.

So, since I think this recipe is gourmet quality already, I'm listing it here just as Brian made it. However, if you think you'd prefer it with a more normal-sized crust, leaving out the gluten and cutting down the yeast to a teaspoon would probably take care of that.

BRIAN'S BUTTERNUT SQUASH PIZZA WITH FRESH SAGE
  1. Dough: In a large bowl, combine 3/4 c. water and 2 tsp. yeast. Then add 3/4 tsp. salt, 2 tsp. sugar, 1 1/2 Tbsp. olive oil, 1 Tbsp. gluten (optional), and about 2 cups all-purpose flour (add more flour if the dough is too sticky). Turn out onto a floured surface and knead for 10 minutes. Then put it back in the bowl and let it rise at least 1 hour. If it needs to sit longer before you're ready to use it, you can punch it down halfway through.
  2. Toppings: Coarsely grate 1/2 pound mozzarella cheese (you can use shredded cheese from a package, but it won't be as good). Peel a chunk of butternut squash and slice it into thin, half-round pieces. Pick 15-16 fresh sage leaves and cut them up into smallish pieces. Slice 1/2 red onion thinly and sauté in olive oil until softened and slightly brown.
  3. Assembly: Turn out the dough onto your pizza pan, adding flour to the pan and your fingers if the dough is sticky, and spread it out into the pan, leaving a thick, raised crust around the edge. Paint the crust lightly with olive oil. Spread the mozzarella, sage, and onion evenly over the top. Lay out the butternut squash slices in a single layer until they completely cover the flat surface, leaving only the raised crust exposed. Bake the pizza at 400°F about half an hour, or until the squash is soft and the crust lightly browned.
  4. To serve: Cut up a few more sage leaves and add them to a small bowl of olive oil, with salt to taste. Serve this on the side for dipping the crust.

Sunday, November 6, 2016

Thinking wrong about wealth

Today, in a desperate effort to avoid thinking about the upcoming election, I started looking again at some of the material I used for my article on the middle class in America. And this time, it struck me that the various ways of defining the middle class (and, by extension, the wealthy and the poor) were not just different, but in some ways contradictory.

Take us as an example. According to this article at CNN Money, the "most common" way of defining the middle class is based on income. There are various ways you can divvy up the U.S. population to figure out who's in the middle, but most of them agree that Brian and I are part of it. The article cites one common formula created by the Pew Research Center, which defines middle class as anywhere from two-thirds of the median income to twice the median for a given household size. And according to this calculator on the Pew website, a household of two people with our income falls smack dab in this middle range. So according to Pew, we're neither rich nor poor; we're solidly middle-income.

But, of course, there's a problem with defining wealth based on income alone. As CNN points out, your social class really has more to do with how much you spend than how much you make, because this "more accurately reflects your well-being." If your income varies widely from year to year (as mine does), you don't suddenly cease to be middle-class just because you're having an especially good or bad year.

So CNN also cites the formula created by Professor James X. Sullivan of Notre Dame, which measures class based on how much you spend on all your needs (food, housing, transportation, etc.) and wants (such as entertainment). It specifically excludes costs for health care and education, since those could be considered investments for the future rather than expenses in the present. Sullivan defines the middle class as those whose spending in these areas falls in the middle quintile for all U.S. households. For a family of four, that's $38,200 to $49,900.

Now, if you define middle class this way, it looks like Brian and I no longer make the cut. Our annual spending (not counting "investment" spending like health insurance and retirement contributions) is lower than the minimum for a middle-class family. Granted, our household has only two people, not four, but there's nothing in the article to suggest Sullivan actually makes any adjustment for this. So it looks like, as far as he's concerned, we're too poor—or at least, we're living too much like poor people—to qualify as middle-class. And we certainly couldn't be considered wealthy.

But there's a problem with this definition, too. Defining class based on spending, rather than income, makes it possible for a family to raise its position by borrowing money—living a middle-class lifestyle that's financed with debt. But a family that takes home $45,000 a year and then spends all of it and then some isn't really well off; it's steadily losing ground. It hardly makes sense to say they're better off than a family down the street that's bringing in $40,000 and spending only $30,000, gradually building up more wealth every year.

Based on that reasoning, it makes more sense to define class based on overall wealth—in other words, net worth. CNN cites a third formula, developed by Professor Edward Wolff of NYU that defines the middle class as all those households whose net worth falls into the middle three quintiles for the country as a whole—that is, anywhere between $0 and $401,000. And according to this definition, Brian and I still don't qualify for middle class—but for the opposite reason. Wolff's formula bumps Brian and me out of the middle class and into the ranks of the wealthy. So while Sullivan considers us too poor for the middle class, Wolff considers us too rich.

Now here's what's bothering me about all this. Most people looking at the CNN article would tend to assume that the various definitions of the middle class, the poor, and the wealthy generally apply to the same group of people. Sure, using spending rather than income may put a few more people into the middle group, while going by wealth may include fewer. But in general, those who make the most money are also those who spend the most and, over time, accumulate the most—right?

Well, no, not really. Because when you look at the numbers for me and Brian, it's plain to see that our net worth is higher than normal for our income, while our spending is lower than normal. And once you think about those three numbers together, it makes perfect sense that this would be the case. The whole reason we have more money than most of our peers in the same income group is because we don't spend as much. Spending less than your income naturally means you save more, and saving more naturally means you build up more wealth. This isn't a surprise result; it's exactly what you'd expect. Except that, if you were relying on the standard definitions of the middle-class and the wealthy, you wouldn't.

The real problem here is that each formula is looking at just one of these numbers—income, spending, or net worth—by itself. But in reality, these three numbers are linked—and not in a positive way. Yes, it's often the case that the more you earn, the faster your net worth grows. But the more you spend of what you earn, the slower your net worth grows. And a real understanding of wealth needs to account for this.

So I think the most important number to consider isn't income (how much you make), or expenses (how much you spend), or even net worth (how much you have already). Instead, it's a frugal person's favorite line in the budget: how much you save. By looking at this one number, you can tell instantly, at a glance, by how much you're getting ahead—or falling behind—each year. That's the number that people should really be comparing if they want to see how they're doing relative to their peers.

Now technically, this number doesn't measure how wealthy you are right now; instead, it measures how much wealthier you're growing. But here's the thing: I think for most people, that's what's they really care most about. As this article from the Christian Science Monitor points out, a classic definition of the middle class centers on "upward mobility coupled with a measure of financial stability": not just where you are, but where you're going. Simply put, people are more likely to feel well off when their financial position is getting better—regardless of where it is right now.

I'm not the first person to suggest this. Financial reporter Bob Sullivan, in "The Restless Project," argued that many Americans who look well-off on paper feel financially insecure because "they are working harder, and perhaps making more money than they'd ever dreamed, but yet falling behind anyway." And conversely, financial writer Donna Freedman declared back in 2007 that she was not just surviving but "thriving" on $12,000 a year, because she was building up her savings and even had enough to give to charity.

I don't have enough actual data to come up with a full-fledged formula for gauging your social class based on your savings rate. I can feel pretty confident in saying that anyone who's saving more than half of what they make every year—no matter how little that is—is doing well, and anyone who's saving nothing is not. There's a lot of middle ground in there, and I'm not sure at what point along that spectrum the average person would feel financially comfortable. But I do know this: it has to be somewhere in that range. Anyone who is saving nothing—no matter how much they make—is not going to feel financially secure, nor should they.

I'm not saying that savings is the only number that matters, and income and net worth are irrelevant. But it is definitely a number that matters—and as far as I can tell, it's the one number no one is looking at.

Sunday, October 30, 2016

Gardeners' Holidays 2016: Late Harvest

I've only been a gardener for about eight years now, but there's one thing I've already learned: nothing is really predictable.

For example, at this time of year, production in the garden is normally shifting over from the summer crops to the fall crops. The summer squash and cucumbers are played out, and the tomatoes and peppers have only a few lingering fruits. So while there's still produce to be picked in November, it's mostly the later-ripening crops: winter squash, fall greens, lima beans, leeks, Brussels sprouts, and the last few hardy, stubborn stalks of rhubarb.

But this year, summer has been hanging gamely in there. Though we've had a few days of hat-and-coat weather, they've been interspersed with others where even two layers are too many. And just last week, Brian came in from the garden bearing an unprecedented late offering: one last large zucchini, and more surprising still, three smallish cucumbers.

On top of that, our pepper plants are stubbornly continuing to produce. Brian picked all the good-sized fruits before the first frost, but new ones are still appearing: skinny green fingers on the Jimmy Nardello plant, and little white globes on the Klari Baby Cheese. So if the next frost holds off for another couple of weeks, we might yet be able to pull in a second harvest of those.

This unexpected bounty helps somewhat to make up for the fall crops, which have been a little bit disappointing. Our trusty Waltham and Ponca Baby butternut squash plants have done pretty well, providing us with ten squash so far, plus a few more still ripening on the vines. But we've only harvested about a pint of lima beans in total, and the one last leek that Brian just brought in from the garden brings our total harvest for this year to four. As for the Brussels sprouts, despite our best efforts, there's still nothing on them large enough to pick. We started them indoors way back in mid-March to give them a good head start, and as the plants grew, Brian plucked off their lower leaves to give the sprouts more sunlight...but all that did, apparently, was cause the stalks to become top-heavy and flop over. The sprouts remain the size of marbles, with little hope that they'll reach a reasonable roasting weight before the snow flies. So I guess at this point we have to accept defeat on this particular crop and resign ourselves to relying on Trader Joe's for our sprout supply.

Fortunately, what we have is still enough to celebrate the fall harvest with. In fact, we're spoiled for choice. For tonight's harvest feast, we considered making one of our favorite butternut squash recipes (soufflé or lasagna), or perhaps combining the butternut squash with our last zucchini to make squash and zucchini fritters from a recipe we pulled out of Savory magazine last year. (This is a freebie you can pick up at Stop & Shop stores. I searched for the recipe on the Stop & Shop website, but it doesn't seem to be there anymore.) But since we needed something that would give us leftovers for tomorrow's lunch, we decided to keep it simple and just use the last of the garden leeks, plus one additional one from the H-Mart, to make frizzled leeks. We're serving those over some spinach gnocchi we picked up on whim during a recent Aldi trip, topped with mozzarella and accompanied by a basic green salad.


And, since our new rosebush is also continuing to bloom even as November approaches, we'll have fresh flowers to grace the table as well.


Saturday, October 29, 2016

An Election Week request

I'd like to start off with an apology: this post is going to be a bit off-topic. It's not directly related to ecofrugality, though it is about avoiding waste. Specifically, in this case, the waste of a vote.

I usually try to avoid posting about anything overtly political on this blog, because I know politics is a topic that divides people, and I'd like us to be able to focus on the common areas that interest all of us: saving money and living green. But in this case, something is going on that's so important I feel I have to speak out through any forum I have available, and this is the best one I have.

As you probably know, Donald Trump has been encouraging his followers to go out and monitor polling places for signs of voter fraud. Some of them have responded by saying, in so many words, that they intend to use racial profiling to spot voters they consider illegitimate and challenge them. The Christian Science Monitor quotes one of them, Steve Webb of Ohio, as saying he plans to look for "Mexicans. Syrians. People who can't speak American. I'm going to go right up behind them...I'm not going to do anything illegal. I'm going to make them a little bit nervous."

What Mr. Webb apparently doesn't realize is that what he is proposing to do actually is illegal. It's voter intimidation, and there are laws against it. As the website of the American Civil Liberties Union (ACLU) explains, it is against federal law to "intimidate, threaten, [or] coerce...any other person" in order to stop that person from voting, or from voting in a particular way. If anyone does this to you, you can report it to the Department of Justice or to any local official. Election Protection even has a hotline (1-866-OUR-VOTE) that you can call on the spot to respond to this kind of behavior.

The problem is, the average voter may not know this. So if someone like Mr. Webb "goes right up behind them" in a threatening way, they might not know how to respond. If they become "nervous" enough to flee without casting their ballots, it will be a victory for the lawbreakers and a loss for democracy.

So what can we do prevent it? So far, the best thing I can think of is to make sure this information about what voter intimidation is and how to respond gets out to as many people as possible. And that's where I'd like to ask for your help.

This PDF contains all the information from the ACLU site in a printable form. I'm asking you to print out copies of this document and post them in whatever public places you can think of in your town - community bulletin boards, utility poles (if that's legal where you live), or anywhere else that people will see them as they pass by. Ideally, they should be posted as close as possible to the places where people vote, so people will see them on their way to the polls and will be aware of the issue. Maybe not that many people will read the notice, and maybe not many will learn anything from it they didn't already know. But if even one person who sees it is encouraged to stand up for their right to vote, that will be a victory.

Let me be clear: My goal here is not to support or oppose any particular candidate. I just want to make sure that everyone who's legally allowed to vote is able to. And I believe that all of you, people who care enough about the world to read this blog, would agree with that goal. No matter which candidate you support, surely you would want to see that candidate elected fairly and legitimately, not through vote suppression.

I'm also encouraging you to pass this information on to anyone else you know who you think would share this goal. Send e-mails to friends, put it on Facebook, tweet the link, or whatever you think will help to get the word out. This, too, is a request I wouldn't normally make...but as I said before, I consider this election a special case.

Thank you for reading. Tomorrow we'll return to our regularly scheduled program of posts about DIY, thrift shops, and local produce.

Tuesday, October 25, 2016

Money Crashers: Can You Live Without a Car?

About a year after Brian and I got married, I sold my car and we became a one-car family. It was a pretty easy decision for us, since my car had been sitting mostly unused throughout that year. I was working from home by them, so I didn't need it for commuting; it was only trotted out for the occasional trip to the store or the doctor's office during the day. And since Brian was only using his car to get to work when the weather was too bad for bike riding, most of the time I could just take that car if I happened to need one.

So for the past eleven years or so, not only have we limited ourselves to one car, but that one has spent a lot of time just sitting in the driveway. Brian rides his bike to work whenever the weather allows, and I do most of my errands during the day on foot. Even when the car is available, I generally prefer to walk if I can, because I enjoy walking a lot more than driving (and worse still, parking) in city traffic.

And yet we've never seriously considered the idea of dumping the one car we have and going completely car-free. Every time we think about it, it quickly becomes obvious that there are just too many places we can't easily get to without a car. We could, in theory, take a bus or a train down to Princeton every week for dance practice instead of driving (though we would no longer be able to run other errands en route, and even shopping in town would be a lot more difficult). And we could fly to Indiana to visit his family every Christmas, though it would be both expensive and stressful. But there's literally no way we could get to my parents' house from ours without a car. It's too far to go by bike, and the roads aren't that safe for cycling anyway—and the nearest bus and train stations are miles away from where they live. Theoretically, I guess, we could take a cab (or an Uber), but it wouldn't be very convenient, and it would probably end up costing us more per year than our paid-off car does.

So living without a car just doesn't work for us. But that doesn't mean that it couldn't work for you.

In my latest article for Money Crashers, I explore the topic of car-free living in detail. I talk about the pros and cons of a car-free life and examine the various alternatives to car ownership, including foot power (walking, cycling, and in-line skates), public transportation, and using cars that belong to other people (through carpooling, taxis, ride sharing, car sharing, and rentals). Then I offer a step-by-step guide to crunching the numbers so you can figure out whether you could reasonably replace your car with some combination of these alternatives.

Perhaps you'll find, as we did, that the answer is no—and that's okay. The point is to get a clear idea of how your life could look without a car, so you can make an informed decision.

But on the other hand, maybe after looking at all the alternatives, you'll realize that living without a car really is the best option for you. In that case, count yourself lucky. By giving up your car, you can save lots of money, improve your health by exercising more, and reduce your stress levels by driving less. And, of course, you get the satisfaction of knowing that you've personally lopped a big chunk off your personal carbon footprint.

As MasterCard would put it: "New bicycle: $500. Bike lock: $30. Helmet: $20. Being able to tell people you don't own a car: Priceless."

Can You Live Without a Car? – Cost Savings, Benefits & Alternatives

Monday, October 24, 2016

DIY desk dingus

When I upgraded my computer a few weeks ago, the one piece of software that I had to ditch completely was the pair of apps that came with my camera. I can't say I was really sorry to see them go, because they'd always been incredibly clunky to use; you had to plug in the camera and use one piece of software to download all the pictures from it, then close that and open a different piece of software to view the pics, and then manually copy the files from that program and paste them into the folder on my hard drive where I keep images for uploading to this blog. The whole system was one big ugly kludge, but I put up with it because it was the only way I had of getting the images off the camera and onto the computer.

With my new OS, however, the software no longer worked, and the camera was so old that no upgrades were available for it. So after some experimenting, we concluded that the best way to get the pictures off the camera would be to buy a little microSD card reader that I could just pop the camera's card into directly. That only cost about 15 bucks at NewEgg.com.

This setup worked fine, and it was a lot easier to use than the old system, but it made my desk a bit cluttered. I had the little Mac mini itself sitting next to the monitor, a USB hub plugged into that (for the camera and various other peripherals that are used only occasionally, such as a webcam), an external hard drive, a pair of speakers, and a power strip that holds the plug for my monitor and the charger for the camera battery. The little gadgets all stuck out at odd angles, and the various cords that connected them looked exactly like chew toys to our cats.

I searched Staples and other office supply sites for an organizer to corral all these little gadgets, but I couldn't find anything suitable, so Brian generously offered to custom-build one for me. First, he constructed a simple stand out of scrap wood that would fit over the top of the Mini.


This would hold the USB hub and the card reader side by side, with the cord from the card reader plugged into the back of the hub and the cord for the hub extending out the back and down to the power strip below.


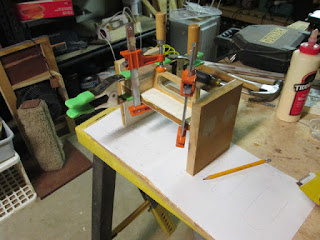
To plug the card reader into the hub, he had to raise it up to the same level, so he added a block for the card reader to sit on. He added two little blocks in the back to hold it in place. Then, to hold the hub in place next to it, he cut a wooden frame to fit snugly around the back of the hub.


He glued the block and the frame to the bottom of the stand. With those in place, both peripherals would stay fixed in position and aligned with the front of the stand.


Once that was done, he added a top piece. He glued the wooden frame for the USB hub to the top as well as the bottom to keep it extra secure. (The card reader wasn't completely snug against the top of the stand, so he shimmed it up with a piece of cardboard cut from a raisin bran box.)


At this point, the stand did everything it really needed to do, but he went the extra mile to make it look nice. First, he stained the outside with some leftover stain in a dark color. (I believe it's "Rosewood," the shade we used on our living-room futon frame.)


Then, he made a face plate for it out of some thin wood, and stained that piece to match.


Then came the hard part: cutting the holes in the face plate for the slots of the hub and the card reader. He measured carefully to get the positions exactly right and traced their outlines onto the wood. Then he cut around the outlines with an Exact-o knife and used a woodworking tool to scrape away the plywood from the middle. It wasn't the most elegant way to do the job, but it worked.


He wanted the face plate to be screwed on rather than glued, so it could be removed to pull the peripherals out if necessary. Initially, he used a pair of wood screws, but their bright steel heads clashed with the dark finish, so he ended up replacing them with darker-colored drywall screws. 

The finished stand sits next to my desk and keeps everything neatly contained. The hub and the card reader are tucked inside the stand, the power strip sits neatly next to it, and the external hard drive rests on top.


The best part, from my ecofrugal standpoint, is that the whole gadget was made from materials we had on hand: scrap wood, stain, screws, and glue. So while he invested a fair amount of time in building it, he didn't spend a penny on materials. And this free, handmade contraption does a much better job containing the clutter on my desk than any fancy organizer the tech world has to offer.