Sunday, July 28, 2024

Frugalversary 2024: We'll take Manhattan

Most years, Brian and I celebrate our anniversary in a modest style. For the first few years of our marriage, I'd put on the bodice from my wedding dress, we'd buy a little 4-inch version of our wedding cake, and then we'd go to the park where we got married to eat it. When the bakery stopped carrying small cakes, we started going to Princeton instead and visiting the bakery cafe to order a slice of the same cake. And when the cafe shut down during the pandemic, Brian started baking the cake himself. Our gifts to each other were either small tokens (like the game I made for Brian and the aluminum-foil flower he made for me on our tenth anniversary) or practical items (like the cherry tree we planted for our fourth anniversary, which sadly didn't survive, or the glass-and-silicone lids I got Brian for some of our Pyrex containers on our fifteenth). The biggest celebration we ever had was going shopping at IKEA and having lunch in the cafe.

But this year, for our twentieth anniversary, we decided to splash out a little. We've discovered that one activity we really enjoy is going to a town where we haven't spent a lot of time before and just exploring, wandering up streets and into shops looking at whatever takes our fancy. So, for our anniversary, we decided to carry out this activity on a grander scale by visiting the biggest town on the whole East Coast: New York City.

Although this trip was bound to be much costlier than our usual anniversary outings, we tried not to go overboard. We made no attempt to get tickets to a show, which could easily have cost more than we'd spent on all our previous 19 anniversaries put together. We didn't even plan a visit to a museum, not even the intriguingly named Museum of Illusions or Museum of Sex, which would have cost over $70 for two tickets. Instead, we looked for things we could do at little to no cost within walking distance of Penn Station, thus avoiding any need to find our way around on the subway. 

Our first stop (well, second, after the rest rooms at the station) was 9th and 31st, where an article from Beloved City had promised we could find a "magical art installation" called Citrovia. But as it turned out, this article was several years old, so the exhibit was no longer there. Fortunately, we hadn't gone very far out of our way, so we just continued on to the next site on our list: the High Line, a park built on a disused set of former elevated train tracks. It's only about 1.5 miles long, but it has lots to see, including a variety of native plants, some funky art exhibits, and an above-the-fray view of the city. 

We also got a look at the neighboring Hudson Yards, which is both a resting spot for the city's trains and an open-air food court. We weren't quite ready for lunch at that point, but we did get a peek at a huge public sculpture in that area called "The Vessel": a series of staircases and landings visitors can explore. The ground-floor level is normally open to the public for free, but it was closed for construction, so we had to content ourselves with snapping a photo or two from outside.

Being thwarted by construction continued to be a theme of the trip as morning wore into afternoon. We'd planned to exit the High Line at 16th Avenue and then descend to street level to go visit Chelsea Market, a sort of Bohemian shopping mall with lots of eateries, but the section of the park between 23rd and 16th was closed for maintenance. So we got off at 23rd and wended our way through the streets to Chelsea Market in the wake of a large crowd of students all wearing yellow backpacks with "MLA" on them. (My first thought was "Modern Language Association?", but a quick search showed it referred to Moving Language Ahead, an English course for foreign students that culminates with a trip to an English-speaking country.)

For lunch, we chose a place called Berlin Currywurst, which offered an intriguing-sounding tofu kielbasa. Sadly, the sausage itself was disappointing, a bit mushy and lacking the garlic punch I expect from a proper kielbasa sausage. Also, the bun it was served on (along with some unremarkable sauerkraut) disintegrated about three-quarters of the way through, and Brian's more traditional meat bratwurst sandwich didn't fare any better. So, 6 out of 10 for the sausages, but 10 out of 10 for the accompanying French fries, which had a crisp, golden exterior over tender insides. The only fault I could find with them was that they were perhaps a trifle over-salted, but Brian thought they were just right. 

We ate our sausages at a small table, shoulder to shoulder with several Italian students, then spent some time exploring the rest of the shops. We ventured into a fancy bakery, an artists' market, a vintage candy store, a place called Imports from Marrakesh featuring an intriguing assortment of clothing and decor, a quaint delicatessen, and finally a genuine independent bookstore called Posman Books. We browsed through the volumes and found nothing irresistible, but I did drop $5 on a little LED flashlight for my key ring. I'd been looking for something like this anyway, so I took the opportunity to support an independent bookseller and pick up a little souvenir of our trip at the same time.

After reascending to the High Line and continuing down it to the end, we wove through the streets and crossed the bridge to Little Island, an artificial island built out in the Hudson. It's mostly used in the evenings as a live music venue, but it was a fairly interesting place to walk or, more accurately, climb along sloping paths and natural stone staircases. After rambling up and down in the midday heat, we were feeling a little tired, so we stopped into Pier 57—another large, upscale food court—to have a cup of coffee and spend some time in the air conditioning.

Refreshed by our rest, we sallied back out and made our way to the garment district, where we strolled up 7th Avenue peeping into shop windows. I slipped into one store just long enough to check the price of a dress I'd seen in the window, which I'd guessed would be too rich for my blood at $278. Apparently I'd failed to account for the Manhattan conversion rate, because the actual price tag read $795, causing me to back carefully out the door and flee before a salesperson could spot me. 

The only store we actually explored in detail was the always entertaining Williams-Sonoma, home of pricey kitchen gear. (An amusing and very New York sales clerk at this particular branch described it as a "toy store for adults.") None of the on-sale items appealed to us, but Brian found one thing he thought he could use: a candy thermometer to replace the wildly inaccurate one we have now. Unfortunately, it was a $65 model equipped with Bluetooth, a feature for which we'd have no use whatsoever. So instead, I bought him a more reasonable $29 instant-read thermometer, suitable for a variety of applications, as my anniversary gift to him. (He's already used it once to test the temperature of an ice cream base he's preparing in our new-to-us ice cream maker.)

As the clock ticked past 5pm, we had to decide whether to stay in the city for dinner or head home. Deciding that we didn't want to wait that long to eat, we settled for a quick bite at New York Pizza Suprema right near the train station. Beloved City had described this as the best slice of pizza in New York, but I strongly suspect this isn't true; both the fresh mushroom and the vegan margherita were pretty good, but neither was superior to Brian's homemade pizza. (The crust was nicely crisp on the edges, but a bit soggy in the middle, and the cheese on the vegan slice had an odd, liquid texture, not nearly as good as our homemade vegan mozzarella.) Still, it was unquestionably an authentic New York experience, and at $12.50 for both slices, undoubtedly the cheapest meal we could have expected to enjoy in the city. After this light supper, we roamed just a few blocks farther north before heading back to the station and home again for cake.

Although we hadn't officially made a budget for this trip, my private goal was to keep the entire excursion under $200: $10 for each year of our marriage. As it turned out, we met this target with plenty of room to spare. Our expenses were:

  • Two round-trip fares on NJ Transit: $64.40
  • Lunch at Berlin Currywurst, including tip: $31.30
  • Mini flashlight from Posman Books: $5.44
  • Tip for a busker playing the erhu on the High Line: $2
  • Coffee at Pier 57, including tip: $6
  • Thermometer from Williams-Sonoma: $29.34
  • Dinner at NY Pizza Suprema: $12.50
  • Parking in New Brunswick, which saved us a long walk at the end of a busy day: $16.00
  • TOTAL: $166.98

Even if you add in the $21.27 Brian spent on my anniversary gift (an amusing board game called Cat Lady) and the groceries we bought for our anniversary cake, our celebration still easily rings in at under $200. It's more than we'd usually spend for a one-day outing, but when you consider that Arthur Frommer's 1957 feat of seeing Europe on $5 a day would cost at least $125 today—or $250 for two people—New York on $167 a day doesn't sound so bad.

Sunday, July 21, 2024

Make or buy: personal care products

I'm always pleased when I can figure out how to replace one of the products in my personal care routine with a homemade alternative. It's not just that these homemade products cost less than store-bought alternatives; they're also more sustainable. Since I decide what goes into them, I can make them with nontoxic, low-impact, cruelty-free ingredients, and they produce no packaging waste whatsoever. As an added perk, I know they can never be discontinued—something that invariably seems to happen to any commercial product I get really attached to.

But much as I like to make my own products, I don't do it for everything. It's possible to find recipes online for almost any kind of product (with one exception that I'll get into later), but some of them are so much hassle that I can't imagine the savings would be worth it. Others aren't that hard to make, but they just don't work very well. And a few DIY recipes call for ingredients so costly or hard to find that once you add up all the costs, including shipping, it's actually more expensive to make a product than to buy it.

I've written several blog entries over the years about my successes and failures with homemade personal care products, but I've never gathered them all together into one place. So, for this entry, I thought I'd offer a complete rundown of which products I do and don't make for myself, and why. And since Brian and I share a lot of the same products, I figured I might as well cover his choices as well.

So, starting with the basics:

Soap: Buy

For showering and washing hands, we use Trader Joe's honey-oatmeal bar soap. It costs $1.99 for two four-ounce bars, and the packaging is minimal: just a thin plastic wrapper. And while it does contain some palm oil, I've discovered that this ingredient isn't actually so harmful as it's made out to be. The reason it's used in so many products is that oil palms are a lot more productive than other oilseed crops; if we replaced all the palm oil we use with alternatives like coconut or soy, we'd need a lot more land to grow those crops, possibly resulting in even more deforestation. So making my own soap from a recipe like this one, which calls for a mixture of olive and coconut oil, wouldn't necessarily be greener. 

What it would definitely be is a lot more work. Not only would it involve working with lye, which is highly hazardous stuff, it would also require a bunch of special equipment—including molds, a soap cutter, a candy thermometer, an immersion blender, and a set of spatulas—all devoted exclusively to soap-making use and never used for foods, because lye. And how much could it possibly save me? According to this soap-making site, the ingredients alone come to roughly $1.22 per bar, which is more than we're paying now for the TJ's stuff. The only possible advantage would be to avoid a couple of grams of plastic waste, and when you weigh that against all the stuff I'd have to buy, I find it hard to believe it would be a more sustainable choice.

Face wash: Make

Unlike soap, face wash is incredibly easy to make from scratch. In fact, I just whipped up a batch and the entire process, from getting out all the ingredients to cleaning up and putting everything away, took 8 minutes—less time than it would take to go to the store and buy some. My recipe calls for only three ingredients, all of them easy to find in stores: aloe vera gel, honey, and olive oil. A half-cup batch of it costs me about $1.50 and lasts at least a month. And it leaves my skin smoother and softer than any commercial face wash I've ever tried. Making my own is an absolute no-brainer.

Moisturizer: Buy and make

During the day, I use a moisturizer that contains sunscreen. The way I see it, if I didn't do this I'd just have to buy a separate facial sunscreen anyway, and this way is less work and less irritating to my skin. I also don't consider either sunscreen or SPF moisturizer to be something I can reasonably make myself. Although there are recipes for homemade sunscreen online, experts generally say you shouldn't trust them. So I just use e.l.f. Holy Hydration SPF 30, which I can buy at the local drugstore. It costs around $13 for a little pot that lasts me a couple of months, and it works well for my often finicky skin. I just have to keep my fingers crossed that they'll never discontinue it.

At night, however, sun protection isn't a concern. I've tried various night creams containing different ingredients, including some that claimed to miraculously halt the signs of aging (spoiler alert: they don't). As far as I can tell, none of them works any better than straight aloe vera gel, which costs me around $5 for a 16-ounce bottle at Target. So that's what I use now, on top of my rosacea meds. It's not a miracle cream, but it does keep my skin moist, which is all you can really expect a moisturizer to do.

Shampoo: Buy

I don't generally use shampoo on my dry, curly hair, but Brian uses it on his long, flowing mane. He recently traded in his store-brand shampoo from Target, which cost around 4 cents per washing, for a low-waste bar shampoo from Trader Joe's that's even cheaper: about 3.5 cents per washing. There's no bottle to throw away, only a cute little cardboard box that can be reused. And it's much easier to use up every drop than it is with the liquid shampoo: he simply presses the last flimsy sliver of the old shampoo bar against the new one, the same way we do with our bar soap.

Now, it's theoretically possible that we could find a homemade shampoo that would cost even less and produce even less waste than this bar shampoo. Unlike me, Brian has never tried (and failed) to wash his hair with plain baking soda. But since he already has a shampoo that's quite cheap, produces little waste, and agrees with his hair and his scalp, I don't see replacing it as a high priority.

[Edit, 12/14/24: Sadly, the last time we tried to buy a shampoo bar at Trader Joe's, it was no longer available. A friend who works there confirmed that it was not just sold out but fully discontinued. Fortunately, we were able to find another brand, Love Beauty and Planet, that's costs $4.99 at Target for a four-ounce bar. That's a little less convenient and a little more expensive, but it's still only about 4.4 cents per washing, only about 10 percent more than the store-brand shampoo he used to use. That's a small enough price difference that we're willing to pay it for the sake of discarding fewer plastic bottles. However, Brian hasn't actually tried the new bar yet because he's still finishing up his last bar of the Trader Joe's stuff, so we don't know how well it will work for him.]

Conditioner: Buy

Although I don't use shampoo, I use quite a lot of conditioner. In fact, it's pretty much my only styling product. After showering, I let my hair dry until it's just damp, then comb in some conditioner with my fingers. A quick finger-fluff, and I'm good for the day. 

Since conditioner is such a major part of my beauty routine, I'd love to be able to make my own. Over the years I have attempted several different recipes, from extremely simple (apple cider vinegar, pure olive oil, canned coconut milk) to more complex concoctions (coconut oil with shea butter and honey, coconut oil with distilled water and guar gum). But sadly, none of them gave me good results for more than one day. 

So, for now, I'm sticking with Suave Almond and Shea Butter, which costs about $5.50 for a 28-ounce bottle. I've never timed how long this bottle lasts me, but it's at least a couple of months, which means it costs around 9 cents per use at most. As far as I'm concerned, it's not worth trying any more DIY recipes unless they can meet or beat that price.

Hair tonic: Make

Conditioner isn't the only product I use on my hair. As menopause descended upon me, I noticed my hair was growing decidedly thinner, and I considered shelling out for a product with Rogaine. But given that it costs around $55 for a 3-month supply and you have to keep using it forever, I wasn't sure it was worth it. Instead, I decided to try another treatment I'd read about online: rosemary essential oil. At least one study suggested it worked just as well as Rogaine and caused less scalp irritation. And at just $8 for a 10-mL bottle, it would certainly cost less to try.

Unfortunately, the articles I found online about rosemary oil were a little bit vague about how to use it. They said to dilute it with a carrier oil and rub it into the scalp a few times a week, but they didn't specify how strong to make the solution and they disagreed on how long to leave it on. (The Cleveland Clinic suggests applying it at night and washing it out in the morning, while Elle says leaving it on that long can cause irritation.) So, taking a wild guess, I mixed ten drops of rosemary oil into two tablespoons of coconut oil and started applying that every evening at bedtime.

I've been doing this for about six months, and it does appear to be working. There's less of my scalp visible and more short hairs growing in on the top and at the temples. And I still have most of that initial $8 bottle left. On the down side, it does seem to be causing a bit of scalp irritation, so I've backed off from using it every night to every two or three nights. That means my $8 investment will last me even longer, making it decidedly a better value than Rogaine.

Toothpaste: Buy

Toothpaste, even more than sunscreen, is not really possible to make at home. Sun-blocking ingredients such as zinc oxide are at least possible to buy over the counter, even if they're hard to distribute perfectly throughout a homemade mixture. But cavity-fighting ingredients such as fluoride are not. Thus, although there are recipes for homemade toothpaste online, I would never consider using one. 

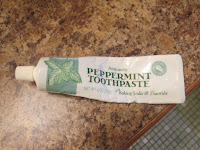
We've been relying for years on Trader Joe's toothpaste, which is one of very few brands that (a) is cruelty-free, (b) contains fluoride, and (c) does not contain sodium lauryl sulfate (SLS), which tends to give Brian canker sores. And, until recently, it was also available at any Trader Joe's store for a very affordable price: just $3 for a 6-ounce tube. 

But about a month ago, we went looking for a new tube of toothpaste at Trader Joe's and couldn't find any. We thought it was just temporarily out of stock, but a friend of ours who works there said that the store has actually had problems with its supplier and needs to find a new one. Unless it finds one before our current tube of toothpaste runs out, we will have to find a different brand. 

We have a couple of sample-size tubes of SLS-free Sensodyne that we got from our dentist, and we can use those as a stopgap measure, but I don't want to buy it because it's not cruelty-free. So we might end up having to switch to a pricey, hard-to-find brand that has to be specially ordered. Needless to say, I am not happy about this, but I'm not unhappy enough to risk my teeth on a homemade toothpaste.

Deodorant: Make and buy

I've always found it frustrating to buy deodorant. It's very difficult to find a brand that's cruelty-free and actually works. And even the few brands that meet these criteria come in plastic tubes that can't be recycled and that inevitably make it impossible to use up every bit of the product.

I've tried many homemade deodorants over the years, most of which either didn't work (baking soda, vinegar, rubbing alcohol, hydrogen peroxide) or had unfortunate side effects (milk of magnesia). Eventually I figured that I could get pretty decent results with alcohol-based hand sanitizer. During the pandemic, when hand sanitizer became incredibly difficult to find in stores, I learned to make a homemade version from rubbing alcohol and my trusty, multipurpose aloe vera gel. But even that wasn't a truly waste-free solution. 

So, earlier this year, I switched to a simple DIY deodorant made from baking soda, cornstarch, and coconut oil. It works about as well as the hand sanitizer, costs even less, and produces no waste at all. Its only fault is a tendency to separate a bit, but I can easily remedy that by stirring it up with a toothpick before applying it.

Brian has also had problems over the years with commercial deodorant. He dislikes most of the scents that it comes in and finds them irritating to his skin. For a while he tried just going without it altogether, but that proved not to be satisfactory on days when he was riding his bike to work. So for now, he just switches off between the two brands he can find that come in a fragrance-free version (Speed Stick and Arm & Hammer), stocking up on them whenever he can find a good price. 

However, I've suggested that he should also give my new baking-soda mixture a try. If it works for him as well as it does for me, maybe he can also strike this commercial product from his shopping list. Watch this space for updates.

[UPDATE, 9/30/24: Brian has found that the new baking-soda deodorant does indeed work reasonably well for him. He has now finished up the last of his commercial deodorant, and we won't be needing to buy any more.]

Perfume: Make

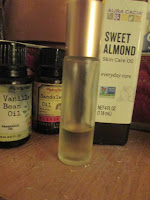
For most of my life, I wasn't in the habit of wearing perfume regularly. I'd tried a few different brands over the years, but I never found one that really felt like my own signature scent. But early in the pandemic, feeling in need of a mood booster, I decided to try experimenting with creating my own. I sent away for a few bottles of essential oil and a little roller bottle and experimented until I found a ratio I liked: 20 drops of sandalwood, 10 of vanilla, and 5 of cinnamon, then fill the bottle up with carrier oil. (At first, not knowing if I would like the results, I used plain canola oil out of the pantry, but eventually I invested $4 in a little bottle of sweet almond oil from the drugstore.) 

I paid $4 each for the essential oils, and the supplier threw in an extra bottle of the sandalwood for free, so that initial supply has lasted me through the entire four years since. So, all told, I've paid $16 for four years' worth of perfume—a price I doubt any commercial fragrance could beat. And it's a signature scent that is truly my own.

Cosmetics: Buy

There are only two cosmetics I use at all regularly: concealer to hide any stray pimples and white nail pencil under my fingernails. I use the pencil not so much to whiten the space under nails as to create a barrier there so dirt doesn't accumulate. Otherwise, my fingernails always seem to get dirty by the end of the day, even if I haven't touched dirt anywhere.

I'd be happy to make either of these products from scratch—particularly the nail pencil, which is increasingly difficult to find in stores—but I've never found a good recipe for either one. Recipes for DIY concealer always call for too many hard-to-find ingredients, like "non-nano titanium dioxide" and "zeolite ultrafine clay," and I've never found any recipe at all for the nail pencil. When I search for "homemade nail pencil," I find lists of tips on ways to whiten my nails with baking soda or lemon juice, which isn't what I'm trying to do. And when I search for "how to keep dirt out from under nails," I find tips on how to clean the dirt out after it accumulates, which isn't what I want either. I've experimented with substitutes like white crayon, which isn't exactly homemade but would at least be easier to find in stores, but it doesn't seem to work. 

Fortunately, neither of these store-bought products is all that pricey. I think I paid $4 for my last tube of Wet N Wild concealer, which has lasted me quite a while, and $10 for a set of three nail pencils. So my beauty routine isn't exactly breaking the bank.

Conductive gel: Make

My one major concession to vanity over the past couple of years was shelling out $150 for a mini microcurrent device. Every evening, I spend just a couple of minutes running this little gadget over my neck and jawline in the hope that it will help me keep my over-50 skin firmer. Does it work? Hard to say for sure, but at least my skin doesn't seem to be getting any saggier since I started using it, and that's enough for me to keep at it. 

However, I would not be willing to stick with this routine if I had to shell out $59 an ounce for the fancy "conductive serum" that the manufacturer recommends. Before buying the device, I searched online to see if there were cheaper alternatives, and many people said all you really needed was plain aloe vera gel with a pinch of table salt. That's what I currently (har!) use, and I can't detect any difference between it and the (tiny) sample of pricey serum that came with the device.


And that's it for my personal care routine (and Brian's). It's not as complicated, and certainly not as expensive, as many people's, but I'm still happy to learn about ways I could make it even simpler and cheaper. So if you happen to know of any fabulous DIY recipes for the few products I'm currently buying, please share them in the comments.

Sunday, July 14, 2024

The planter project

Last month, when I told you about our new patio set, I mentioned that we'd been able to haul it home because we'd already rented a truck to tote lumber for the laundry room and for another project that I promised to tell you about later. Well, that time has come. Allow me to present our new outdoor planter.

The background on this: When we moved into our house, there were several barriers between our property and our next-door neighbor's. Our driveway was lined with a couple of hefty concrete road barriers, and our neighbor had some large evergreen bushes and an aging picket fence along the side of his yard. The bushes covered up the gaps in the picket fence and softened the industrial forms of the crumbling concrete barriers, so taken as a whole it didn't look too bad. But a few years ago, our neighbor cut down those shrubs, and their absence exposed the full extent of the fence's battered condition—not to mention the ugliness of the concrete barriers on our side.

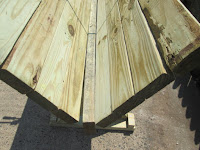
So, around that time, Brian started noodling with ideas for ways to replace those concrete blocks with something more attractive that would also be tall enough to conceal the fence. He considered putting up a new fence, then toyed with the idea of planter boxes with attached trellises for climbing vines. But eventually he settled on the idea of a couple of plain, trellis-free planter boxes that he could build out of two-by-fours. He spent several months sketching out different designs until he settled on one he was satisfied with: a long, deep V shape formed by stacked two-by-fours mounted on three sets of crossed legs. Then, after hauling home the lumber, he spent much of the past two weekends sawing all the boards to the proper length and assembling the pieces that could be assembled indoors. And finally, today, he had a few free hours with decent weather to put it all together.

Mind you, when I say "decent," I don't mean "pleasant." As of 10 am, the thunderstorms that the weather forecast has been consistently and inaccurately predicting all week still had not materialized. But in their place we had blazing sun, heavy humidity, and temperatures that were already into the upper eighties. When I wasn't helping Brian with the parts of the job that required an extra pair of hands, I was bringing him cold drinks and dishes of salty pickles and cherry tomatoes to keep his electrolyte balance up. And even with all that, he didn't attempt to assemble more than one of the two planters he had planned. But that's enough to show you how it was done.

He started by lining up all the cut pieces in the driveway, like this:

Then he attached the leg pieces together and connected them with long two-by-fours that would form the tops of the the planter's two sides, like this:

Then he unfolded it again and started attaching additional two-by fours to  complete the sides. Once they were all in place, the frame was much heavier, so we had to work together to fold the two sides into place. To hold them that way while he worked on attaching the end pieces, Brian applied a couple of clamps and pushed the legs into a set of little foot brackets he'd made for them. (Later, he plans to remove the end pieces and turn these into the feet of the second planter.)


He ran into a slight complication when he tried to insert the bottom piece. According to his design, there should have been just enough room to slide one intact two-by four into the V of the crossed legs. But since the boards he was using weren't perfect (some wider than others, some slightly warped), there wasn't. So, rather than try to shave down the side of one of the two-by-fours, he simply slid it in with its shorter edge facing up. That left a bit of a gap in the bottom, but since we're filling up the bottom with rocks for drainage anyway (or, to be more accurate, chunks of the old concrete barriers), it shouldn't matter.

I helped hold the end pieces while he drilled the pilot holes and screwed them into place. Then, working together, we flipped the now very heavy planter upside down so Brian could attach the feet. And finally, we got it back upright and maneuvered it into the spot where he wanted it. That was when he discovered one final complication: since our driveway is neither level nor flat, one end of the planter was floating nearly an inch off the ground. He had to shim it up with a couple of the boards stripped from of our old patio set. Some additional, smaller shims were needed to stabilize the planter from side to side.

This project took up the entire morning and about an hour of the afternoon, but we managed to get it done before the long-promised thunderstorms finally hit. Of course, "done" doesn't mean completely done, because we still have to assemble the whole second planter and fill them both up with dirt and plants. (I've been doing some research on suitable perennials to keep in an outdoor container year-round, but we haven't made any firm decisions yet.) But already, even this single planter sitting there empty looks much better than the dilapidated fence behind it.

Saturday, July 6, 2024

Recipe of the Month: Seitan Burgers

A new month, a new Recipe of the Month. And this one's something we haven't tried before: a veggie burger. You might think that doesn't really fit the criteria for a Recipe of the Month, which is supposed to be a veggie- or fruit-centered dish, but this one features a secret veggie ingredient: beet. (Actually, it turned out to be not so secret, but more about that later.)

One of the difficulties of being a vegetarian in summertime is grilling. Don't get me wrong, grilled vegetables are fantastic, but they're just not that substantial. (We love our grilled eggplant and pepper sandwiches, but we have to supplement them with smoked herring to add protein to the meal.) We've tried all the brands of veggie dogs and sausages without finding one that we both like. (Brian quite enjoyed the Impossible Brat, saying it tasted just like a real bratwurst; I concluded that I must not like bratwurst.) We've also attempted multiple recipes for homemade vegan sausage, and none of them really ticked all the boxes for taste and texture. And when we tried taking some veggie patties from Trader Joe's and tossing those on the grill, it was a complete failure. (Maybe that was partly because they'd been in the freezer too long, but I don't think it would work much better with fresh ones.)

After that failed attempt, I decided to check the It Doesn't Taste Like Chicken blog for a vegan burger that would work on the grill. Not only did the author have one, she confidently billed it as "The Best Vegan Seitan Burger." This, she maintained, was due to its weird-sounding combination of ingredients, including vital wheat gluten, cooked lentils, soy sauce, liquid smoke, peanut butter, and raw beets. I was skeptical about that last one, since I have never been a fan of beets, but the post insisted that this ingredient would "add a deep earthiness that really makes these burgers taste authentic." Even her beet-hating husband, she assured me, loved these burgers. So I decided to swallow my objections and give it a try. Even if it was another failure, I reasoned, it would at least give me a Recipe of the Month for July.

This recipe has multiple steps, so Brian spread it out over a couple of evenings. First, he cooked up a batch of lentils in the pressure cooker. (The blogger said she'd used canned lentils, but we've never seen those in any store. Maybe it's a Canadian thing.) The second step was supposed to be mixing those up in the food processor with the other ingredients, but Brian quickly realized that even the half-batch he was making would be too much for our little Magic Bullet. So, instead, he mixed up the dough in stages. First he pulsed the beet in the Bullet; then he added the lentils and mixed those in; then he dumped the contents into a bowl and stirred in all the seasonings; and finally he blended in the wheat gluten by hand. 

Once that was done, he shaped the dough into patties and steamed them. The full recipe was supposed to make six patties, but he found that his half-recipe was enough for four reasonable-size patties, just enough to fill our steamer basket. At this stage, the burgers looked very much like actual ground beef patties. They then went into the fridge to be chilled until grill time. 

The next night, the burgers went onto the grill, along with some zucchini spears and sliced potatoes. With a coating of oil to keep them from sticking, they held up quite well on the grill, coming out firm and nicely browned. Nor did their texture disappoint when they were served up on buns. The burgers had a satisfying, meaty chew, and they weren't dry or tough like so many other meat substitutes. If I were judging them strictly based on texture, I'd say they were by far the best homemade plant-based meat we've ever tried. 

But their flavor was a disappointment. Despite the blogger's assurance that I wouldn't be able to taste the beets, to me that distinctive bitterness was the dominant note. Brian, who is not a huge fan of beets either, said he couldn't detect them at all, and other commenters on the recipe post have said the same (including one who loves beets and was quite disappointed that she couldn't taste them). But for me, it was clearly present, and neither ketchup nor mustard could entirely disguise it.

Still, all hope is not lost for this recipe. I left a comment on the post asking if there was any way to make these burgers without the beet, and I got a response suggesting I could "try substituting with sweet potato for a milder flavor." So my idea is to give this one more go, using that substitution, and see how it comes out. If we both find that version palatable, it could be the perfect protein for summer grilling. The wheat gluten is a somewhat pricey ingredient, but it's still only a little over a buck for four patties' worth. That makes these much cheaper than Impossible Burgers, with a lot less packaging to boot. And, assuming we can eliminate the beet flavor, just as satisfying.