

Before we could position the new timbers, however, we had to remove the old ones—a slightly more manageable job thanks to their half-rotted condition—and then clear out the weeds choking the bed, since that was a job that would be easier to handle without the edging in the way. Since most of the weeds were poison ivy, this job fell to Brian, who is least sensitive to it. He used a variant of the Plastic Bag Method advocated by Mike McGrath of WHYY's "You Bet Your Garden":
- Place a plastic bag over your hand.
- Grasp the little bugger with the bagged hand and pull it until it comes out.
- With your other hand, invert the bag so that the poison ivy stays completely enclosed within it and it never touches your skin.
- Put all the bagged plants into a larger garbage bag, which you then tie shut for disposal, keeping all the poison ivy plants double-bagged within it. (Since Tim is quite severely allergic, we added yet another bag over top of this bag to make sure that he couldn't come into contact with anything that might have touched the plants.)
 He didn't take all the additional precautions McGrath recommends (wait until after a heavy rain, apply Ivy Block, cover every inch of your skin, and strip down and rinse off immediately after you finish the job), relying instead on his natural immunity to protect him. It seems to have worked, as he hasn't developed any hint of rash. However, he did sustain a wasp sting after disturbing a nest that was sitting right under one of the old landscape timbers. He had to take off his wedding ring and spend ten minutes sitting in the kitchen with a poultice of baking soda on his hand. Fortunately, that has left no discernible swelling either. Unfortunately, it meant that we had to skip the step of pruning the big overgrown shrub that sits right on top of the wasps' home. rather than risk annoying them further. So we just plunked the new timbers into place and let it go at that.
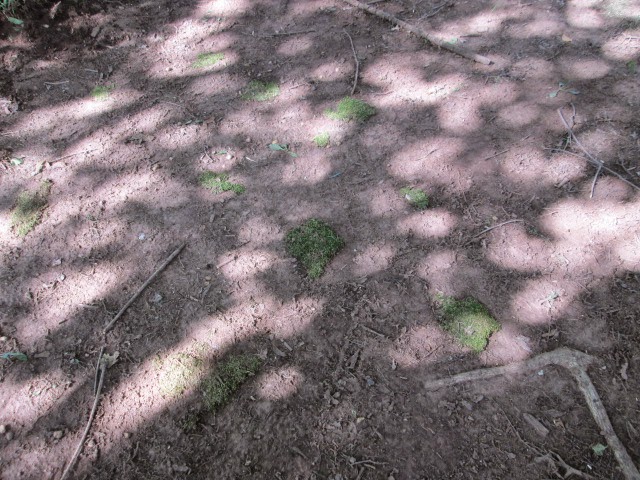 While Brian was working on the weeds, Tim and I started laying down some patches of moss in the yard. There was plenty of it in his driveway, so we just started prying up large clumps of it and laying them down on the dirt. We gave each patch a good soaking with water and then stepped on it firmly to encourage it to take root in the soil. (You might think stomping on a new plant is a good way to kill it, but with moss, apparently, it's the right thing to do.) We scattered these fragments throughout the yard, and I left Tim with instructions to keep them moist and keep walking on them periodically. We'll just have to wait and see how they do in their new home.
 Our next task was to start laying the path from the driveway to the door. Once we started digging out the flagstones, we discovered that (a) there were actually a lot more of them in the yard than we realized, and (b) they were made of a different sort of stone than the three slate ones Brian and I had brought from our yard. So we ended up setting those aside and using only the local stone, as it were. The pieces varied considerably in size, so we laid them out in order from biggest to smallest. This seemed appropriate, since the smaller stones at one end mingle with the gravel of the driveway, while the larger stones at the other lead up to the big, solid slab of the doorstep. Plus it seems somehow to convey the sense that the path is opening up as you go to welcome you in.
The hardest part of laying the path was digging out a spot for each stone to lie in. The soil in Tim's yard is all hard-packed clay, incredibly difficult to get a shovel into. Brian could jam the shovel into the dirt and then jump onto it with both feet and it wouldn't penetrate more than half an inch. So, to spare his back, he sat on the ground next to the spot we'd designated for each stone, chipping away at the dirt with a shovel and emptying it into a bucket. Fortunately, the stones were only about an inch thick, so he didn't have to scoop away more than the top layer of soil. (He wisely started at the end nearest the house, so that the stones got lighter and the areas to be dug smaller as he went along.)
 The difficulty Brian had with digging was enough to convince him that it would be futile to try and dig holes to plant all the lilies of the valley we'd brought with us. Instead, he proposed attacking the problem from the other direction: plunk down clumps of lilies wherever we thought they'd look nice, and then pile dirt around them from the bucket he was filling. It wouldn't give the lilies much of a head start at putting down roots, but given how stubborn these plants have proved to be, we thought they'd at least have a fighting chance. So Tim and I set out several little bunches of lilies around the base of each large tree, covered their roots with dirt, watered them deeply, and then just hoped for the best. According to this site, lilies with small "bulblets," like these lilies of the valley, only need 1 to 2 inches of soil coverage, so there's some grounds for hope, at least. And even if they don't all make it, they'll at least give the yard a temporary and much-needed burst of green.
Before packing it in around mid-afternoon, we added one last finishing touch. In addition to the large, flat flagstones, Tim had in his yard several thicker and narrower pieces of what appeared to be bluestone. Rather than let those sit around looking untidy, we stacked them in a little triangular array around the unsightly well pipe in his yard. There weren't enough of them to conceal it completely, but they at least help it blend in better with its surroundings.
 By 3pm, we were all dirty, aching, and ready for a shower and a good meal. But the yard looked decidedly better for just one day's worth of work...and if we're lucky, the moss and lilies that we put down will spread, causing the yard to grow still greener as time goes on. It's a pity we didn't get to tackle those big shrubs, but maybe at some point we'll get a chance to do the job properly and just replace them altogether.


No comments:
Post a Comment