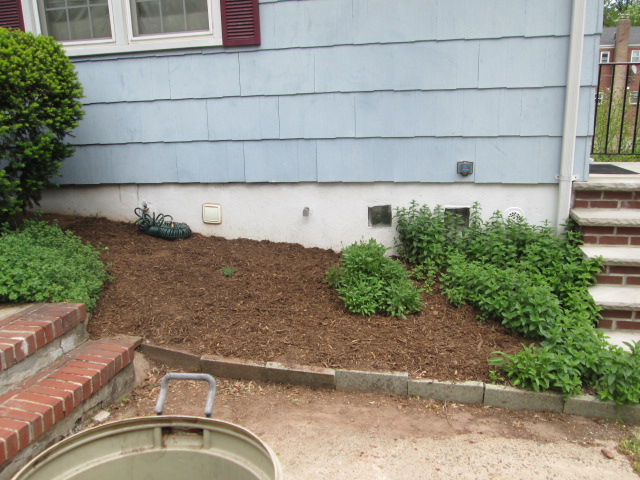
Showing posts sorted by relevance for query mulch. Sort by date Show all posts

Sunday, June 2, 2024

Mulching on a slope

When we first got our honeyberry bushes five years back, we covered up the entire hillside where we planted them with groundcloth and mulch to protect them from weeds. This turned out not to be one of our more brilliant ideas. Apparently, groundcloth is very slippery stuff, and if you put it on a steep slope like the one in our yard, anything you put on top will slide right off it. So, instead of a nice bed of mulch, we ended up with an expanse of bare groundcloth with pools of mulch (and some ambitious barren strawberry plants) around the bottom. 

The mulch might have stayed in place without the groundcloth underneath, but Brian was reluctant to remove it. There was no guarantee the mulch would stay put without it, and even if it did, it probably wouldn't do as good a job of deterring weeds by itself. Instead, he thought we should lay down some deer netting between the groundcloth and the mulch, giving the mulch a rougher surface to cling to. And since we had to net the honeyberries themselves anyway to protect the ripening berries from birds, we decided to take advantage of Memorial Day weekend to tackle both jobs at once. 

On Saturday, we got out our collection of deer nets and started cutting pieces to fit around the bushes. Rather than cut holes in the netting and try to squeeze the bushes through them, we just cut one long rectangle to place on either side of each berry bush, angling them to achieve maximum coverage and tucking in any excess around the trunks of the bushes. (We did have to cut holes in a couple of places to fit them over the concrete boulders that dot the slope.)

The trickiest part was removing and then replacing the hollow concrete blocks along the fence line. We didn't want to take them all off at once, because they were helping to hold down the groundcloth. So Brian had to repeatedly perch halfway up the slope between two bushes, removing the concrete blocks and handing them to me so he could place the netting, then putting the blocks back in place to hold it down. He also added long spikes to the center of some of the concrete blocks to help hold them in place. (We couldn't treat all of them this way because some of them had rocks in the way, and anyhow, we didn't have enough spikes.)

We also decided, sort of on the spur of the moment, to make a border for the mulched area with some old slate pavers we had sitting around unused. The idea was to create a flat, smooth path for rainwater to flow down so that it would be less inclined to cut a channel through the mulch. We laid the pavers out along the edge of the mulch zone and pounded some more of those big spikes in to hold them in place. Then we spread the last of the mulch from our most recent trip to the Belle Mead Co-Op over the slope and went inside for some well-deserved showers. 

At this point, the hillside was pretty evenly covered with mulch. However, I wasn't confident yet that it would stay that way. That slope had looked pretty good the first time we tried mulching it, but it didn't take long for the rain to start wearing paths through the mulch and leaving bare patches. So I knew the first rainfall would be the real acid test.

As it turned out, we didn't have long to wait. We had a brief thundershower that very night and a couple of additional squalls over the course of the following week, and so far, the mulch has mostly stayed put. There are a couple of tiny bare patches around one bush on the far end, but that might just be because the mulch wasn't laid very thickly to begin with. We've since returned to the Co-Op and hauled home another half-yard, so we can add another layer and cover up those bare patches in the process. Then we'll keep a sharp eye out to see if any more appear. If they do, we may need to come up with a different solution. But for now, fingers crossed, this seems to be working.

Of course, after finishing this job on Saturday, we still needed to put up some additional netting to protect the berry bushes themselves. But that's a topic for another post.

Sunday, May 15, 2016

Much ado about mulch

It was two years ago that we discovered the benefits of buying compost for our yard in bulk from our friends at the Belle Mead Co-Op, the same place that supplied all the gravel and stone dust for our patio project. Since then, we've managed to supply all our compost needs out of our one little bin (which will probably need to be replaced this year, so keep your eyes peeled for that project in a future post).

One thing we haven't been able to supply for ourselves, however, is mulch. Our homemade leaf mulch is adequate for mulching small areas, but this spring we had vast swathes of our yard in need of additional mulch cover, including:
  • the three plum trees in the front yard;
  • the cherry bushes along the south fence;
  • the asparagus patch on the south side of the house;
  • our makeshift herb bed in front of the house; and
  • my new rosebush, which has settled into its new home and is just starting to bloom.
Even at the height of fall leaf season, we wouldn't have enough leaves to mulch all that area, and even if we did, it would take way too long to process it all. So, since we'd had so much success buying compost in bulk from the Co-Op, we decided to try our luck with their mulch.

Since we'd been through the process once before, we were able to plan ahead a little better this time. We took along two big garbage cans, which we figured could hold a good quantity of mulch but not too much to lift, plus several of our five-gallon buckets and a wide assortment of plastic bags—some 40-pound birdseed sacks, some smaller ones that had held cat litter, and some of middling size that had previously held bagged mulch from the store. Ironically, the bags that were actually designed to hold mulch proved the hardest to work with, as they were much thinner and harder to hold open than the others. But having a variety of sizes and shapes to work with enabled us to pack the car pretty efficiently, filling up most of the space in the trunk and rear seat. So we got at least the half-yard of mulch we paid for, and certainly more than we could have bought in bags for the $11 we shelled out.

By the time we got it all home, it was too late in the day to start distributing it right away, and it was starting to rain anyhow. So for the time being, we just got all the various containers stashed in our little temporary greenhouse, which is still up in the back yard, providing our vegetable seedlings with a place to "harden off" before going into the garden. (The only ones left to go are the peppers and eggplants, which get transplanted at the beginning of June, and at that point we'll probably stow the greenhouse away until next spring.)

This afternoon, we got to work spreading all the mulch were it belongs. Our top priority was the cherry bushes, so we pulled out all the visible weeds we could see and started dumping mulch containers into the space, spreading out the contents with our hands and a small rake until we had a good couple of inches distributed over the whole bed. Next we brought some of the smaller bags into the front and reinforced the mulch "doughnuts" around the trees, and we spread some over the asparagus bed, doing our best not to disturb the ferns that were already there. (Next time it would probably be easier to do this part of the job in the fall, after cutting down all the previous year's growth, so we'd have a flat area to work with.)

Then we went to work on the herb bed. This area, which sits to the right of the front door has been a work in progress for some years. When we first started it, we had three big oversized bushes growing in the space, so we merely squeezed a few herb plants into the spaces between them. Then, a year or so ago, we took out two of the bushes, since they were getting in our way every time we had to shovel snow. This gave with more space to work with, but all the plants already in the bed were crammed toward the front in the spots where we'd squeezed them earlier. We managed to transplant our giant sage bush to a more central spot, leaving one little chunk behind that has since grown into a smaller secondary plant, and the mint we put in toward the steps has spread out and filled the whole corner nicely. (The way mint grows, we figure it will eventually take over all the empty space in the bed, which is fine by us.) The big thyme plant we had, which was spilling over the edge of the bed onto the sidewalk, took care of itself by dying over the winter, so we just bought a smaller English thyme plant this spring and planted it farther back in the bed, where it will have plenty of room to spread. That just leaves one large oregano plant snuggled in next to the one remaining large bush, spreading out of its shade and onto the sidewalk. Brian is hoping that when we get around to removing that last bush, the oregano will respond to the increased sunlight by redirecting its growth toward the middle of the bed—but if not, we'll have a go at transplanting it.

So right now, what we've got in this area is one big sage plant, one tiny thyme plant, one vast spreading mass of oregano that's awkwardly positioned along one edge, a big patch of mint, and a lot of empty space. We have plans to fill in some of that with rosemary (for which we have seedlings started), chives, and marshmallow, which is supposed to be useful as a cough remedy and also looks nice. In the meantime, covering this empty space with mulch should keep it from getting overgrown with weeds too quickly, while also making the bed as a whole look more pulled-together.

After this was all done, Brian applied a coating of mulch over the new rosebush. Before mulching, however, he took the opportunity to pull apart its brick enclosure, which had come out a bit uneven when he first laid it and had only grown more uneven as it settled over the past two weeks. So he removed the first couple of layers of bricks and re-laid them, taking more care to get them properly aligned. This, plus a nice layer of mulch, makes the whole area look a lot neater and more attractive.

Even all these chores didn't quite use up the entire half-yard of mulch, so we still have a little bit left for future jobs. It may end up going on the secondary asparagus bed in the back yard, or the new kiwi vines, or perhaps the raspberry canes—or we'll just keep it on hand to top up the existing mulched areas whenever they get low. No matter what becomes of the extra, I'd say we've certainly gotten our money's worth out of it already.

Monday, May 13, 2019

How do you like them honeyberries?

Sorry to be a little late with the blog entry this week, folks, but the past week has been absolutely nuts. Or perhaps, to be more accurate, I should say it's been absolutely berries.

Last weekend, as I noted, we spent most of Saturday hacking, slashing, pulling, and otherwise tearing down the big forsythia hedge on the north side of our back yard to make room for the new honeyberry bushes we'd ordered from Honeyberry USA. We'd planned to stop by the Belle Mead Co-Op after our dentist appointment on Sunday (since it's right in the same neighborhood) to pick up some mulch for the new plants, but the weather was too wet, so we had to put off that errand until Monday.

Brian had already arranged to take the day off from work, and I was able to rush through my work and go with him to load half a yard of bulk mulch into a motley assortment of bags and trash barrels crammed into the back of our little Honda Fit. We also picked up another 50-yard roll of groundcloth to protect the new plants from weeds. After unloading all this, we ate lunch and spent most of the afternoon stripping down and bundling up the big pile of forsythia branches. By evening, we'd reduced it to just a small pile of untrimmed branches, plus 23 bundles of sticks for bulk pickup and a mass of leaves for the compost bin.

However, even after spending most of the day on planting-related tasks, we still weren't as far along as Brian had hoped to be. He'd originally intended to get the ground all prepared for the new bushes, digging the holes and amending the soil with compost, so all we'd have to do on Friday would be to put the plants in the ground and cover them up. But at this point, it looked like we still had a whole day's work left in front of us to prep the ground, plant the bushes, and cover them with ground cloth and mulch. And since we were supposed to be heading down to Virginia on Friday to visit friends for the weekend, he didn't think we'd have enough time that day to get the job done. So, when we came in from our work and found the new bushes themselves waiting for us in a big cardboard box out front, Brian promptly contacted his office and arranged to take Wednesday off as well, so we'd be sure to have enough time to get them into the ground before our trip.

So Wednesday saw us once again suiting up in our gardening clothes and heading out into the garden. Following the rule of thumb that you should "dig a ten-dollar hole for a five-dollar tree," we figured we'd need holes a good foot deep and wide to accommodate the six-inch root balls of our new plants. Brian got each hole started with the big shovel, then moved on to the next hole while I went in with the trowel and excavated further to remove stones and stray roots and make sure the sides of the hole were rough enough for the roots to get a good foothold in the soil. (In clay soil like ours, if the sides of the hole are too smooth, you end up with the "clay pot effect," in which the plant becomes effectively trapped within the boundaries of the original planting hole.)

Next, we started adding compost to the holes. We didn't have enough compost left in our bin for this purpose, so we used some "Black Kow," a cow-manure-based compost that we picked up at Home Depot. Brian bought it right after we ordered the new bushes, and ran a compost test on the contents of both bags to make sure they wouldn't hurt the plants. The package said to mix the compost with soil in a one-to-one ratio and fill the holes halfway up with this mixture; rather than get out a separate container for this purpose, Brian just added a shovelful or two of compost to each hole, topped it with a roughly equal amount of the dirt he'd dug out earlier, and mixed it together in situ.

The next step was to lay out several sheets of groundcloth and cut a big "X" in each one over top of the planting hole, so we could fit it in over top of the bush. (We originally thought we'd put the bushes in first and then add the cloth over top of them, but we quickly realized it would be hard to get the holes in the right position if we couldn't lay the cloth out flat on the ground.) We laid them out, weighted them down with chunks of concrete so they wouldn't blow away, and cut the holes with a utility knife.

=However, we realized there was a flaw in this scheme of putting down the cloth first and then picking it up again to put in the plants: what if the holes weren't all in exactly the same place? What if we put the pieces of groundcloth down in different spots from where we originally laid them, and the holes didn't line up? It might not be a problem, but Brian didn't want to take any chances. So to make sure, he labeled each piece of groundcloth by cutting a series of slits in the bottom, from one to five, to show which position it belonged in.

We then removed the pieces of groundcloth again and, at last, got to the main event: putting the bushes themselves in the ground. The five bushes we'd bought were two Tanas and two Keikos, which could pollinate each other, and one Solo, which was somewhat self-fertile but likely to do better with a companion. So, to ensure the best cross-pollination, we laid them out Keiko-Tana-Keiko-Tana-Solo, which we can remember by the acronym KitTy-KaTS. Each plant went in with its roots spread out as best we could in the hole, just below ground level, and got a mix of compost plus dirt filled in around it.

After a quick break for lunch, we got back on the job, laying out all the sheets of groundcloth that we'd previously cut over top of the plants and then cutting additional sheets to fit in between them so the entire slope would remain (we hope) weed-free. (We had to cut out a few holes in the cloth to go around some particularly large rocks and concrete chunks that were embedded into the slope, which there was simply no way to move.) The groundcloth didn't come with any metal stakes to hold it down, but we weighted it down along the top edge with the concrete squares we'd pulled out from around the forsythias and along the bottom with some of the more intact timbers left over from our old garden bed frames. We also had a few stakes left over from a previous purchase, so Brian added one in front of each concrete block that was directly above a bush, hoping this would reduce their chances of  sliding down the slope and crushing the plant below.

The final step was covering this entire slope with mulch, which proved to be tricky. In the first place, the big barrels were too heavy to simply dump out on the slope, and getting a shovel into them to scoop out the mulch was rather awkward. And even once we managed to get all the mulch from the containers onto the ground, distributing it to cover that vast expanse of ground cloth wasn't as easy as it looked. Although we'd bought all that we could reasonably carry home, there was still just barely enough to spread across the entire area without leaving patches of ground cloth exposed. We certainly weren't able to put down anything like the three to four inches of mulch the manufacturers of the ground cloth said it really should have to protect it from sunlight so it doesn't degrade. So chances are, we'll have to go back to the Co-Op for yet another load of mulch some time later this summer. But for now, we at least have five honeyberry plants in the ground with a layer of ground cloth and mulch over them—not a trivial achievement, considering that just two weeks ago this whole slope was a wilderness of forsythias.

Now, I guess, all we can really do is keep these babies well watered and weed free, and hope that they thrive in their new home. Grow, little berries, grow!

Sunday, May 22, 2022

Waste not wood, want not wood

COVID wasn't the only outbreak to hit New Jersey in 2021. Last summer, we also experienced an incursion of the beautiful but destructive spotted lanternfly. These pesky critters lay their eggs on trees, and when they hatch, the nymphs feed on their sap and excrete a substance that can cause fungal growth. At the height of the infestation, Brian and I were squashing a dozen or more of these critters every time we went out for a walk.

However, squashing them one by one can only do so much. The really important thing, officials told us, was to get rid of the plants most likely to host the bugs, particularly tree of heaven. This plant is itself an invasive species, and a particularly common weed in our area; before I knew its name, I referred to it as "stink weed" because of its distasteful smell, which is something like a cross between peanut butter and skunk. We'd always made a point of uprooting it whenever we found it in the yard, but unfortunately, a few of the tricksy weeds had managed to hide themselves away behind the shed, where we didn't spot them until they had grown to tree-like proportions. So when the lanternflies invaded, Brian went out there with a saw and cut them down, while I busied myself trying to kill as many as possible of the hundreds of lanternflies scattered across their surface.

This left us with several fairly substantial lengths of wood, each a few feet long and ranging from about two to six inches in diameter. At first, Brian propped these up against the shed to serve as a "decoy" for other lanternflies. And we did continue to find, and squash, more bugs on these logs for a week or so afterwards. But eventually, the bugs were gone and the wood remained, just sitting there with no obvious purpose.

Fast forward to this spring, as we're getting our garden ready for planting. Along with all the weeding, we're making note of things that need to be repaired, such as the boards that form the front border of our rhubarb patch. They were originally placed on their edges and partially buried to make a sort of wall, but the underground portions have rotted away, causing the wall to collapse inward. And as I was trying to figure out if there was any way to fix this without buying new boards, I noticed those tree-of-heaven logs still leaning there against the shed and thought, well, why not?

So I hauled the boards out and replaced them with some of the longer tree-of-heaven sticks. These make a rather rustic-looking barrier that actually looks nicer, to my eyes, than the old boards, and will probably hold up pretty well since they've still got the bark on them. That used up about half of the wood. 

I didn't think of a use for the rest of it until this weekend, when I was attempting to spread mulch around the honeyberry bushes on the north side of the yard. I say "attempting" because this is a particularly awkward spot for mulching; the slope is very steep, so the mulch has a tendency to slide downhill. Rather than staying around the bushes, where it's needed, it piles up at the bottom, leaving unsightly patches of bare ground cloth behind.

However, there are some spots on that slope where the mulch does stay put. There are a couple of large boulders (some natural rock, some concrete) buried in the side of the hill that impede its downward slide. So, in an attempt to keep the mulch contained, I started hunting around for more rocks and other heavy objects that I could use to shore up the slope. But I was only able to find one sizeable rock and a few brick fragments, so I decided to try grabbing the remaining tree-of-heaven logs and using them to make a sort of border near the bottom of the slope. 

I'm not sure how well these will work to corral the mulch. They may end up sliding down the slope themselves, or the mulch may tumble over and under them. But they're probably better than nothing, and even if they do no good at all, it gets them out of the way. 

It's not exactly a major money-saver. But it is about as neat an embodiment of the ecofrugal motto "Waste not, want not" as you could ask for.

Saturday, March 20, 2021

Gardeners' Holidays 2021: Spring Cleanup

For the first time I can remember, spring actually came right on time this year. After a couple of weeks of alternating cold and warm weather, today was a bright and sunny 60 degrees, with no more freezing spells in the forecast for the rest of the month.

Brian and I took advantage of the nice weather to head out to our favorite garden center to pick up half a yard of bulk mulch for our yard. There are several places in the yard that need it, but the top priority was the hill where the honeyberry bushes are. They're supposed to be mulched deeply at all times to deter weeds, but over the past year the slope has developed bare patches as the mulch layer has slid downhill over the slippery surface of the ground cloth underneath. But once we got the mulch home, we realized that if we simply started piling it on top of the same smooth surface on the same steep slope, it would probably slide off as well, leaving us back where we started. We had a few notions about how we might try to keep it in place — I thought laying some branches along the slope might work, and Brian thought we could use some of the netting we've bought to keep the birds off the berries — but the ideas weren't full-baked enough to put into effect right away.

So, for the time being, we decided to simply stash all the mulch in the shed. But in order to make room for it all, we had to pull out the patio furniture we'd stowed in there for the winter — and we couldn't simply set the furniture up on the patio, because it was currently home to a huge pile of branches we'd trimmed off our rosebush a few weeks ago. We couldn't just bundle those up and leave them at the curb like we normally do with brush, because we'd scratch ourselves to pieces on the thorns, so our plan was to burn them in our little outdoor fire pit. And since we clearly wouldn't be able to get any use out of our patio until that pile was gone, it seemed like this was the day to do it.

Initially, Brian tried simply chopping a few of the branches up and loading them into the fire pit with some newspaper as a starter, but that didn't get us very far. Since we'd only trimmed the branches off a few weeks ago, the wood was still too green to burn well on its own. So he went and fetched some better-seasoned wood from the shed, got a blaze going, and then started carefully feeding in the thorny branches piece by piece. They gave off a lot of smoke, but with the heat of the fire to help dry them out, they did eventually burn down, and over the course of a couple of hours the pile slowly diminished until there was nothing left but some stray leaves. And in the meantime, I busied myself about the yard, raking up dead leaves and pulling out stray bits of brush to add to the fire.

Mind you, the yard isn't completely tidy now by any means. There are still all the branches we pruned off the plum tree this month to be bundled, along with some evergreens left over from the holidays and a few more clumps of dead leaves here and there. We still need to pull some weeds out of the various garden beds and haul out and set up the rain barrel. And of course, all that mulch we just bought isn't going to lay itself. But at least we've taken the first step toward getting our outdoor living space set up to enjoy all this warm weather.

In fact, perhaps next time we fire up the outdoor fire pit, we might even be able to have a few friends over to enjoy it with us. After the long, cold, lonely winter we've had, that seems like as much excitement as we could possibly ask for.

Saturday, March 21, 2020

Gardeners' Holidays 2020: Planting Prep

The world has turned upside down.

Brian's workplace has closed its doors, sending all employees home to work (if they can). Our dance practices have been canceled. Concerts have been canceled. Our last role-playing game session took place online over Discord, with only disembodied voices in place of faces. The governor has "strongly recommended" a curfew of 8pm for all New Jersey residents. Pretty much the only time we leave the house is to go to the grocery store or to take a walk (maintaining a 6-foot distance, as best we can, from everyone else on the street). And who knows how much longer even that will be allowed.

The only thing that's remained normal in all of this is our garden. Because plants don't care about some virus that only affects humans; they're still going to sprout and bloom on their own schedule. So, oblivious to the ongoing pandemic, the seedlings we've started are poking their little heads up through the dirt; our rhubarb is growing and sending up blossom stalks; the asparagus bed has produced its first spear; the cherry bushes are blossoming earlier than they ever have before, and the plum trees don't look far behind; and the winter lettuce we left to overwinter in the garden is producing tiny, tender green leaves. And, of course, all the weeds are out in full force. And all of this requires attention from us if we want to have fresh veggies and fruit during this long, lonely, isolated summer.

So, this morning, Brian and I commemorated the start of spring with a trip to our favorite garden center. We were looking for three things in particular:
  1. Another bottle of copper fungicide, since the one we have is almost empty, and we need to start spraying the plums regularly once the buds reach the "popcorn" stage.
  2. Some seed potatoes for Brian's planned potato-growing experiment. (We ended up not buying the "Pinto" potatoes from Fedco because the minimum quantity we could buy was way more than we needed for this first trial.)
  3. Some mulch for the new flowerbed we're planning for the front yard, as well as for our various trees, bushes, and other permanent plantings.
We figured we'd better get out and buy these things now, while we still could, since at any moment New Jersey could decide to follow New York's lead and shut down all "nonessential" businesses for the duration, which could be anywhere from a few weeks to over a year. The garden center was still open, and fairly busy, to the point that we had some difficulty maintaining the requisite 6-foot distance from other shoppers. We had no trouble finding the copper fungicide, and we selected four seed potatoes from a fingerling variety — one for each of the four five-gallon buckets (formerly serving as tree waterers) that Brian plans to use for his growing experiment.

With the mulch, however, we hit a snag. Brian's plan was to order two yards of mulch to be delivered to our house, but it turns out we're no longer in the Belle Mead Co-Op's delivery area. So instead, we had to fall back on Plan B: buying half a yard and loading it ourselves, as we've done in the past. Fortunately, Brian had planned for this contingency, so we already had several large containers in the car, along with shovels and rakes and implements of destruction. We filled up two large garbage cans, plus about seven empty 40-pound birdseed bags. This, we hope, will be enough at least for the new flowerbed, plus some necessary patching of the layer of mulch on the honeyberries.

We emptied about half a bagful onto the honeyberries straightaway, then made room for the rest of the mulch in the shed by pulling out the patio furniture we'd stored for the winter and setting it back out on the patio. It's looking somewhat the worse for wear; the stain we applied to it in 2014, which was guaranteed to hold up for four years, is now well past that deadline and is looking decidedly patchy. Rather than reapply it, which was kind of a pain in the butt, we're thinking we might just try giving the whole set a coat of spray paint in some neutral color, which would be a much less fiddly job. Some of the chairs also need some tightening up, and the outdoor cushions we bought for them have developed some sort of greenish film. So at some point, we'll probably want to clean those so we can properly enjoy our patio come summertime.

While we were at it, we took care of several other springtime chores as well. Brian pulled out and set up our rain barrel and gave the plum trees their first dose of fungicide. He also cut down the dead stalks of last year's asparagus, and I pulled weeds out of their bed and around the honeyberries. I also went and nipped the heads off the newly formed blossoms on the rhubarb, which I'm sure is frustrating for the plants, but you have to do it if you want them to devote their energy to producing new, edible stalks.

All this, of course, was only the beginning of all the gardening we have to get through this spring. We still have 22 crops to get into the garden, a flowerbed to start (once the seedlings are big enough and the mature plants I ordered have arrived by mail), four potato buckets to plant, and lots more weeding and mulching to do. So I'll be keeping you updated throughout the spring on how those jobs go. If nothing else, it'll give you something to read about that isn't the coronavirus.

Sunday, April 28, 2024

Gardeners' Holidays 2024: Mulching Day

April and May are insanely busy for us this year. What with our eclipse trip to Indianapolis at the beginning of the month, Passover this week, meetings and other events with Citizens' Climate Lobby, and dance gigs with Millstone River Morris, we don't have a single free weekend on our calendar between Easter and Memorial Day. 

Unfortunately, all this is happening during a busy part of the gardening year. We've managed to keep up with the absolutely essential chores, like planting squares of lettuce and spraying the plum trees. But less urgent jobs, like weeding and mulching, have languished on the to-do list for weeks. As a result, the weeds have been running more or less rampant over all our permanent planting areas—the flower and herb beds, the rhubarb and asparagus patches, and the areas under all our fruit trees and bushes. 

This morning, we finally decided we couldn't afford to put these tasks off any longer. Even if we couldn't do the entire job today, we could at least pick up a load of bulk mulch so we'd be able to get it started. So, right after lunch, we made the trek out to the Belle Mead Co-Op and bought half a yard of mulch, which we loaded into our usual assortment of containers (two trash barrels and a pile of empty birdseed bags). We also bought a package of seed potatoes to plant in our old rain barrel. (We'll probably have to buy soil in bags to plant them in; although the Co-Op also sells bulk topsoil, we can't currently use an entire half-yard of it, and we can't buy less than that.)

Once we got the mulch home, we spent the next couple of hours getting some of it into place. After first clearing away as many weeds as we could with our trusty stirrup hoe, we used up one of the big barrels on the spaces under the plum trees and the other in the asparagus bed. Then we hauled the remaining bags of mulch—which, though lighter than the barrels, were still quite heavy—down to the shed and hauled our panting, sweating selves inside for a couple of much-needed showers.

While putting down the mulch, we had a decent opportunity to observe the various areas of the garden and see how our crops are shaping up for the summer. The answer: It's kind of a mixed bag. The plum trees have finished blossoming and are starting to develop little fruitlings where the blossoms used to be, so there's at least a chance we'll get some plums this summer (though we're not counting on it, since we seem to alternate between bumper crops like last year's and complete duds). The cherry bushes have also shed all their blossoms, but not only is there no fruit to be seen on the branches, there are hardly any leaves. We don't know whether the bushes are just stressed or actually dying, but we're already thinking ahead to what we might replace them with in case they don't recover. (It looks like the best bet for our heavy clay soil might be aronia, also known as chokeberries.)

In the garden itself, our scallions and parsley are looking reasonably healthy, and our arugula and spring lettuce are just starting to come up. However, our snap peas are a big disappointment. We're used to getting only about half as many pea vines as we plant, but this year only 9 of the 32 plants I put in have come up—less than one in three. The seeds were brand new, so the problem wasn't their age, and we soaked them overnight before planting them, so it wasn't lack of water. Based on a guide at Tiny Garden Habit, the likeliest explanation seems to be that birds or other critters have been eating the peas before they can take root. Next year we may have to try covering the seeds with a cage for a couple of weeks, or maybe even starting them indoors. 

Another thing we've had a chance to observe early results on is the leaf cover we put down on the garden paths last winter. As you can see in the picture above, it appears to be somewhat effective, but far from perfect. There are quite a few dandelions and a few stray strands of mugwort poking their heads through the leaves, but the paths aren't completely overrun with them. I guess we'll try adding more leaves to the paths this winter and see if we can eventually build up a thick enough carpet to keep the paths weed-free. Even if it doesn't work, a carpet of leaves with a few weeds poking through is a lot better than a carpet of weeds tangling around our ankles every time we enter the garden.

So, all in all, our garden appears to be off to a bumpy start for this year. It's not clear how much of a harvest we have to look forward to, and it will probably be a while before we're able to harvest anything at all.  But considering how little time we'll have to spend in the garden over the next month, maybe that's just as well.

Tuesday, November 25, 2014

Free DIY leaf mulch

Last weekend, we took advantage of a brief interlude of nice weather in the middle of an unseasonably cold November to deal with some long-overlooked gardening chores. At the top of my list was tidying up the flowerbed in the front yard, which looked so promising last spring, but turned into a tumbledown mess by midsummer. I never did manage to get the flowers to stand upright again; some of the later fall blooms managed to grow straight up through the mass of flopped-over ones, but that just made the whole arrangement look even more disorganized. So it was almost a relief when the frosts of the past week withered all the remaining blossoms, leaving nothing but a drab, brown mass. At that point, there was no reason to leave them standing (or half-lying) any longer, and I could simply cut them down to the ground and start over in the spring. (The flowers we grew this year were all annuals; next year, the perennials in the wildflower seed mix are supposed to take over.  Those may be a little less subject to floppage, but just in case, I plan to build a support grid of stakes and string, as described in this article. Watch this space next spring for details.)

The other big task we had to attend to was raking leaves. We don't have any big trees in our yard, but our neighbors' send plenty of leaves our way—enough to make a huge pile on the patio. The big problem was not so much raking them as figuring out what to do with them all, as our compost bin was already full to overflowing. We could, of course, have just bagged them up and left them out on the curb for the borough to pick up, but that seemed like a waste of a lot of nice organic material. Since our now-denuded flowerbed was going to need a nice thick layer of mulch anyway, I suggested, why not put all these excess leaves to use for that purpose?

The simplest way to do this would have been to simply rake the leaves directly onto the flowerbed. That would have helped keep the bed tidy throughout the winter and warm the soil in the spring, but it could also have caused problems once the seeds started to sprout. Whole leaves probably wouldn't break down very much over the course of the winter; they'd just clump together in a dense mat, which might be difficult for the seedlings to break through. So if we wanted to turn these leaves into fluffy, nutritious mulch, we'd need to break them up somehow.

Fortunately, we knew of an easy way to do this. I forget where I first read about the idea of mulching leaves with your string trimmer, but it's simple enough. First, you fill a nice, big bucket (we used one of our trash barrels) about half full of leaves.


Then, you stick your string trimmer in the bucket, switch it on, and swirl it around to chop up all the leaves.


When you're done, you'll have reduced the half-barrel of whole leaves to a much smaller volume of coarse crumbs. You don't have to be a perfectionist about it: if a stray leaf here and there survives intact, it won't do too much damage. What you want to avoid is a solid mass of whole leaves that will just clump together under the snow, rather than breaking down.


It took about half an hour to process roughly half of the leaf pile in this way, producing enough mulch to cover the flowerbed a couple of inches deep.


The remainder of the pile can be tended to next weekend, or whenever we have a little free time. Depending on how much mulch we get, we can add that to the flowerbed or use it somewhere else, such as our bramble patch. And if all else fails, we can just dump it into the compost bin; the finer leaf crumbs will filter down through the bulkier items already in there, rather than piling up on top and spilling over.

Turning waste into something useful: what could be more ecofrugal than that?

Friday, April 20, 2012

Up the garden path

Spring has now arrived in earnest, as well as in New Jersey, and our garden beds have already received their annual top-dressing of compost and their first plantings of peas, arugula, lettuce, parsley, and leeks. I prepared the beds for planting by pulling out as many weeds as I could, but I was frustrated to see that for every weed I yank, two new ones seem to sneak in—largely as a result of runners creeping in below the soil from the garden paths.

When we first built the boxed raised beds in our garden, we didn't bother to surface the paths in any way. I figured that as long as the box was there to provide a clear line of demarcation between bed and path, I could simply remove weeds from the beds while taking a live-and-let-live attitude to those in the paths. However, I've since discovered that weeds in the paths have a way of sneaking into the beds—and also that if the weeds are simply granted a safe haven in the paths, they'll quickly grow to a height that makes the paths difficult to walk on, which is, after all, what they're for. So I've been thinking that it may be time to put down some form of a surface on the paths that will at least deter weeds, even if it can't fully eliminate them. The question is, what?

I consulted my library of gardening books and found that the most commonly recommended surfaces for paths in a vegetable garden are:

  • Grass. This is more or less what we have now, but since our "grass" is really mostly weeds, and since our paths aren't wide enough to admit a lawnmower, it's not working out very well for us.
  • Dirt. Mel Barthlomew, in Square Foot Gardening (the original 1981 edition, not the revised version), says that dirt paths will require weeding, which is what I'm trying to avoid. Jeff Ball, author of Jeff Ball's 60-Minute Vegetable Garden, disagrees, saying that bare soil "compacts down so much over the years that weeds will grow only with difficulty." However, since these are the same weeds that stand up to being walked on everywhere else in our yard and are little the worse for wear, I'm not convinced that this approach would work for us.
  • Wood planks. Mel Bartholomew says that "pieces of scrap lumber can be nailed together to make neat, attractive walkways between the garden blocks," but he must have a lot more scrap lumber lying around his place than we have. With about 80 linear feet of path to cover, we'd have to go down to a lumberyard and buy a whole load of wood planks—which would be not only costly, but really difficult to haul home. (Our Honda Fit can manage nearly any load of reasonable size, but it's not a pickup truck.)
  • Mulch. Mel Bartholomew claims that a heavy coating of hay mulch "looks nice, keeps your feet clean, and needs no weeding." This might be a cost-effective solution if I knew of a place that sold hay (or straw) in bulk, but you can't just go down to the Home Depot and pick up a bale. The big home stores do sell wood chips, which is what Jeff Ball uses for his paths; however, he gets his directly from tree-trimming crews and claims that he "can often get a truckload for free," and never pays more than $5 to $6 for a year's supply. Buying the stuff in bags, by contrast, means paying $4 for a volume sufficient to cover maybe 6 linear feet of path. (The darkened area in the photo at right shows how much path we were able to cover with a single bag of pine bark nuggets.) Now, that's only around $50 to $60 to cover the entire path area, which isn't too bad—but the problem is, mulch doesn't last forever. Jeff Ball says that he adds a fresh load of wood chips to his path every year (and every five or six years, he can remove a "nice layer of beautiful black humus" produced by the decomposing wood from underneath them). So this isn't a one-time expenditure of $50 or $60; it's an extra $50 to $60 per year added to our gardening expenses, not to mention the yearly hassle of hauling home fourteen bags of mulch and spreading them over the paths.
  • Gravel. This costs about twice as much as mulch, but it won't decompose, so in theory, at least, it's only a one-time expense. However, when I consulted online boards devoted to gardening, I saw some complaints that pea gravel doesn't stay put; each time it's walked on, a bit of it escapes and gradually scatters itself all through the yard (or worse, in the beds themselves). Moreover, several gardeners complain that weeds grow up right through the gravel—which defeats the whole purpose of putting down a surface in the first place.
So far, none of these options really looks ideal. Jeff Ball suggests choosing path materials on the basis of "availability and cost," using "whatever is available, especially if it is free." This is sort of what we're doing now—the beds were mulched with leaves throughout the winter, so we've raked all those leaves out and onto the paths, forming a sort of loose covering—but it hasn't been sufficient to keep the weeds down, and we don't seem to have any other choices that are both readily available and free (or at least cheap). Am I overlooking something, or should I resign myself to the fact that our choices are to invest a big chunk of change in some sort of permanent path material (like planks or pavers) or else just live with the weeds?

Sunday, November 9, 2025

Taming the hell strip, part 2

So, I realize there's not much to see in this photo. But there's a lot more going on below the surface. 

Remember how, four months back, Brian first embarked on his project to transform our hell strip (the narrow sliver of land between the sidewalk and street) from a ragged patch of weeds to an actual planting bed? At that time, we planted about one-third of it and assumed the rest would have to wait until spring. But on further consideration, Brian thought it would make more sense to plant seeds now, in the fall, rather than start seedlings indoors and transplant them in springtime. That way, they'd get a head start on germination, the same way the weeds do, and they wouldn't have to deal with transplant shock. 

Last weekend, we started the process. Brian used our King of Spades shovel to chop up the turf into blocks, which I turned over and whacked with a trowel to knock as much dirt off the roots as possible before dumping the top layer into a bucket destined for the compost bin. Then, while Brian went to empty the buckets and fetch his supplies, I set to work with the trowel excavating a narrow channel running along the edge of the road. When he returned, he set down one of the two-by-fours he'd brought into this channel, forming a boundary for the bed. (The main reason he had to do this is that there's a curb cut along that stretch of sidewalk, so he couldn't rely on the curb to form a boundary. But the two-by-fours will also form an extra barrier to keep the plants from impinging on the sidewalk and make the bed look more defined.) 

We then worked together to dig out a similar channel along the other side, next to the sidewalk, and fill it in with a second two-by-four. After that, Brian had to get out his big tape measure and measure the exact distance from the end of this section to the end of the bed, right at the property line, and go inside to cut the boards to the right length. Actually, he had to break one of them up into two smaller pieces, because there's a sewer access pipe right at the edge of the sidewalk. So he fitted two shorter pieces around it, one on either side, and capped the whole area off with a short piece at the end.

At this point, we had a nice, empty planting bed, but we weren't quite ready to plant in it. We'd used up all the free mulch we got last summer, and Brian didn't think it would be a good idea to put the seeds in without a layer of mulch to protect them. We could have used leaves, as we do in some of our other beds, but he wasn't confident they'd stay put in such an exposed area. And by that point, it was getting a bit late in the day to run out to the store and buy some. So we left the bed empty until we had a chance to pick some up at Lowe's (along with a few other things I'll tell you about shortly).

Yesterday, with mulch in hand, we were ready to finish the job. We had three kinds of seeds to plant: salvia, which we already have some of in the first part of the bed; rudbeckia, or black-eyed Susans, which we'd picked up a couple of packets of at Ocean State Job Lot; and golden ragwort, a native plant that we got a small packet of as a freebie at a town fair. It combines low-growing foliage with tall flower spikes that bloom in April and May, making it a good complement to the salvia and rudbeckia, which bloom from midsummer into fall. And all three are supposed to be reasonably deer resistant, a key requirement if we want the plants to survive in an area where deer stroll right up the street browsing on anything they can reach. (It's less clear how the new flowers will fare against groundhogs, but we'll have to wait and see.)

To ensure a good mix of the three varieties throughout the bed, I worked out a staggered arrangement for planting them: ragwort on the near side of the bed, then salvia about four inches along on the opposite side, then back to the near side for rudbeckia, then across to the other for another ragwort, and so on. Brian marked up a ruler with pieces of masking tape to indicate the lengthwise spacing, then placed the roll of masking tape on the ground at one end to mark the spot where his seeds would go. He added a small pinch of seeds in the circle formed by the tape, moved it to the next spot, added a pinch of seeds there, and continued the pattern along the whole length of the bed. My job was to scoot along beside him, handing him the packets of seeds in the correct order, so he wouldn't have to juggle all three. He had to be pretty sparing with his pinches—no more than three or four seeds at a time—to make the ragwort and salvia seeds last the whole length of the bed, but he managed it with a tiny bit to spare. I sprinkled the remaining ragwort and rudbeckia seeds in amongst the existing salvia plants in the older portion of the bed so everything would eventually have the same mix of flowers. Once that was done, we covered everything up with a nice layer of mulch to protect the seeds from wind and hungry birds (and, equally important, make it clear that the hell strip is now a planting bed and not merely a bare patch of ground). Then, as a finishing touch, I took one of the phone line insulators from the edges of our other flowerbed and set it over top of the sewer pipe opening. Besides looking nicer, this will keep the pipe from getting covered up by mulch, so it will be easy to locate.

All told, yesterday's portion of the job took about an hour, and we had lovely weather for it. Then, not content to rest on his laurels (or ragworts), Brian went on to tackle a couple of other jobs that needed doing in the front yard. To put this in context, I need to go back a month or so. One morning in early October, Brian and I noticed a lot of hustle and bustle going on in our next-door neighbor's yard, which turned out to be a bunch of workers attempting to unclog a blocked sewer line. They eventually worked out that to do the job properly, they'd have to dig up and replace the entire line, all the way out to the curb. And although it was technically his sewer line, a good portion of it was on our property. (Apparently these two lots used to be one larger lot, which would explain that unused curb cut in the middle of our curb.) To get at the pipe, they'd have to tear out the hedge on that side of our yard and rip up the underlying ground.

Unfortunately, we were about to head off to Virginia for a weekend with friends, so we couldn't stick around to supervise this process. We told him to do whatever he needed to do and not worry about replacing our hedge, which wasn't in such great shape anyway. And the workers took us at our word, because when we returned home, one whole side of our yard was missing. There was just a big crater in the ground, surrounded by caution tape and plastic sheeting.

Over the next couple of days, the workers filled in the hole, leaving a huge patch of bare dirt, and cleared away the plastic. At that point, it became apparent that a lot more than just the hedge was missing. The excavation had torn up part of the slate flagstone path that led from our front door to the street, and at least three stones were completely gone. It had also damaged our raspberry trellis, shearing off the lines and ripping out both the U-post at the near end and the anchor stake we'd secured it to. Brian was able to find the post, but it was too badly bent to reuse, and one of the three turnbuckles attached to it was missing. And, since the lost post had also been one corner of the invisible deer fence around our front flowerbed, that was damaged as well.

Luckily, none of this damage is terribly difficult or costly to repair. We were able to pick up a new U-post and another turnbuckle for about $26 at Lowe's, and we already had one additional anchor post left from the set of four we'd bought to stake our plum tree in 2020. After finishing up the hell strip on Saturday, Brian drove the new U-post into the spot where the old one had been, and I held the trellis wires in place while he tightened them up. He secured the new anchor into an undisturbed patch of ground a little farther back from where the old one had been and fastened another length of cable, which we still had left over from last time, around the anchor and up to the top of the post. We also had some of the fishing line we'd used for the deer fence left, so fixing that was a simple matter of tying a piece to the new post.

As for the flagstones, Brian wants to hold off on replacing those until the disturbed patch of dirt in the yard has fully settled. By the time that happens, the ground may be frozen, so it's possible it will have to wait until spring. But whenever we're ready, we have a couple of extra flagstones in the back yard, half buried next to the clothesline, that we can unearth and add to the damaged end of the path. And for the third, Brian thinks he can cannibalize one from the rainwater channel he added to the side slope in our backyard last year. If we find that the channel doesn't work so well without it, we can always replace it with one of the leftover tiles from our downstairs bathroom renovation.

Sunday, May 1, 2022

Gardeners' Holidays 2022: Weeding Day

Normally, the Gardeners' Holiday at the end of April and beginning of May is all about the asparagus, the only crop that's really producing at this time of year. But sadly, we're not getting much asparagus at the moment. The bed on the south side of the house has produced only a few ounces' worth, and the bed outside the fenced garden hasn't yielded a single spear big enough to harvest. Only a couple of the plants have sent up so much as a tiny frond.

Part of the problem, I guessed, was that there were too many weeds in the beds. Unfortunately, pulling them out by hand is a time-consuming process, and it's difficult to do without crawling into the bed itself and compressing the soil. And even if I'd spent the time and energy to do it, I suspected the weeds would have been back with a vengeance in a week or two. What the beds really needed, I thought, was a good layer of mulch to suppress the weeds.

So last weekend, we went off to the Belle Mead Co-Op to buy half a yard of their bulk mulch. And while there, I took the opportunity to pick up a tool I'd had my eye on for a while: a stirrup hoe. Some garden book — I forget which one — had recommended this tool for weeding garden beds because it can fit in between the existing plants. Considering the state of the asparagus beds, not to mention the flowerbed, the raspberry canes, and the cherry bushes, I decided it was worth hazarding $35 on.

After we unloaded the mulch, I went inside to tend to a few things, including this blog. I then went back out to tackle the asparagus bed and discovered, to my surprise, that it had been weeded already. I found Brian in the process of spreading some mulch on the flowerbed, which was also looking remarkably weed-free, and he pointed to the new hoe and said, "Good call." 

Of course, after witnessing this success, I just had to give it a try myself. So I turned to the raspberry patch, which was pretty thickly overgrown with dandelions and deadnettles. And sure enough, I quickly discovered that by simply inserting the head of the hoe between the canes and yanking, I could clear weeds quickly and easily from a standing position, rather than having to get down on my hands and knees and stick my hands in amongst the prickly canes. 

This new toy didn't do quite as thorough a job as hand-pulling. It only lopped off the tops of the deep-rooted dandelions, rather than pulling up the entire long taproot. The plants also suffered a little bit of collateral damage, losing a few stray suckers that got grabbed by the hoe alone with the weeds. And because the raspberry canes are so tall, I still had to crouch down on a few times to find all the weeds underneath. 

But overall, weeding this way was much, much less work. It only took me twenty minutes or so to turn the overgrown bed from this...

 to this.


All in all, I'd say this tool was an extremely sound investment. It's turned weeding from a long and arduous task that we need have to set aside time for on a weekend to a job we can do whenever we have ten to twenty minutes to spare. Which, in turn, means that it will probably get done a lot more often, rather than put off until we can find the time for it. And if it helps keep our garden weed-free and productive, it was well worth the $35 we spent on it.

Tuesday, July 16, 2013

Found objects

While digging out the base for our new patio, we dug up quite a lot of rocks along with the clay. Some of these just got tossed onto the pile with all the concrete chunks, but I made a point of saving all the smooth, roundish ones that were at least a few inches long. I'd found these useful in the past for landscaping projects; the bed where our raspberries are now, which we originally dug out as a rhubarb patch several years ago, yielded a large collection of stones that I eventually turned into a border for our day lilies in the front yard. So I was pretty sure I could come up with a good use for these round rocks, even if I didn't have a specific one in mind.

Within a week, a suitable use suggested itself. Our cherry bushes, neglected during the week we spent working on the patio, had begun to become overgrown with weeds, some of which were nearly as tall as the bushes themselves. Moreover, the boundary between the "lawn" (if you can call it that when it's more weeds than grass) and the mulched area surrounding the bushes had become fuzzy as the weeds gradually impinged more and more on the mulch. So I thought it would be a good idea to add a border that would create a clear line of demarcation between the area belonging to the cherries, which should be kept as free of weeds as possible, and the lawn, in which the weeds could be allowed to roam free. An added advantage of this plan was that it meant the rocks, some of which were quite large, only needed to be moved a few yards across the yard, rather than hauled all the way out to the front or side yard.

To do this, though, I had to get the mulched area cleared of weeds first, or it wouldn't be clear where the weeds were meant to leave off and the mulch to begin. So I devoted a rather sweaty hour last weekend to yanking up as many weeds as I could manage to root out from under the mulch. Then I grabbed one of our big cocoa butter buckets and started filling it up with the rocks we'd mined from the patio area, making a couple of trips to transport them all to the other side of the yard and pile them up beside the cherry patch.

Monday marked the beginning of the big East Coast heat wave, so I spread the work on the new border out over a couple of days, working only for half an hour at a time in the cooler morning hours. The biggest rocks were the hardest to move, so I left them near the middle and spread the rest out in no particular order along the lawn/mulch boundary. The final result isn't perfectly straight or perfectly even, but it looks much tidier than it did, and we still have some rocks left over in case we need to expand it at any point.

By the way, those two big rocks in the middle actually aren't the largest we pulled out of the patio area. The very biggest one was literally larger than my head—far too large to be incorporated into the border, and really too large for me even to move over to the other side of the yard. So I ended up just rolling it a little way and leaving it propped up against the pole that supports the clothesline. It shouldn't be too much in the way there, and maybe it can come in handy as a sort of a little table to rest the laundry basket on, or even a place to sit.

Thursday, March 28, 2013

Our trees are here!

I was sitting at the keyboard, trying to figure out how to make a blog entry about getting stuff on sale from L.L. Bean sound more exciting, when I heard a ring at the doorbell. When I opened it, a burly guy handed me a long package, wrapped in white plastic, with the unmistakeable tips of branches poking out of the end. Our trees are here! Now that's exciting!

Following the instructions on the web (which were also enclosed with our packing order), I took off the outer packaging immediately. Next I was supposed to check and make sure our order was complete, but that proved a bit difficult. The insert noted that "labels and smaller plants can be hidden down inside the inner root wrapper," but I didn't want to take the inner wrapper off to check, because it also warned that "roots should not be exposed to air, even for a little while." So I dug in under the wrapper as best I could with my stubby little fingers until I finally managed to unearth eight labels: one Opal plum tree, one Mount Royal plum, one Golden Gage plum, one Jan bush cherry, two Joy bush cherries, two Joel bush cherries, six Autumn Bliss Raspberries, and six Redwing raspberries. Our new edible landscape in a bag.

Next I checked to make sure the roots were still nice and moist. Again, this wasn't so easy without unwrapping them, but the sawdust they were packed in felt moist, and the whole bundle felt sort of sodden from the outside, so I concluded that they were okay. Since it was clearly impossible to plant them right away (with Brian still at work and only three hours of daylight left and a rehearsal in Princeton at 8pm), I carried them downstairs to sit in the cool, dark laundry room until planting time.

I fired off a quick e-mail to Brian to let him know the plants had arrived, along with the suggestion that we get up early on Saturday to get them into the ground as soon as possible. He promptly came back with a counter-proposal: he's taking tomorrow off work so we can devote the day to planting. That will give us plenty of time to get the job done (and leave at least part of Saturday free to attend the International Tabletop Day festivities at our local comic/game store).

So now I'm busily plugging away at the "Planting Guide" that was enclosed with our order to make sure I know as much as possible about how to plant these guys before we start trying to get them in the ground. Here's what I've learned so far:
  • As noted above, the roots are supposed to be kept moist and not exposed to air at any point, even briefly. That means that we'll probably want to dig all the holes for everything—the three trees, the raspberry canes and the five bush cherries—before we start planting.
  • As we already knew from planting our ill-fated dwarf cherry tree, a "five-dollar tree" needs a "ten-dollar hole"—that is, about twice as big in diameter as the root ball. The book says to make the hole 2 to 4 feet across and 1 1/2 to 2 feet deep, with straight rather than tapered sides. In clay soil, like ours, the edges of the hole should be roughened up with the shovel to break up the clay and allow the roots to break through more easily.
  • The tree should be set in with the "graft union" about an inch below ground level. I'm not sure how you're supposed to tell where the graft union is, but the book says just to plant it about an inch deeper than it looks like it was planted originally. So I guess you just look for the level to which dirt reaches up the trunk, and go just a bit deeper.
  • When the hole gets filled, the soil should go back in reverse order, with the looser topsoil on the bottom and the heavier sod on top. When the hole is about half full, the tree should be soaked with 2 to 3 gallons of water before the rest of the soil is added. The tree needs to end up sitting in a "saucer," slightly below ground level, so that water will flow towards the trunk. Once it's in place, it's supposed to get another 2 to 3 gallons of water, leaving the soil "mucky" and "jello-like."
  • Compost and mulch, according to the book, should go on top of the soil, not in it. The tree should get a deep layer of mulch distributed in a dish shape—about an inch thick in the middle and gradually deepening to 6-8 inches thick on the edges. The book suggests laying newspaper under the mulch to deter weeds.
  • Newly planted trees need a lot of water. The book says to give them "5-10 gallons of water per tree regularly"—every day if you can manage it and by no means less than once a week, even in wet weather. They say the only time you can safely skip watering is if you feel the soil (under the mulch) and it feels waterlogged. According to the book, "Ninety percent of all tree failures in the first season are caused by lack of water."
  • The owners of St. Lawrence Nurseries claim that plum trees do not like clay soil. However, I read enough sources claiming exactly the reverse that I feel no hesitation about planting them (especially since we're pretty much committed now).
And that's just the information on the trees. The bushes have a whole separate set of instructions. I'd better buckle down and learn this stuff before our big day tomorrow.

(Oh, and by the way, only one of our local utilities—the water company—has gotten back to us about our "call before you dig" query. So it looks like we are indeed going rogue.)